12 Diy Christmas Ornaments for a Warm, Handmade Tree
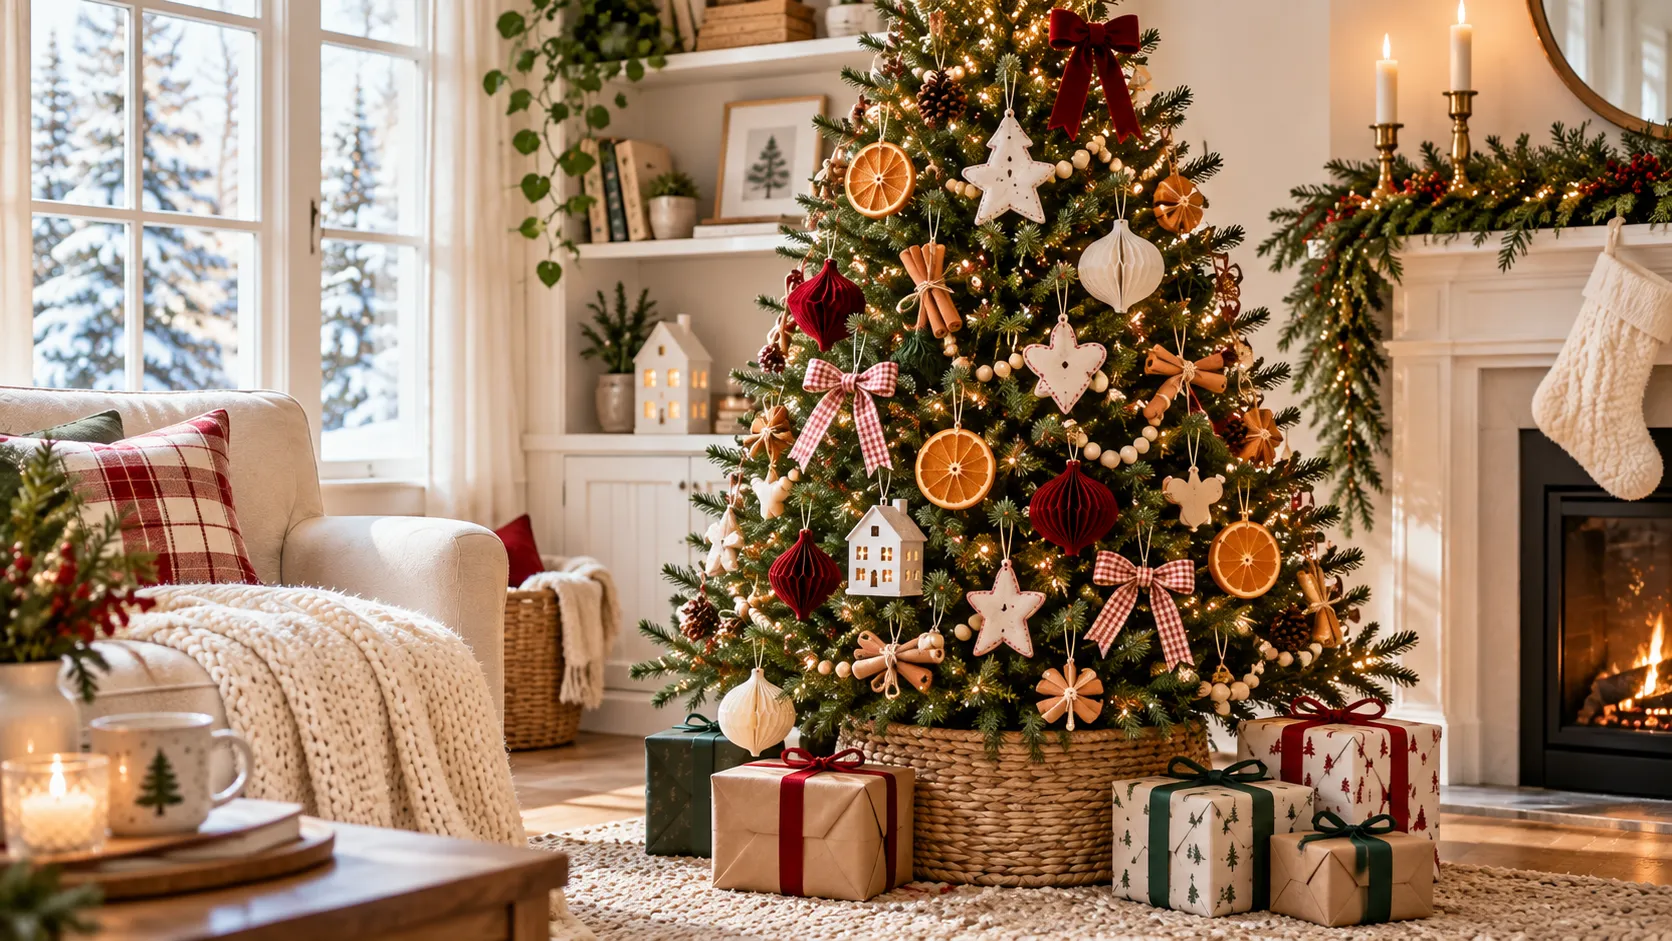
A Christmas tree can feel personal without filling every branch with matching decorations.
You Might Also Like
Diy Christmas ornaments let you use soft fabrics, simple clay shapes, beads, and leftover craft supplies.
They also make it easier to choose a palette that suits your home, whether that means muted colors, pastels, or warm folk shades.
Some ideas are quick enough for an afternoon, while others make a slower craft-night project.
Keep the handmade pieces balanced with a little open space so each one has room to be noticed.
Let's break it down.
1- Turn Clay Gift Tags Into Tree Ornaments
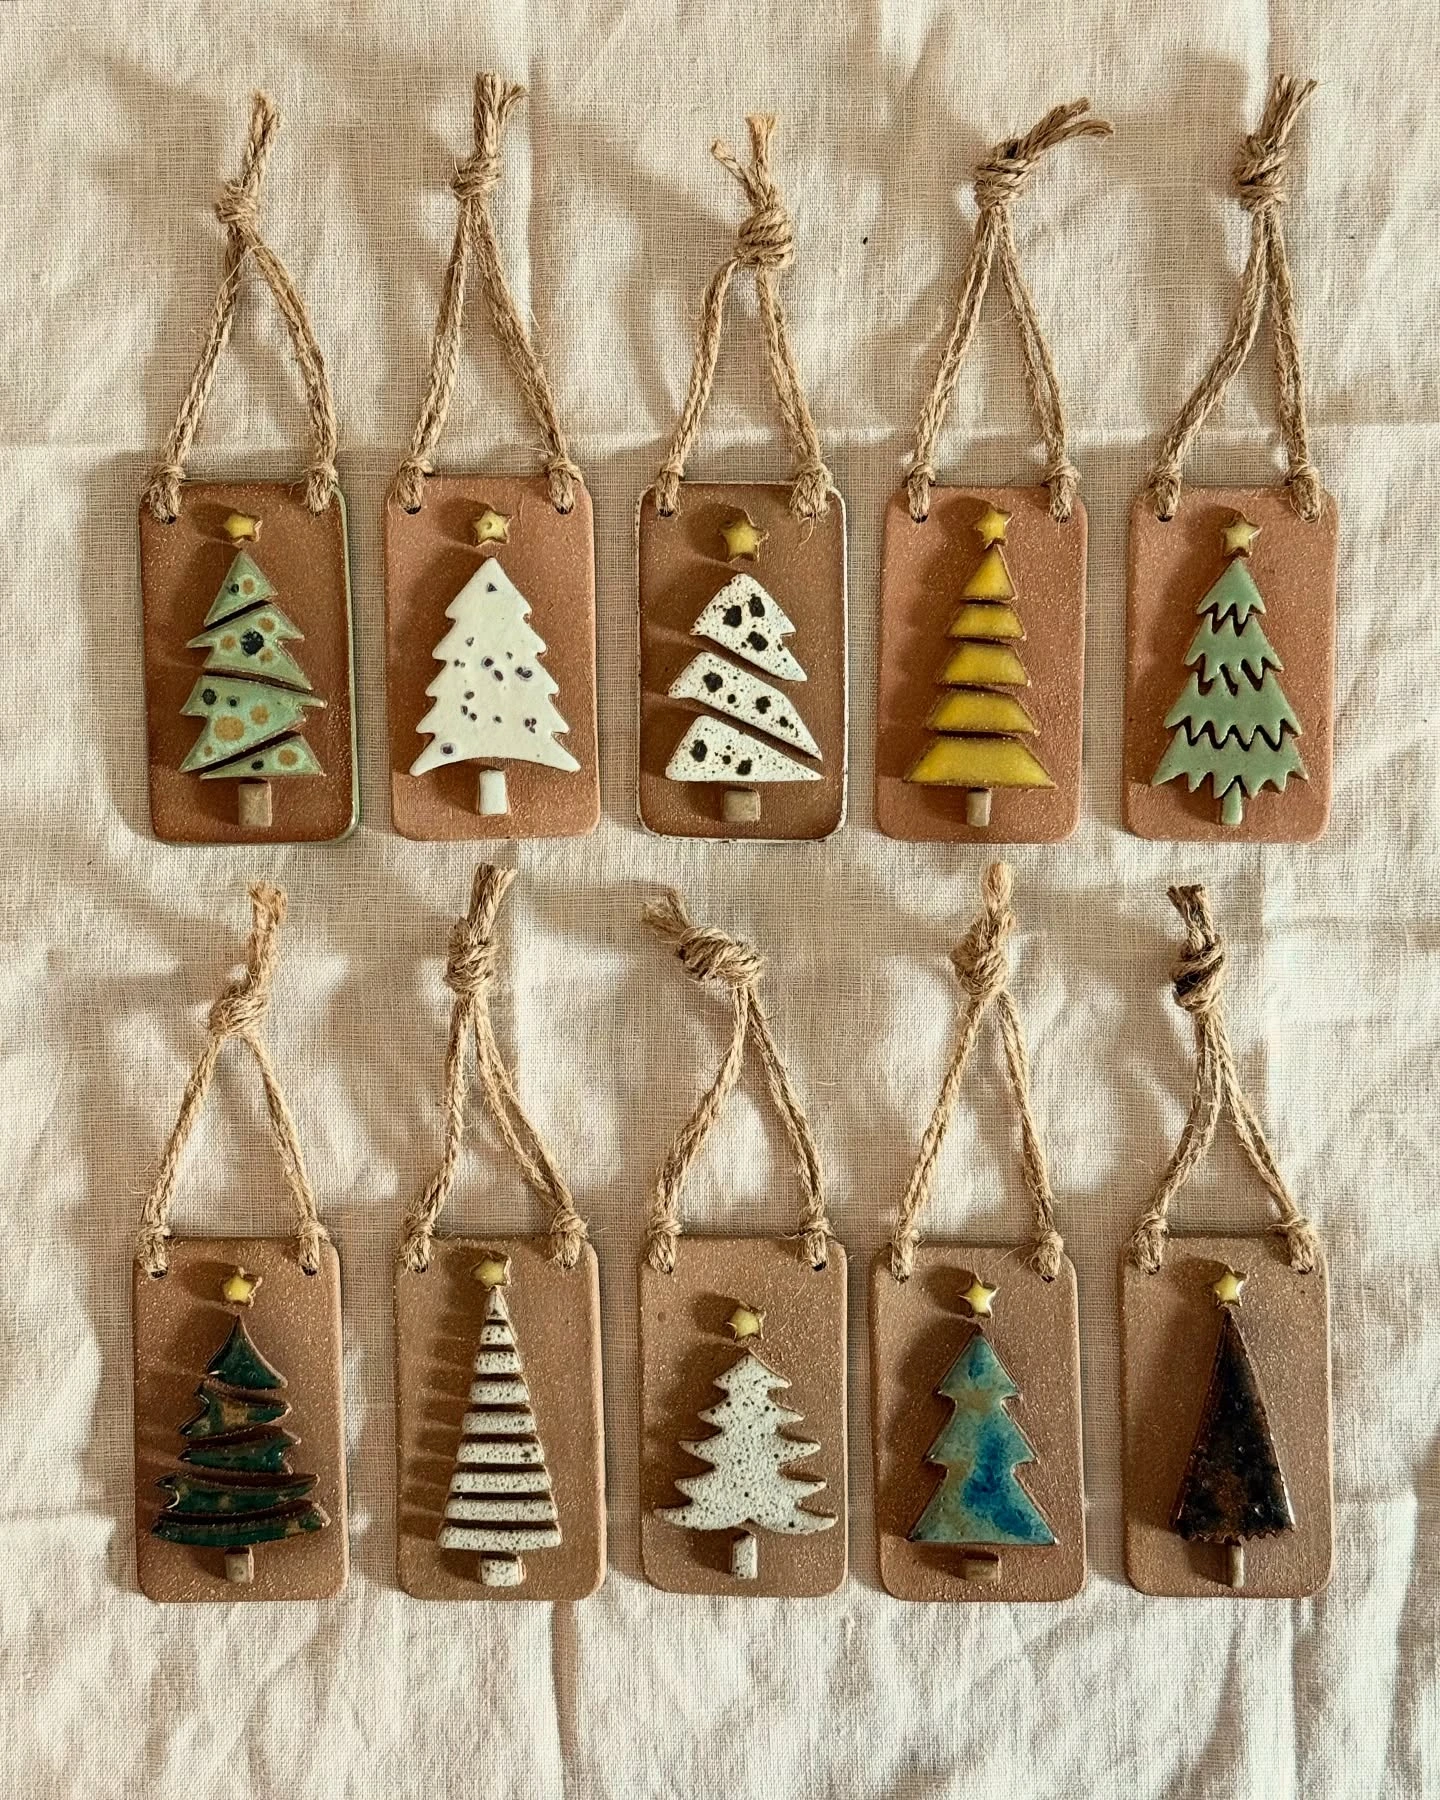
Air-dry clay gift tags can decorate presents first, then move onto the tree after the wrapping is opened.
Paint them in muted colors and add small tree designs with a thin brush for a quiet, handmade finish.
Their simple shapes work well among fuller ornaments because they add a little flat, graphic detail without making the branches feel crowded.
- Air-dry clay
- Paint
- Twine
- Thin brush
2- Stitch Soft Fabric Christmas Trees
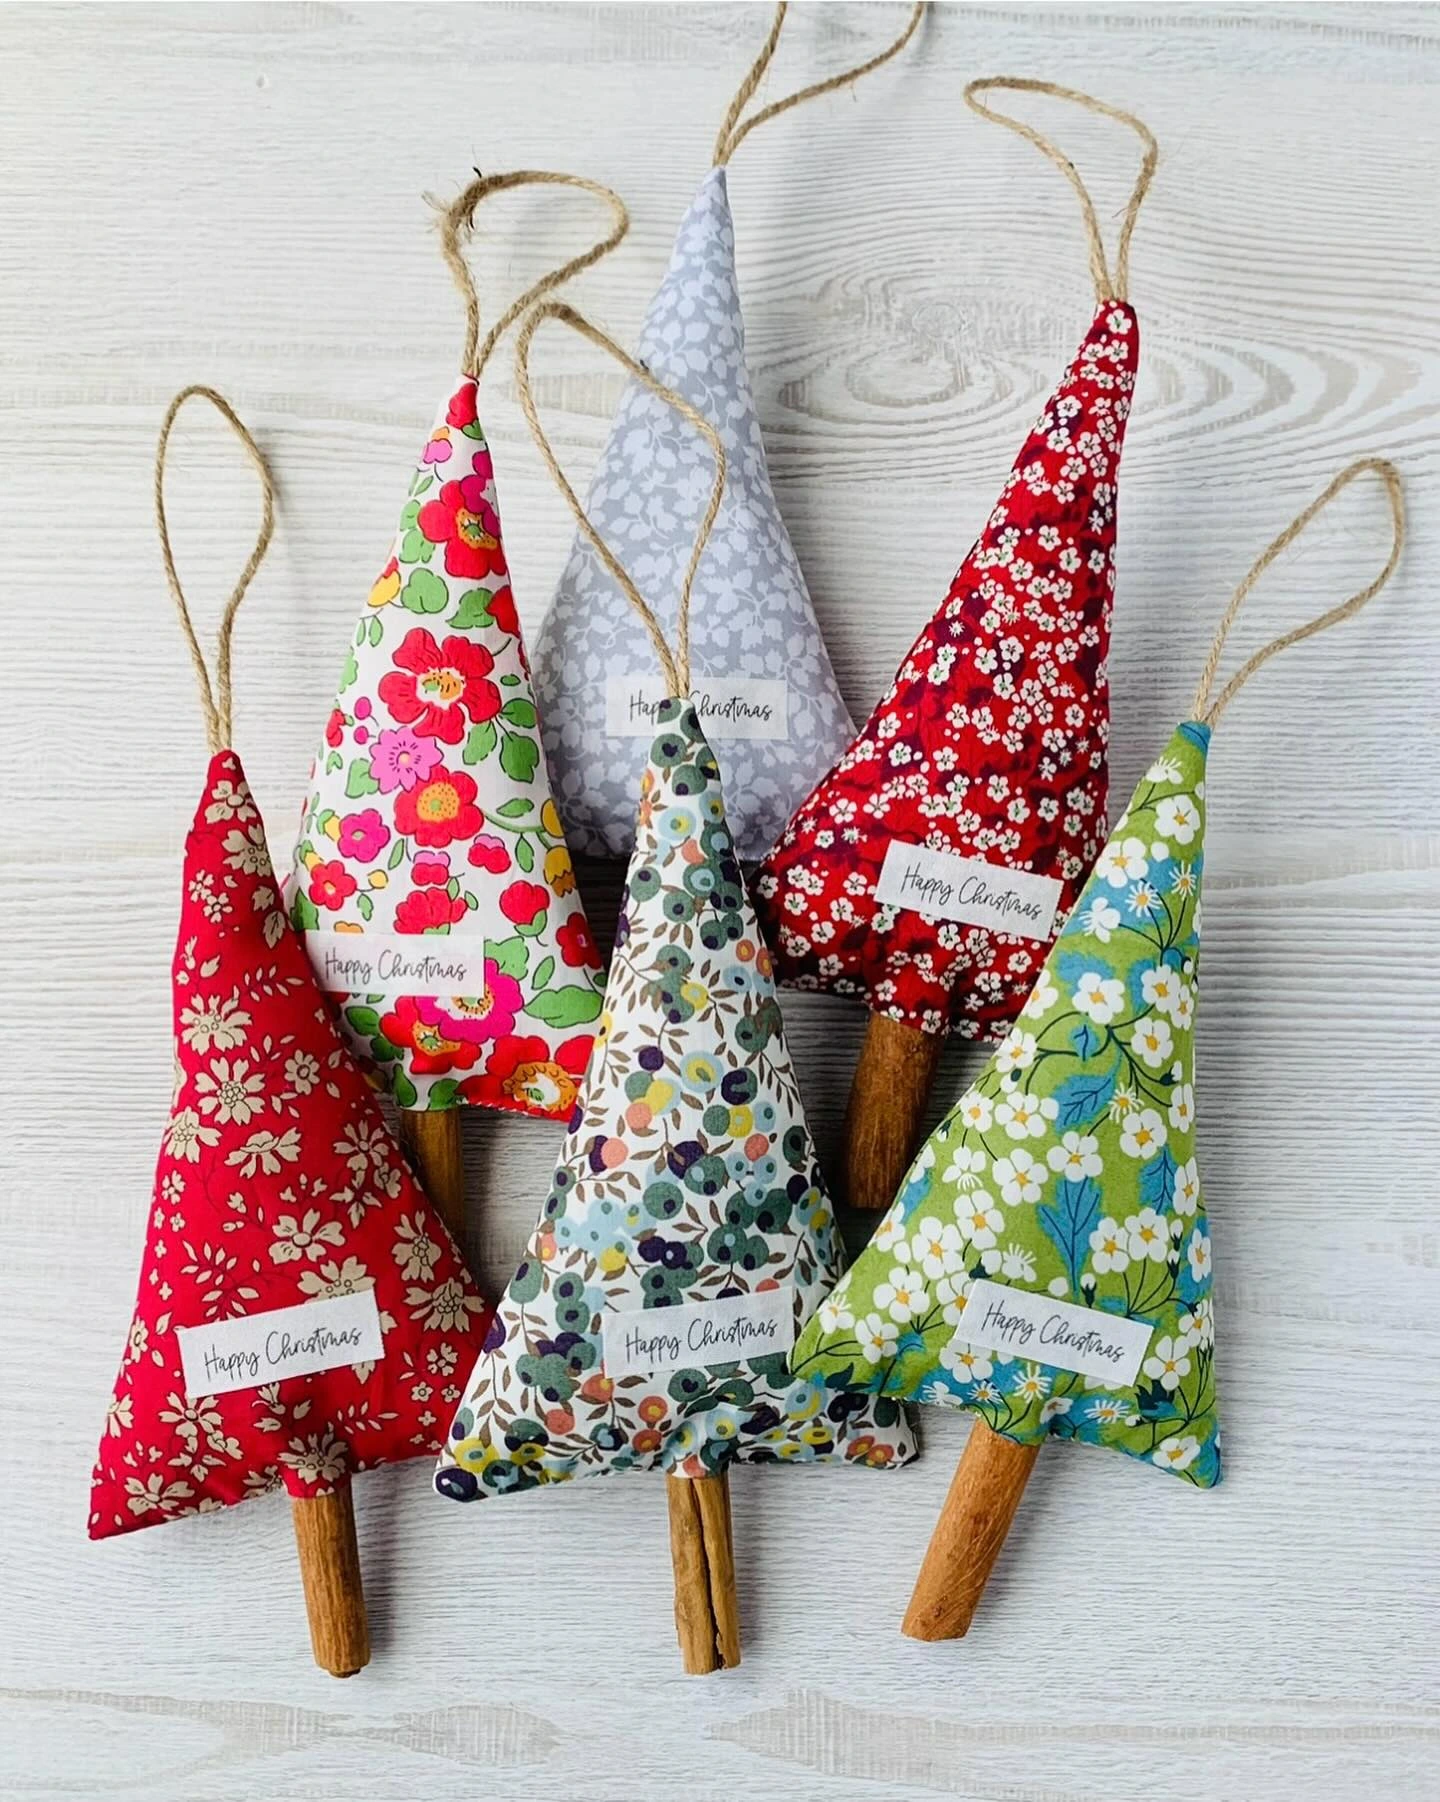
Fabric Christmas trees are a useful way to turn holiday scraps into decorations with a cozy, homespun feel.
Cut two tree shapes, stitch or glue around the edges, and add stuffing if you want a softer, puffed form.
Gingham ribbon, wooden beads, and gentle Christmas colors help the ornaments feel connected without making every piece identical.
- Holiday fabric scraps
- Thread or glue
- Stuffing
- Ribbon
- Wooden beads
3- Make Delicate Pastel Felt Ornaments
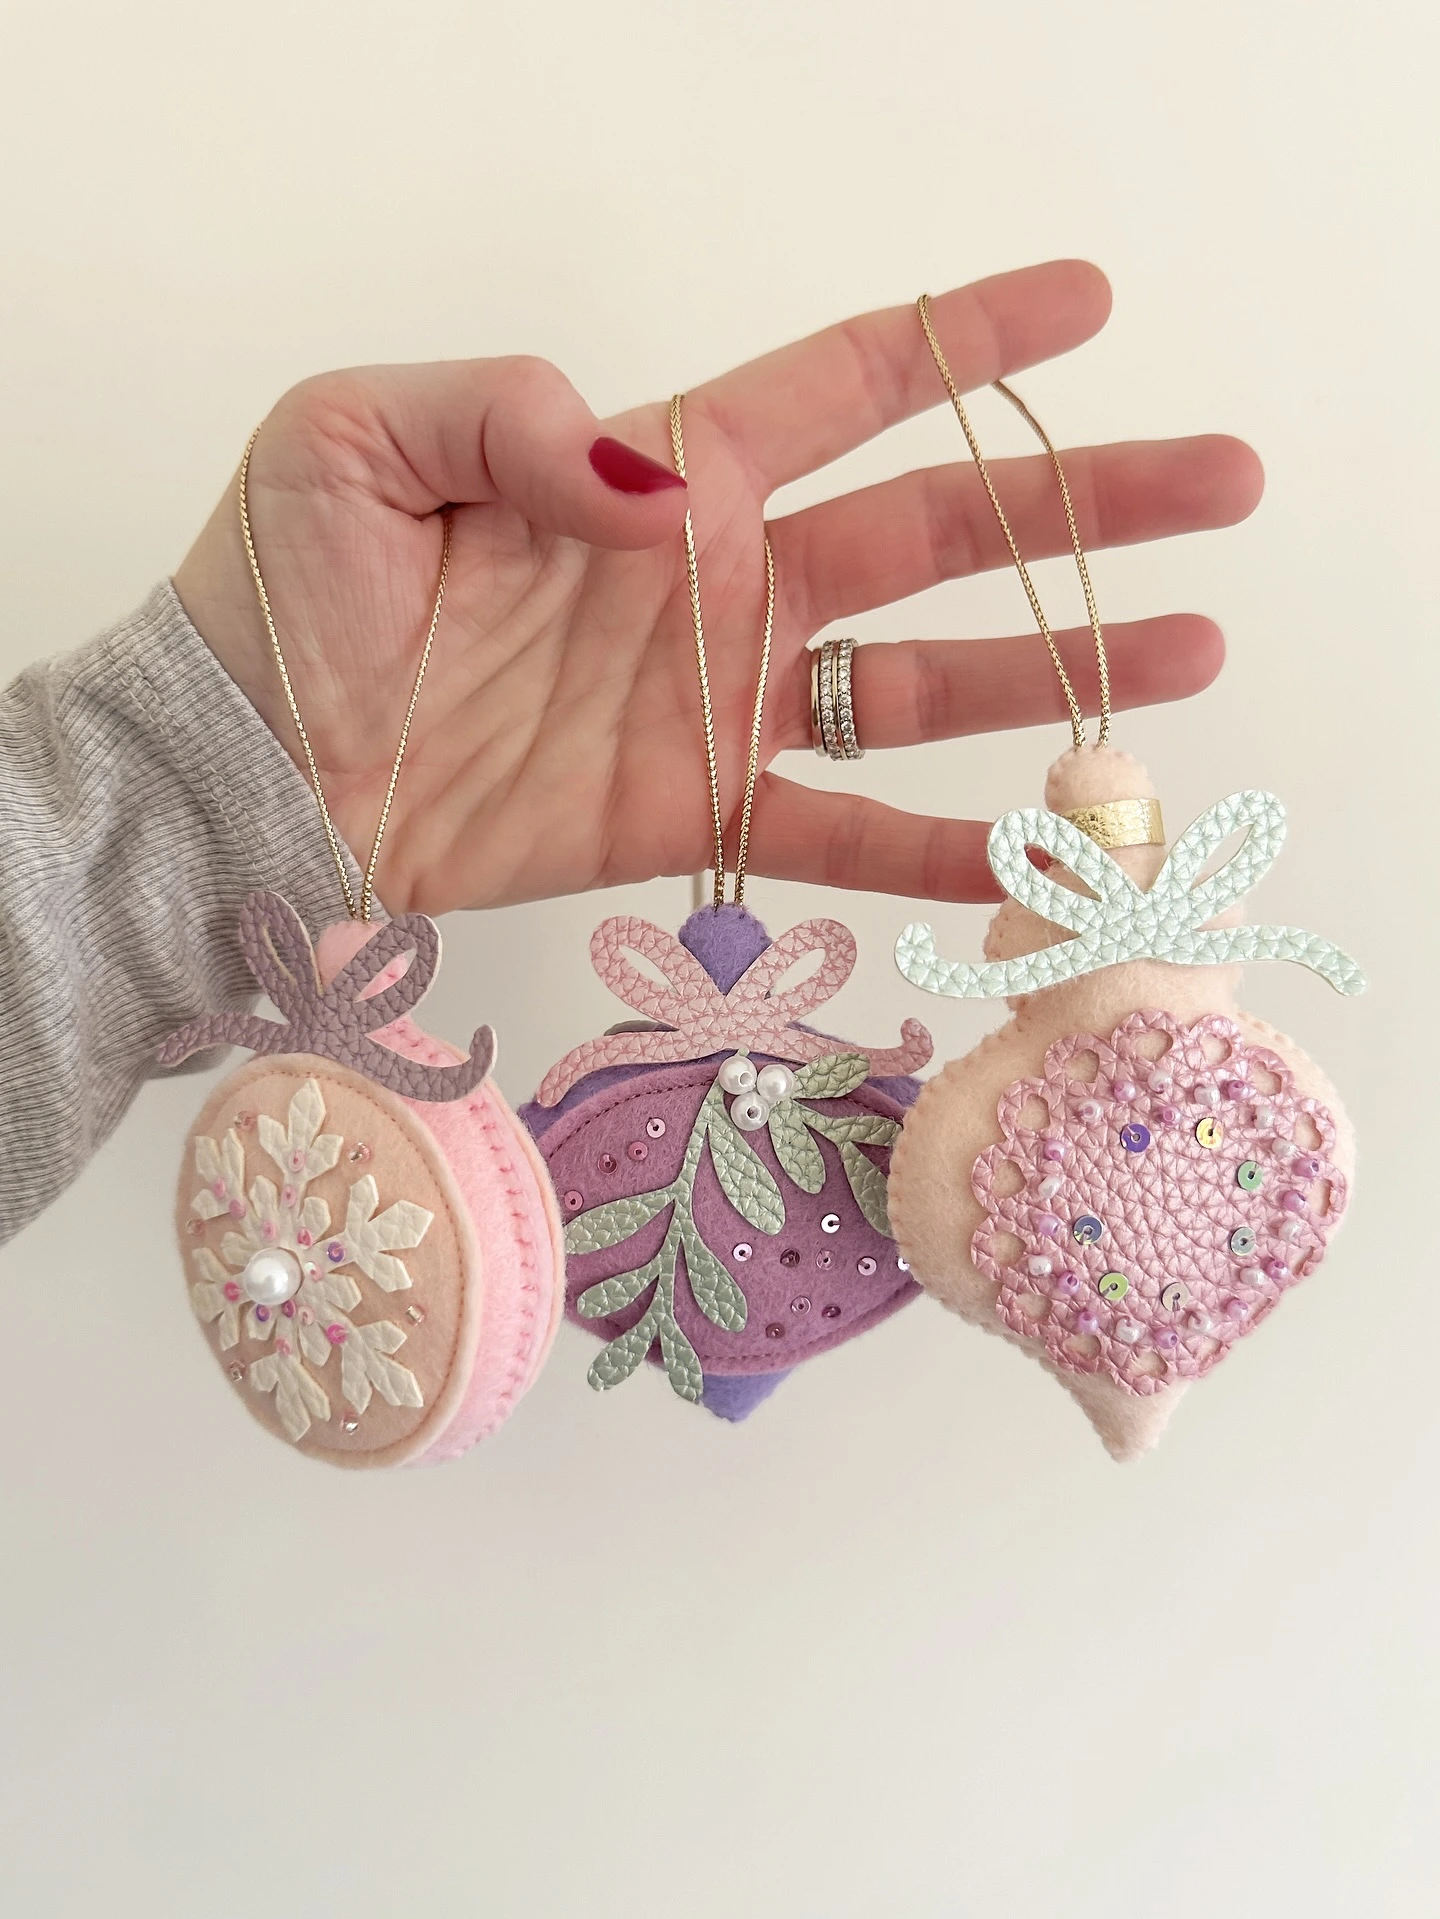
Pastel felt creates a softer alternative to a traditional red and green tree.
Keep the ornament shapes simple so pearl beads, ribbon, and small stitched details stay easy to see.
The pale colors and gentle texture bring a light, delicate note to fuller branches.
- Pastel felt
- Pearl beads
- Ribbon
- Thread
4- Create Warm Folk-Style Felt Shapes
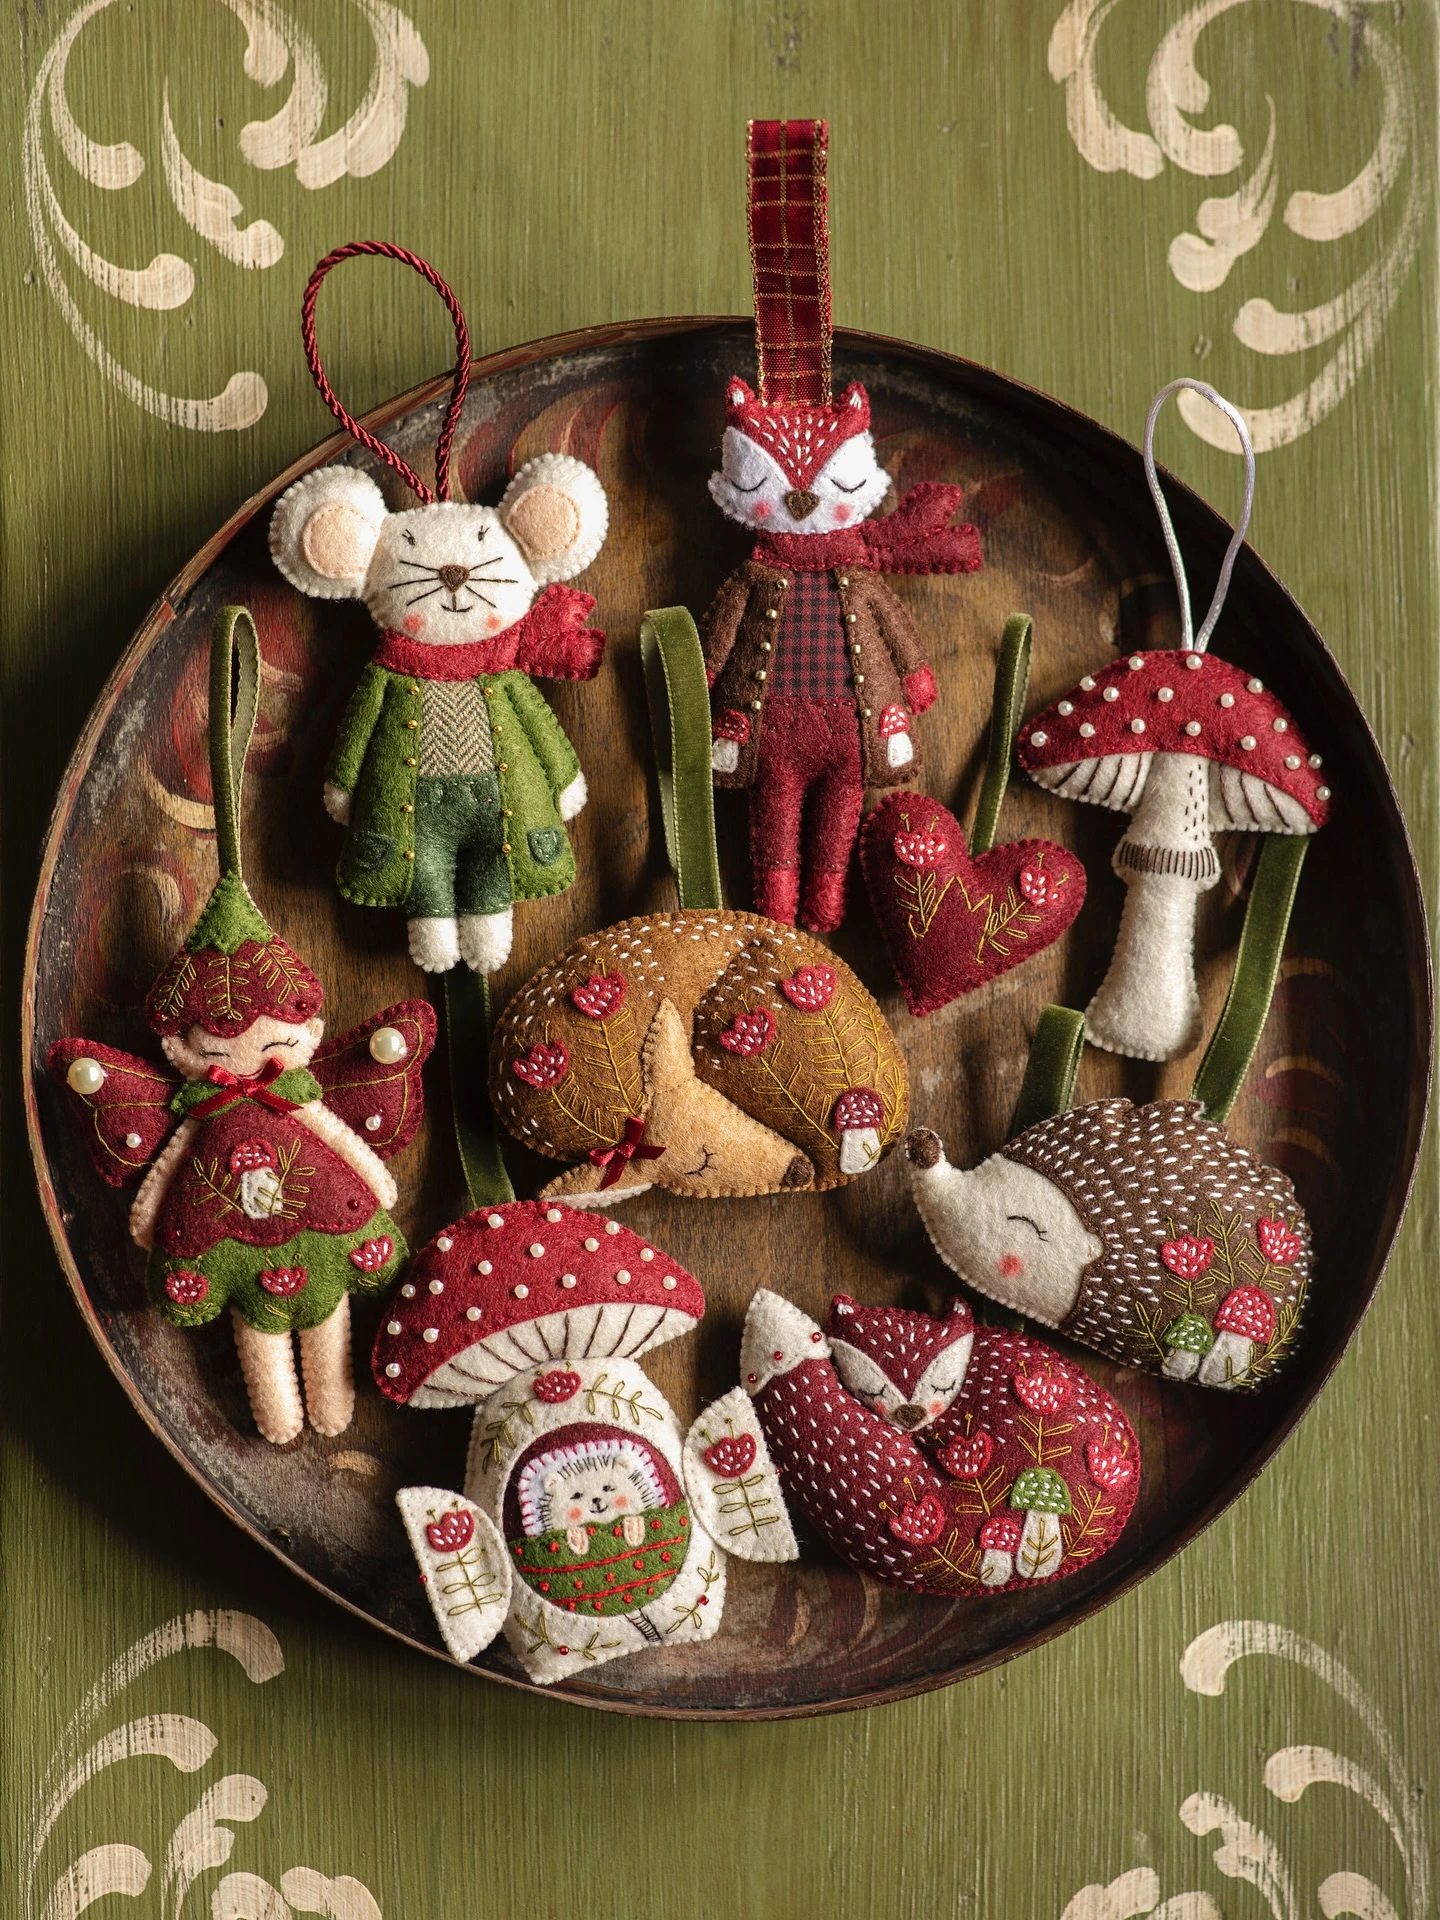
Felt ornaments shaped like mushrooms, animals, or dolls bring an old-fashioned folk feeling to the tree.
Embroidery thread, tiny beads, ribbon, and a little stuffing add layers of texture without needing complicated forms.
Warm, slightly muted colors keep the collection feeling vintage rather than overly bright.
- Felt
- Embroidery thread
- Stuffing
- Tiny beads
- Ribbon
5- Frame Holiday Fabric in Mini Hoops
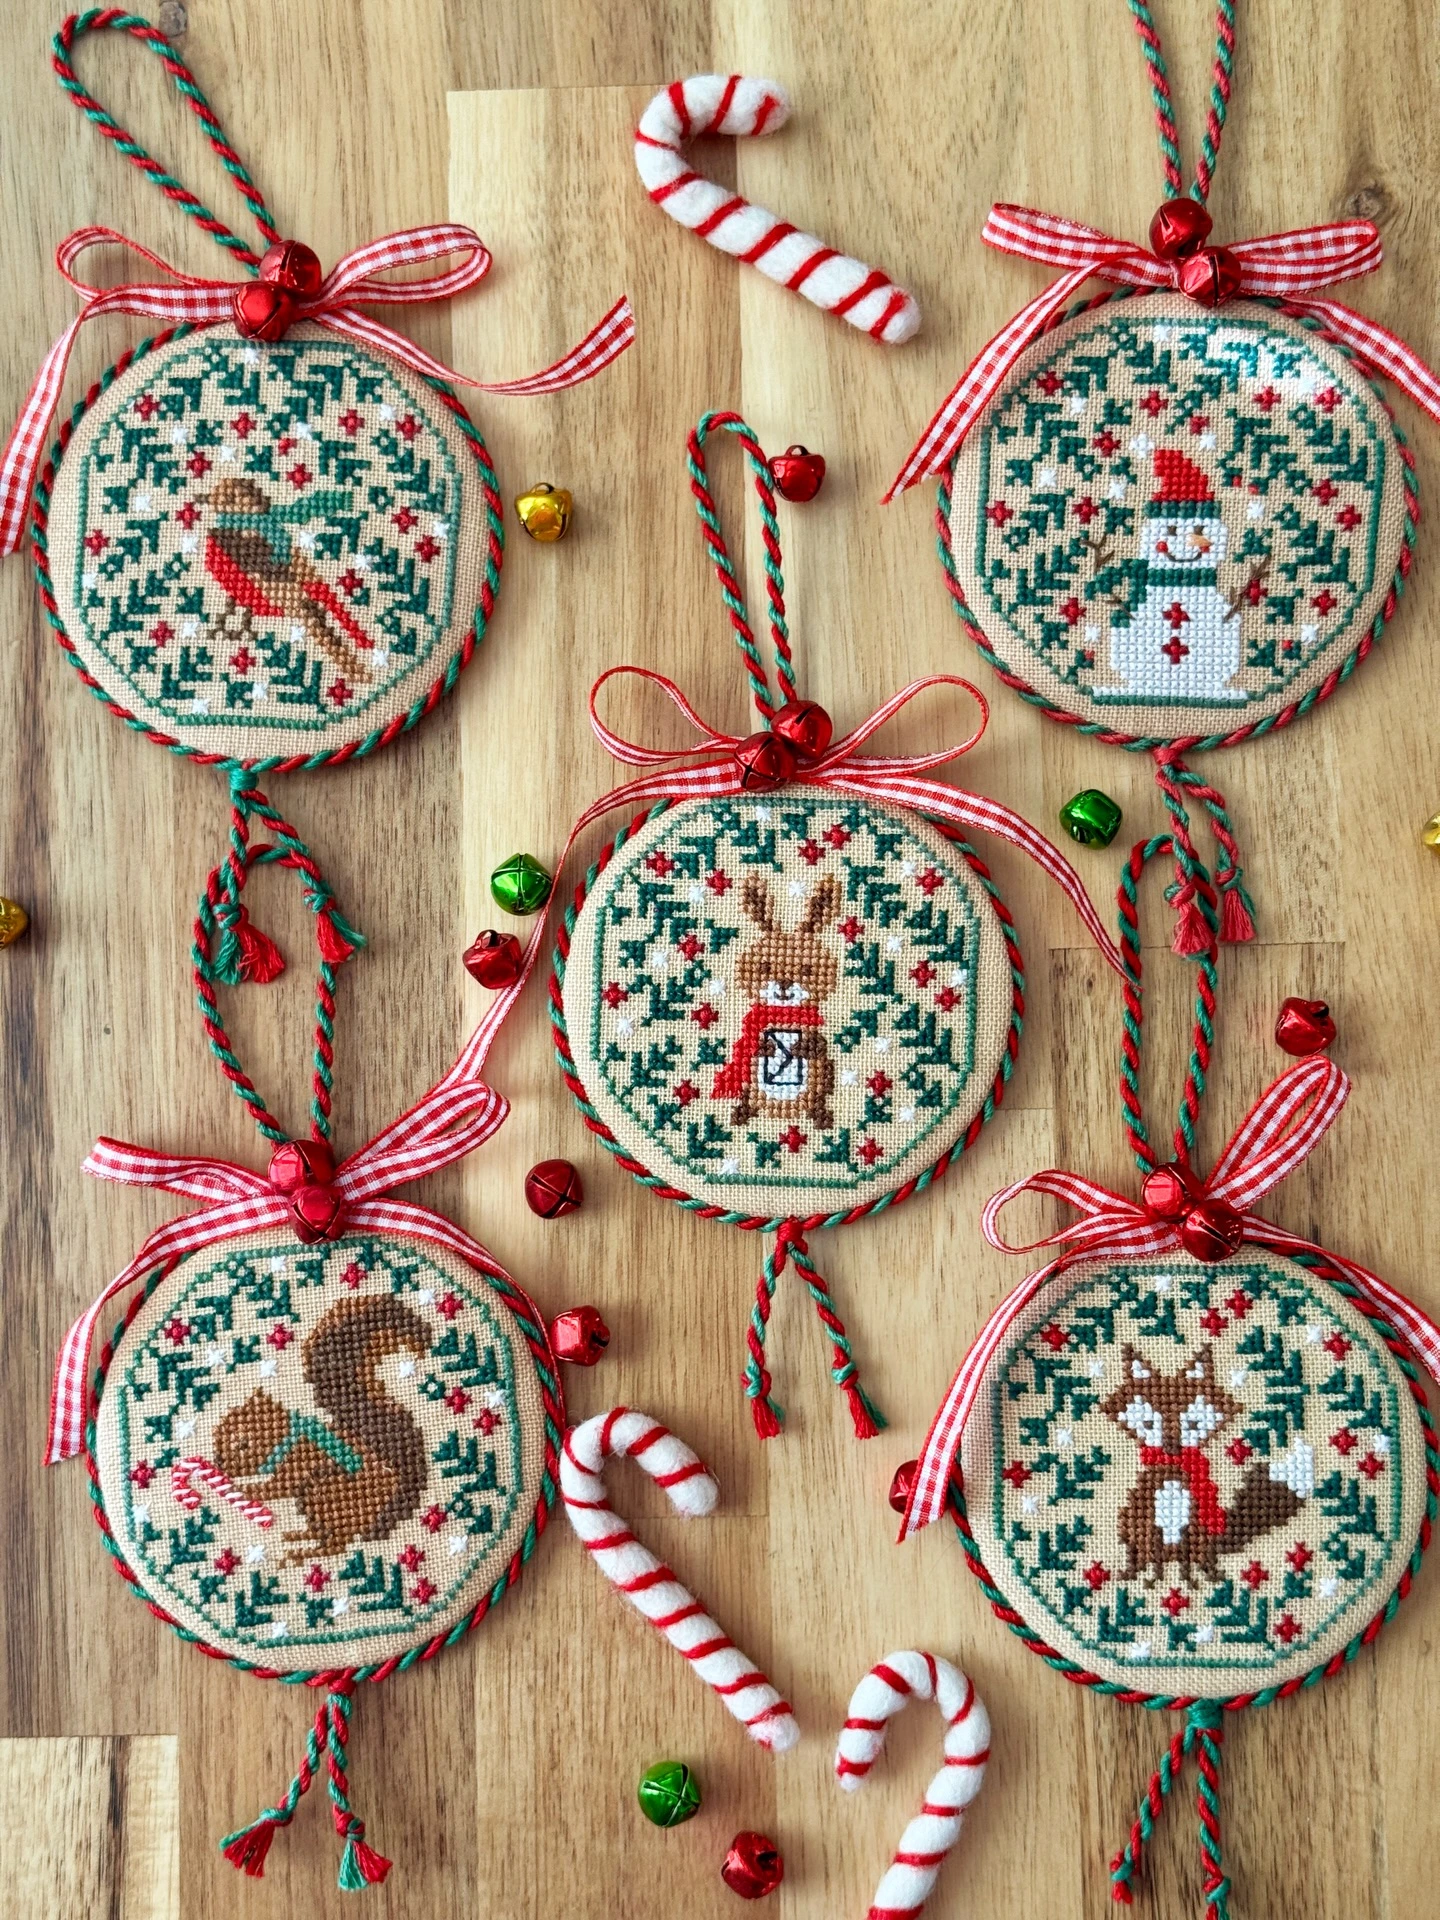
Mini embroidery hoops give handmade fabric ornaments a neat, finished outline.
Choose a smaller fabric print so the pattern remains clear once it is stretched inside the hoop.
Ribbon, twine, and a small bow at the top add a soft finishing detail while keeping the shape easy to hang.
- Mini embroidery hoops
- Christmas fabric
- Ribbon
- Twine
- Small bows
6- Sew Patchwork Fabric Stars
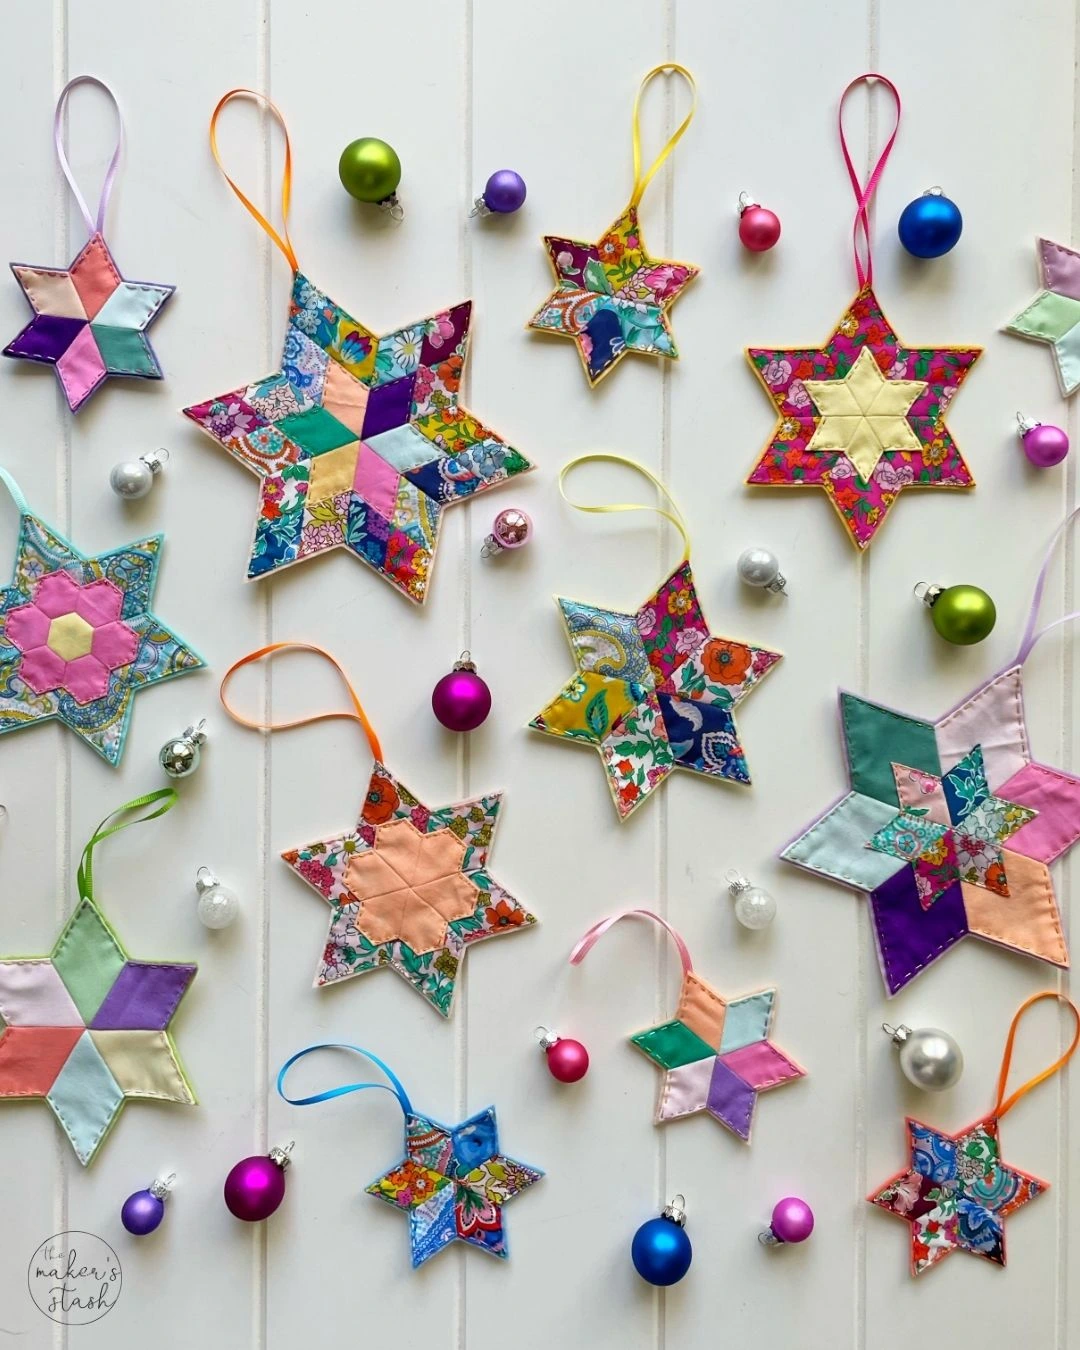
Patchwork fabric stars add color and a quilted look while making good use of small fabric scraps.
A simple star template keeps the shapes consistent, while changing the fabric combinations stops the tree from looking too uniform.
Batting or stuffing gives each star a little body, and ribbon makes it ready for hanging.
More Ideas to Love
- Fabric scraps
- Star template
- Batting or stuffing
- Ribbon
- Thread
7- Add a Playful Beaded Shrimp
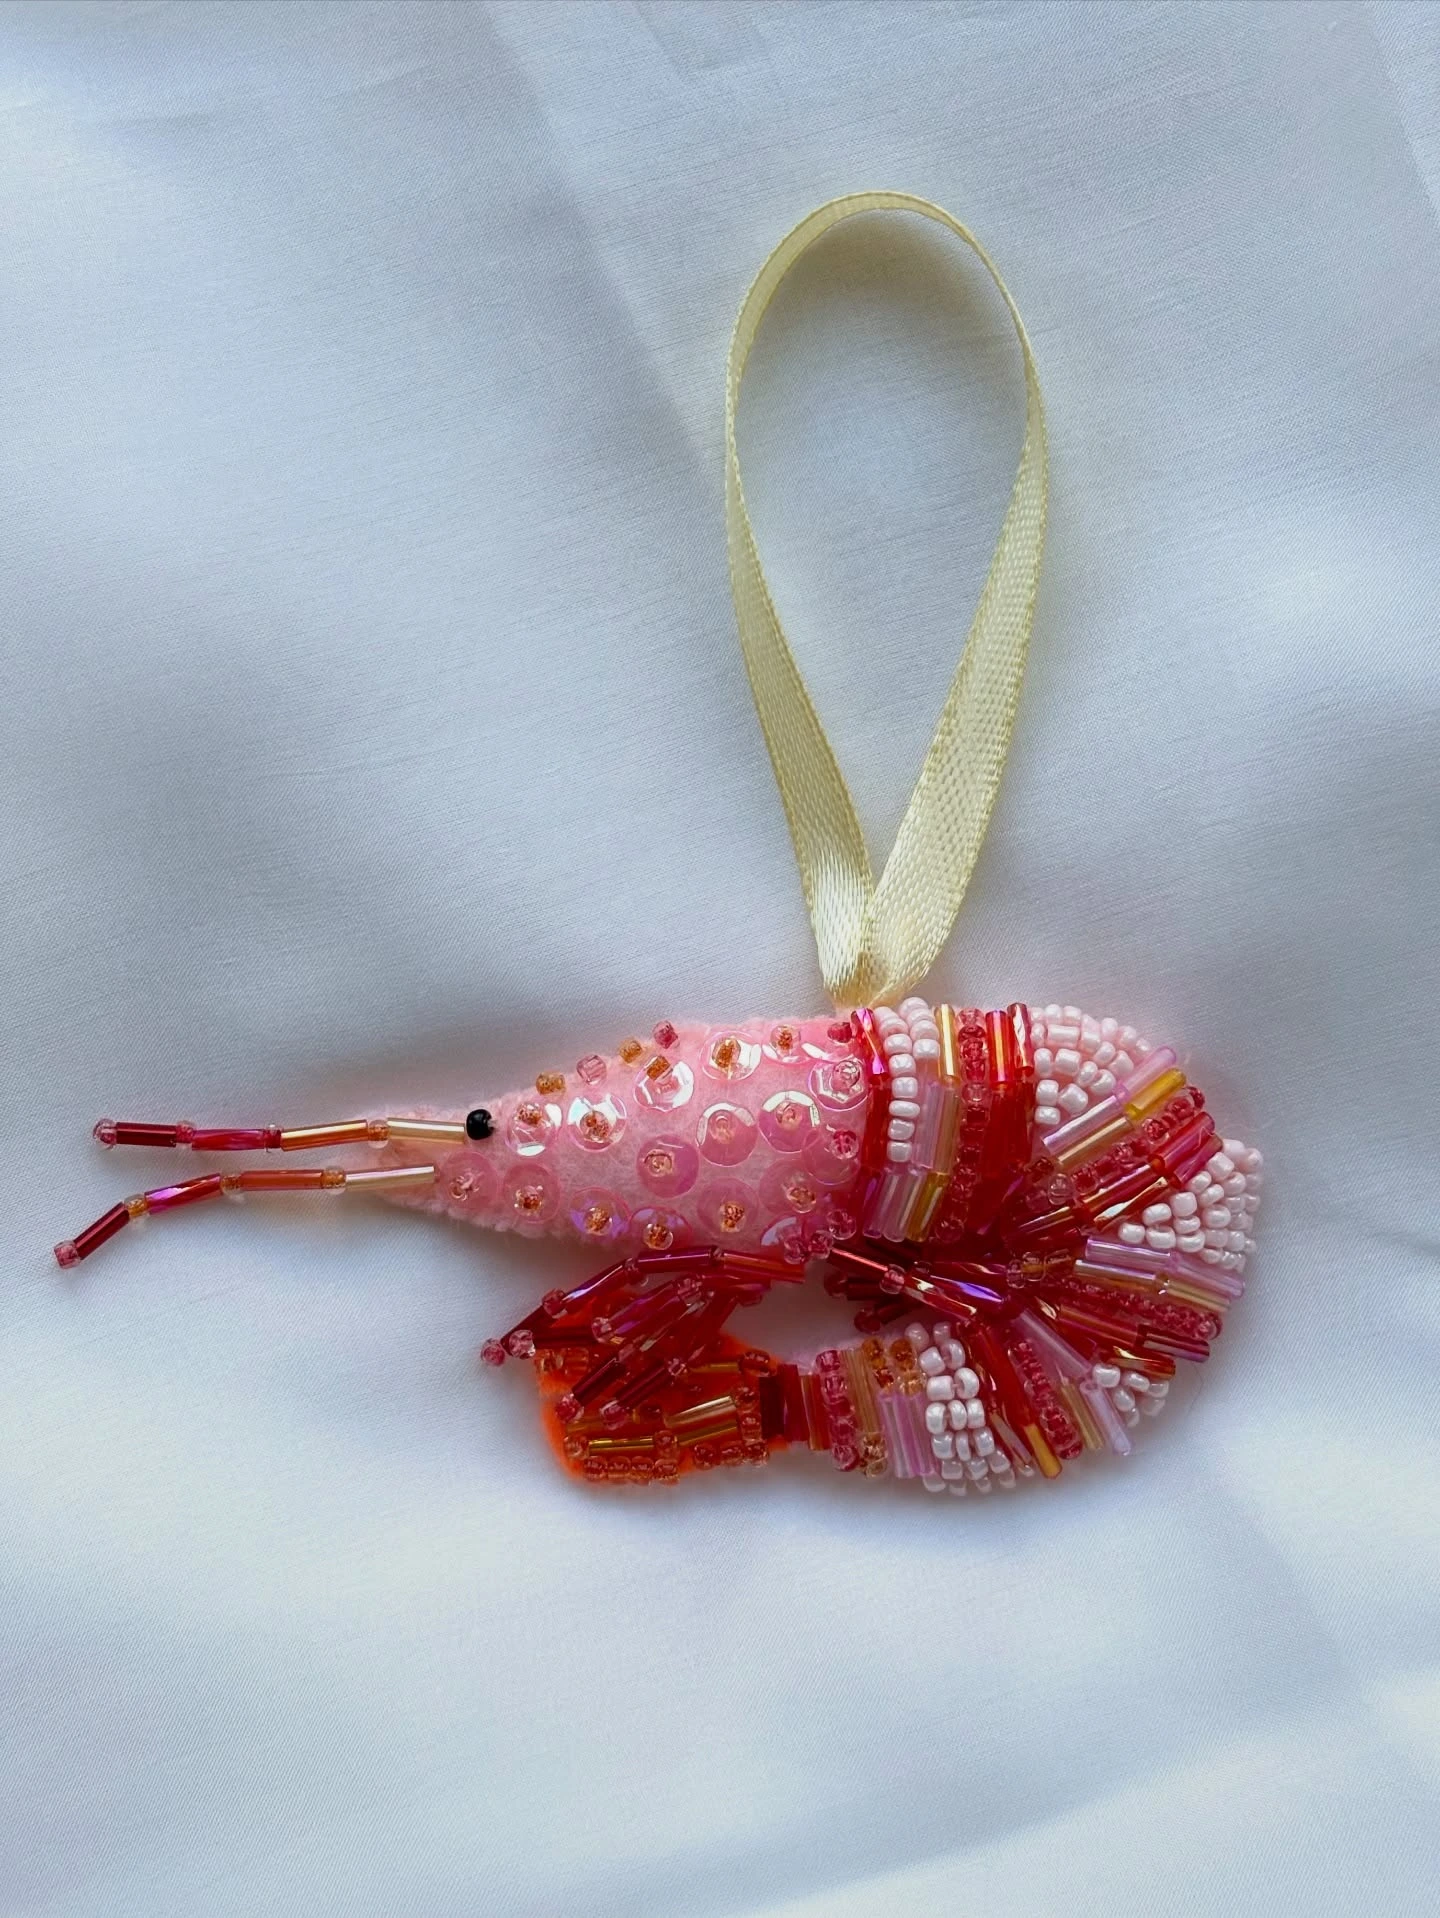
A beaded shrimp brings an unexpected, quirky note to a handmade Christmas tree.
Felt creates the base, while tiny beads and embroidery thread define the shape with colorful detail.
Keep the beading focused in one area and use only a little stuffing if you want the ornament to feel softly raised without becoming heavy.
- Felt
- Tiny beads
- Embroidery thread
- Ribbon
- Small amount of stuffing
8- Paint Minimal Clay Baubles
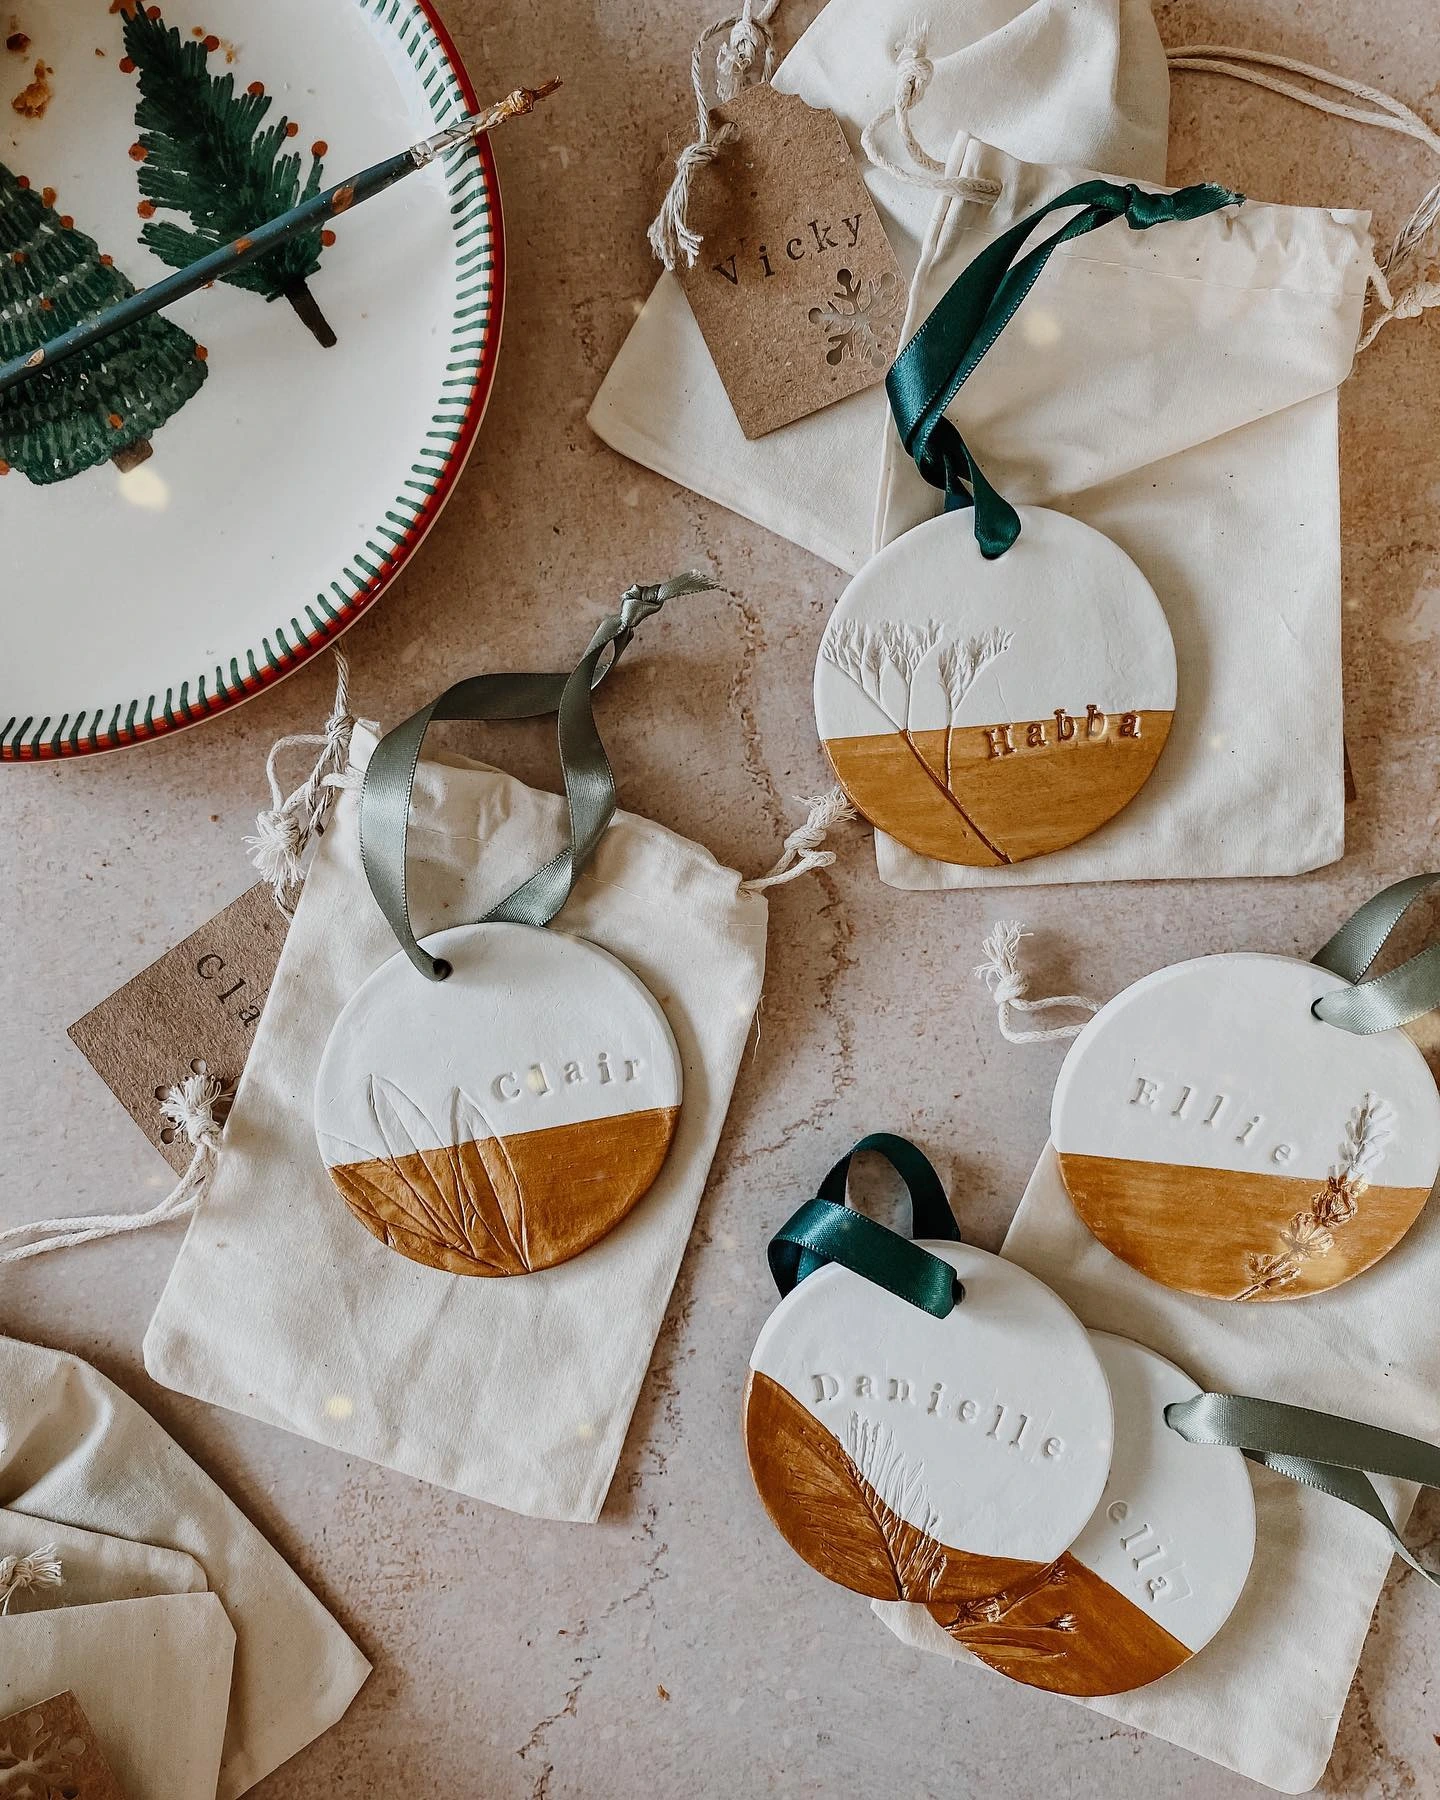
Air-dry clay baubles suit a calm tree with a handmade touch.
Paint only the bottom section for a clean two-part design, then add twine, ribbon, or small lettering if you want personalization.
The rounded shape balances more textured fabric ornaments while keeping the overall arrangement visually quiet.
- Air-dry clay
- Paint
- Ribbon
- Twine
- Small stamps or lettering tools
9- Crochet Tiny Green Trees
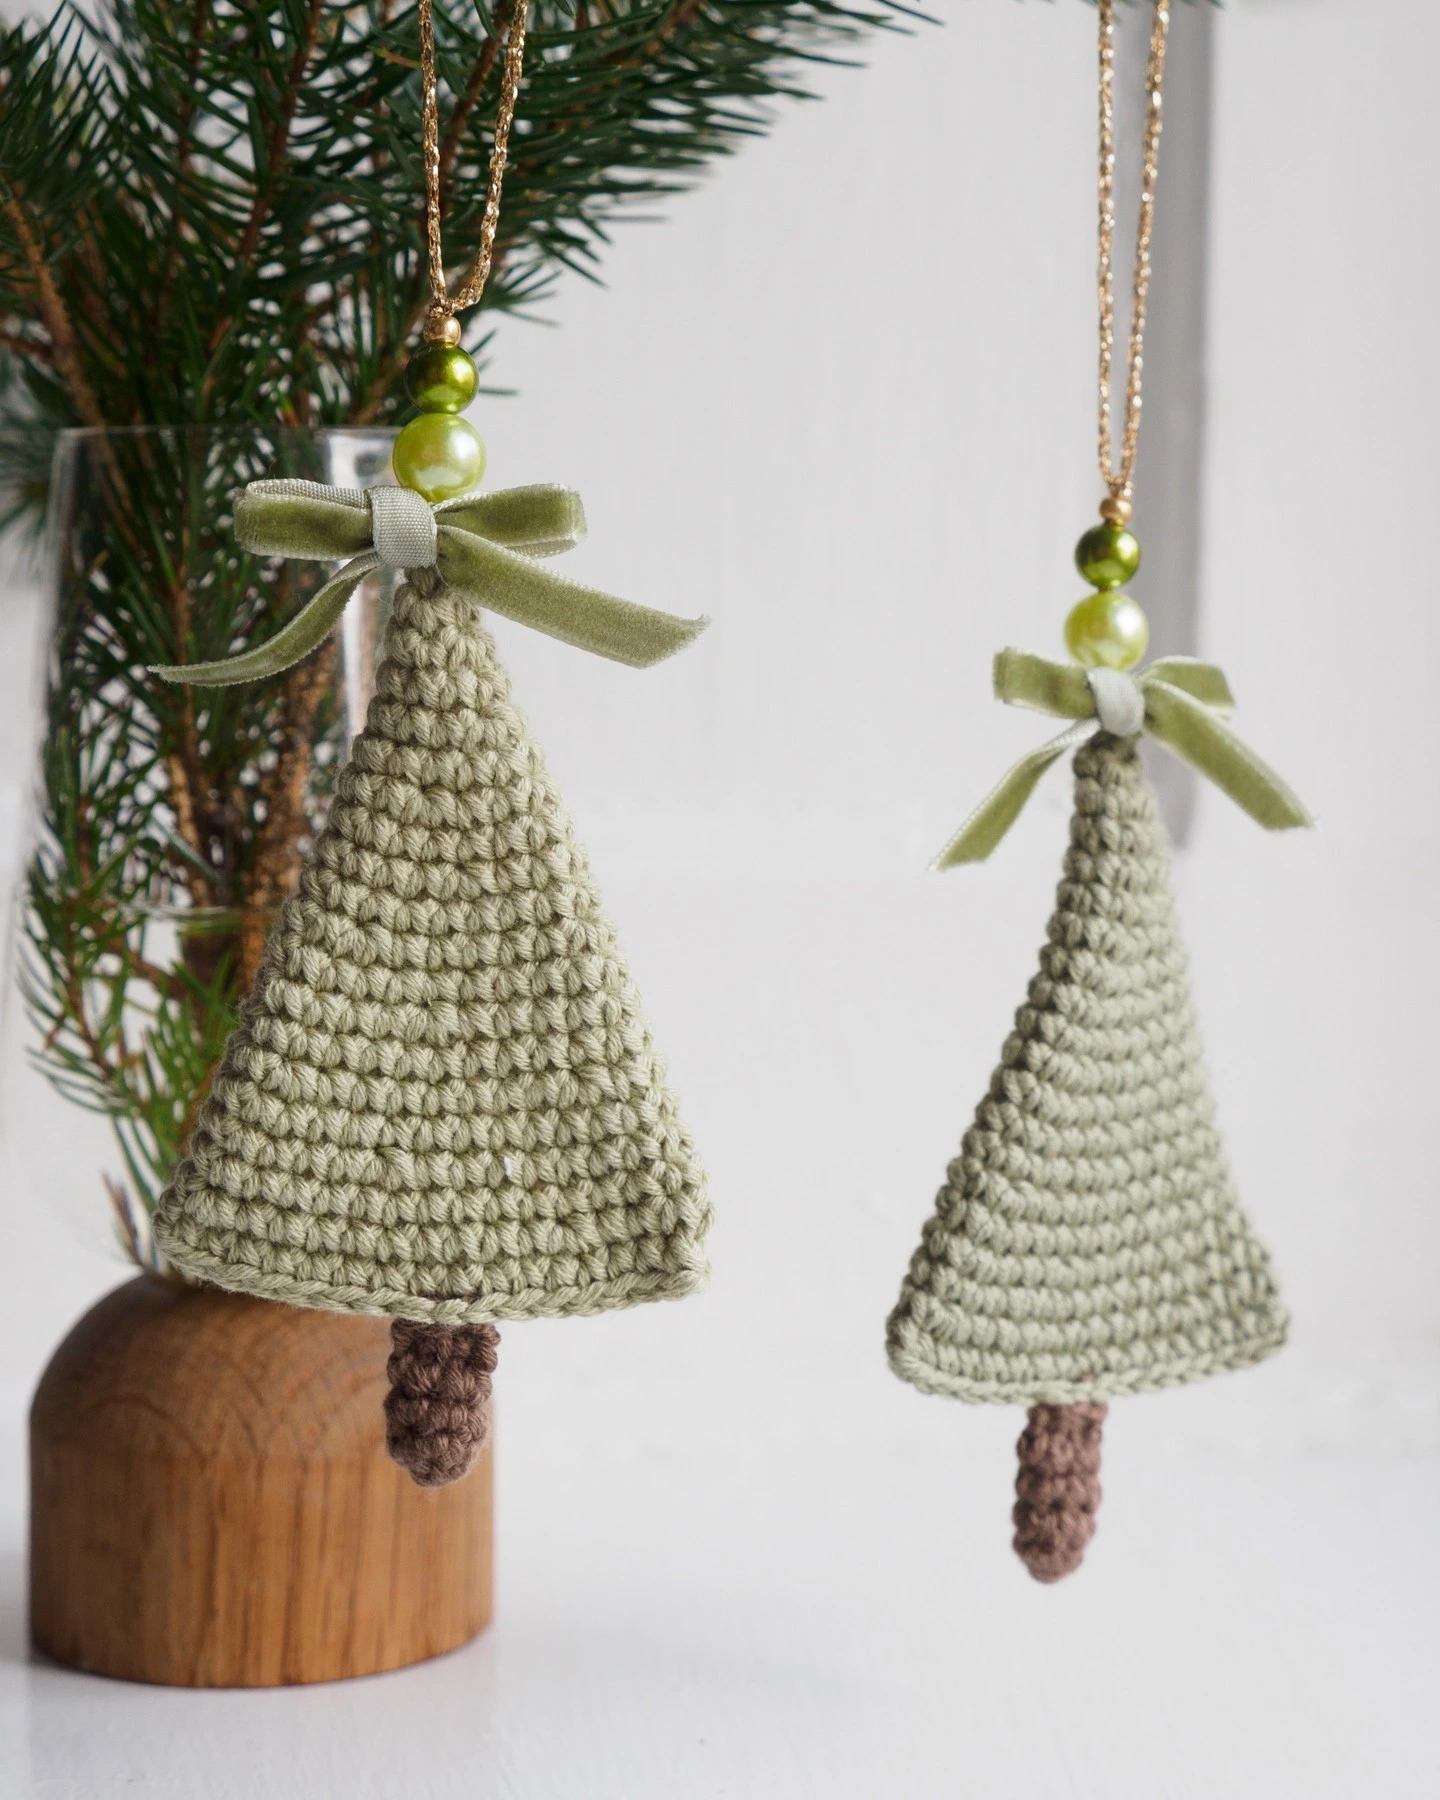
Crocheted tree ornaments bring soft texture and a natural feeling to the branches.
Neutral green yarn keeps them more subdued than bright plastic decorations, while wooden beads and tiny pinecones can add a simple woodland detail.
Their small scale makes them useful for filling gaps without overwhelming larger ornaments.
- Yarn
- Crochet hook
- String
- Wooden beads
- Tiny pinecones
10- Embroider Sparkling Felt Shapes
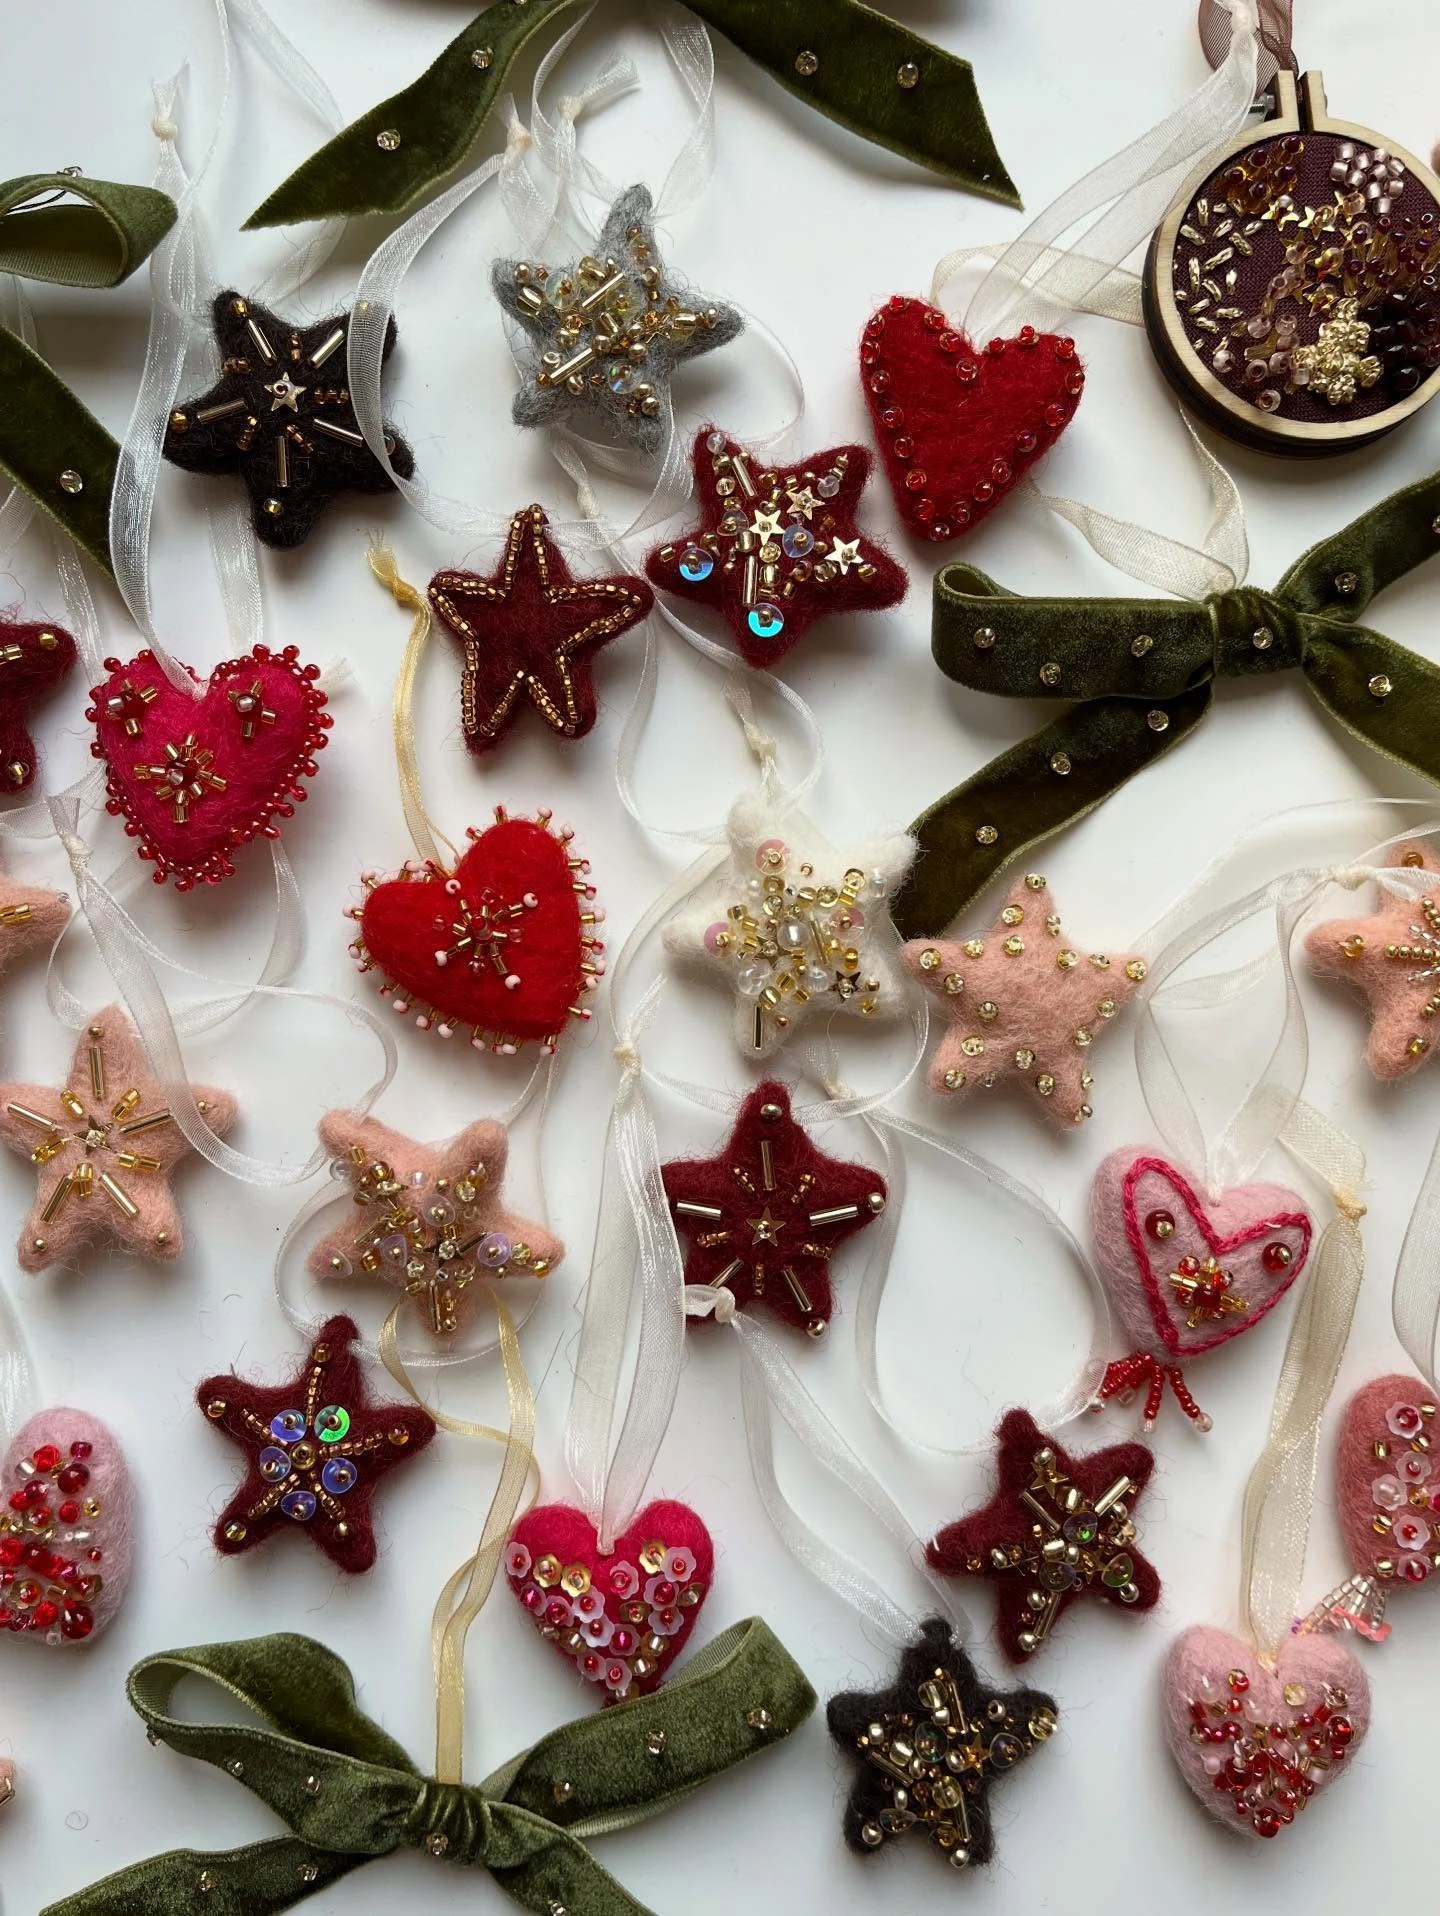
Simple hearts and stars become special when they are covered with careful seed-bead details.
Felt gives the ornament a soft base, while embroidery thread and ribbon add structure and a finished hanging loop.
Because the beads provide enough sparkle, uncomplicated shapes keep the result balanced.
- Felt
- Seed beads
- Embroidery thread
- Ribbon
11- Shape Whimsical Pretzel Ornaments
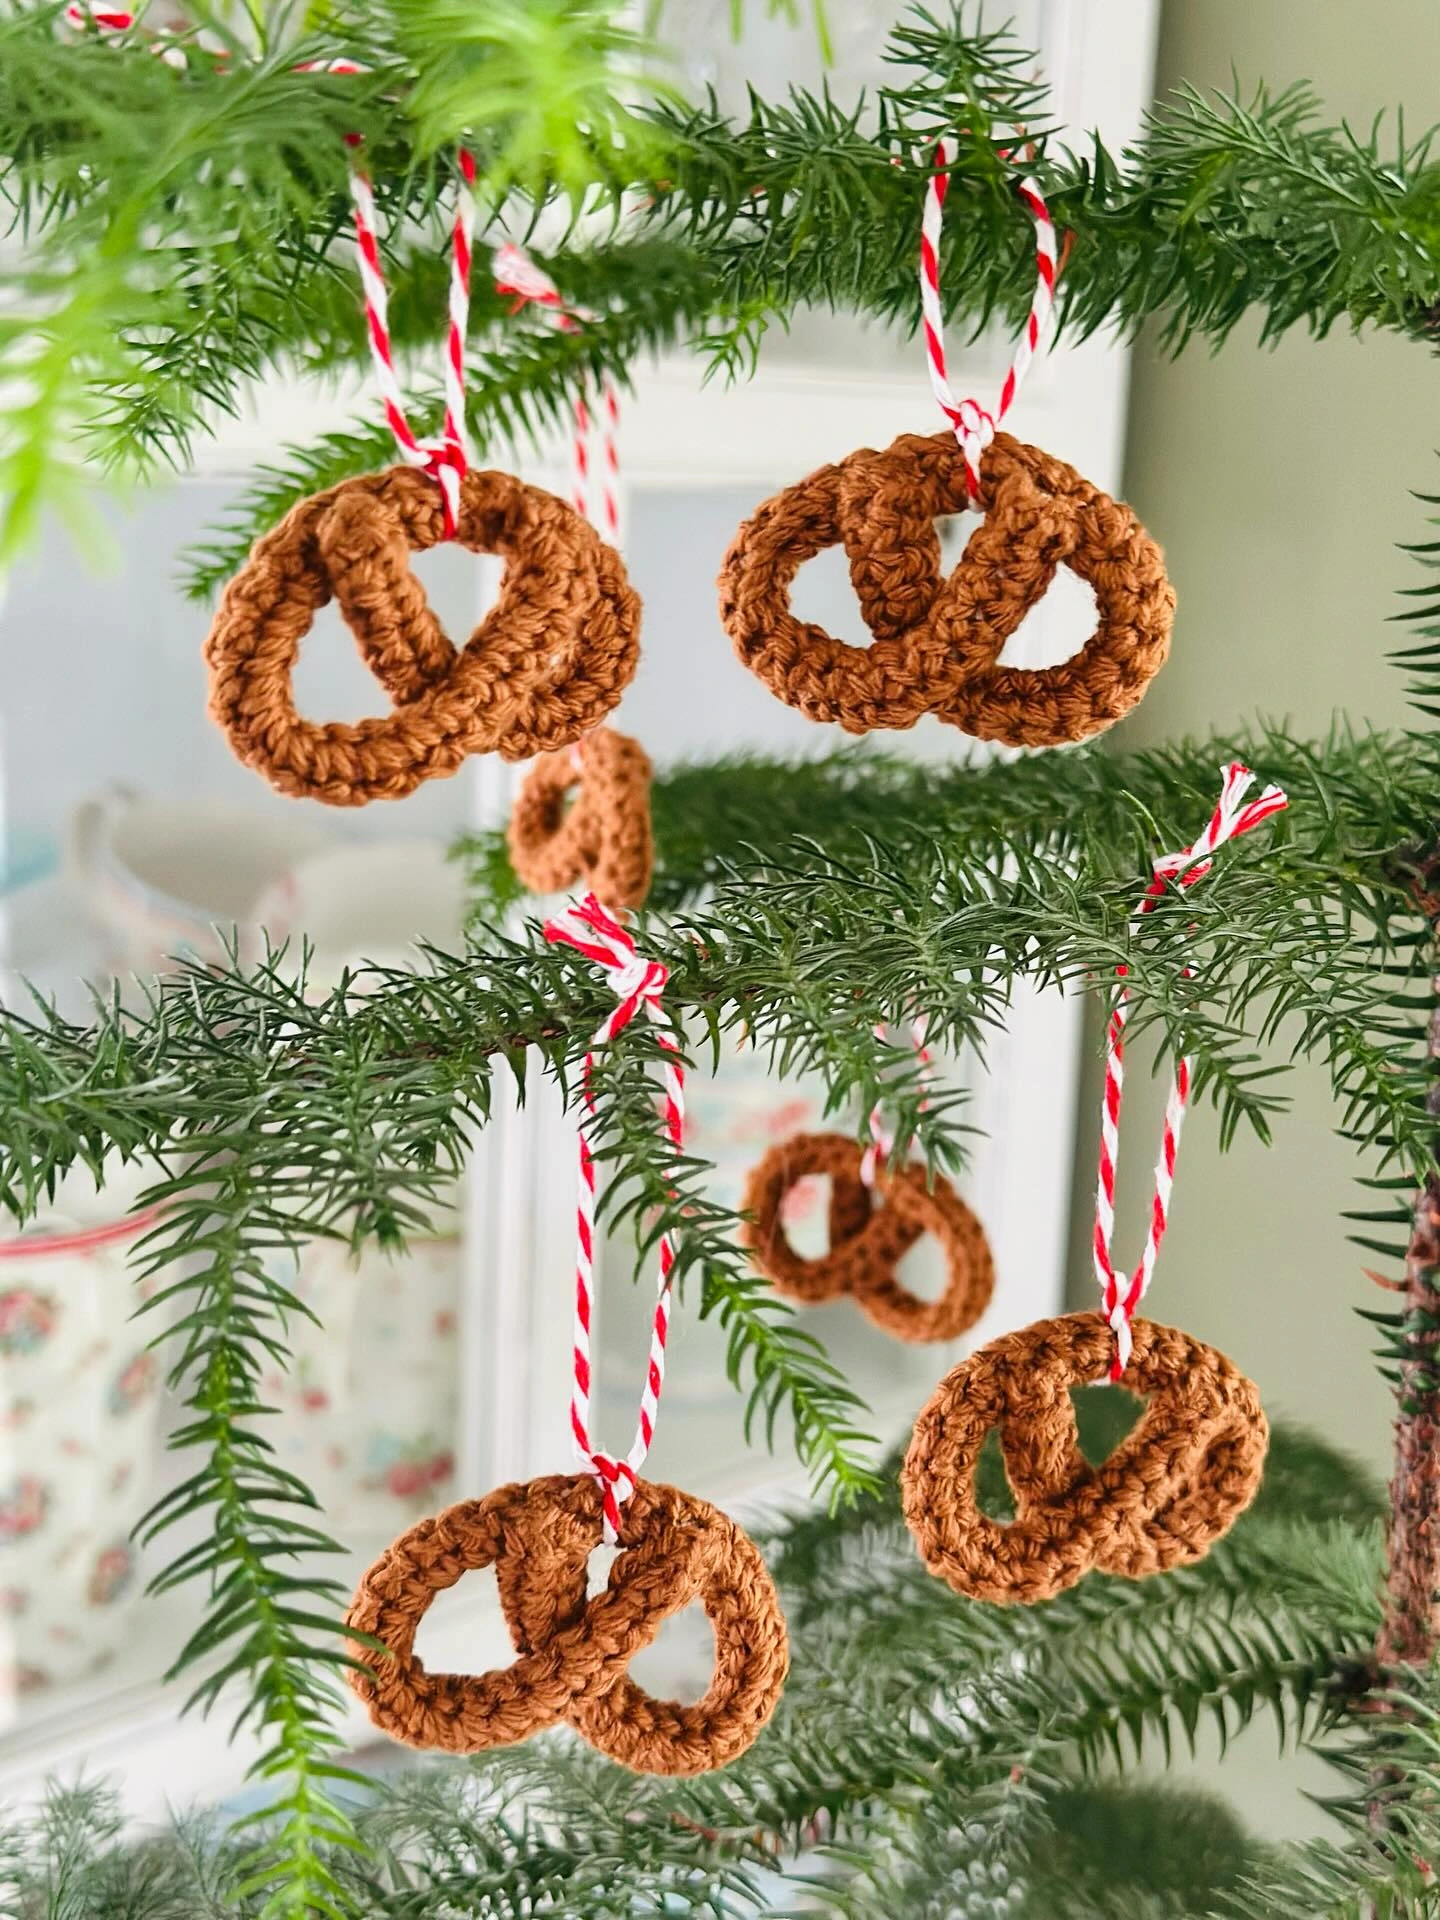
Pretzel ornaments add a playful detail for a tree that does not take itself too seriously.
Keep Reading
Pipe cleaners or chunky yarn make the basic shape easy to form, while red-and-white string and glue can add contrast and texture.
Keep the loops loose and recognizable so the shape reads clearly from across the room.
- Pipe cleaners or chunky yarn
- Red-and-white string
- Glue
- Salt-style texture material
12- Finish With a Handmade Star Topper
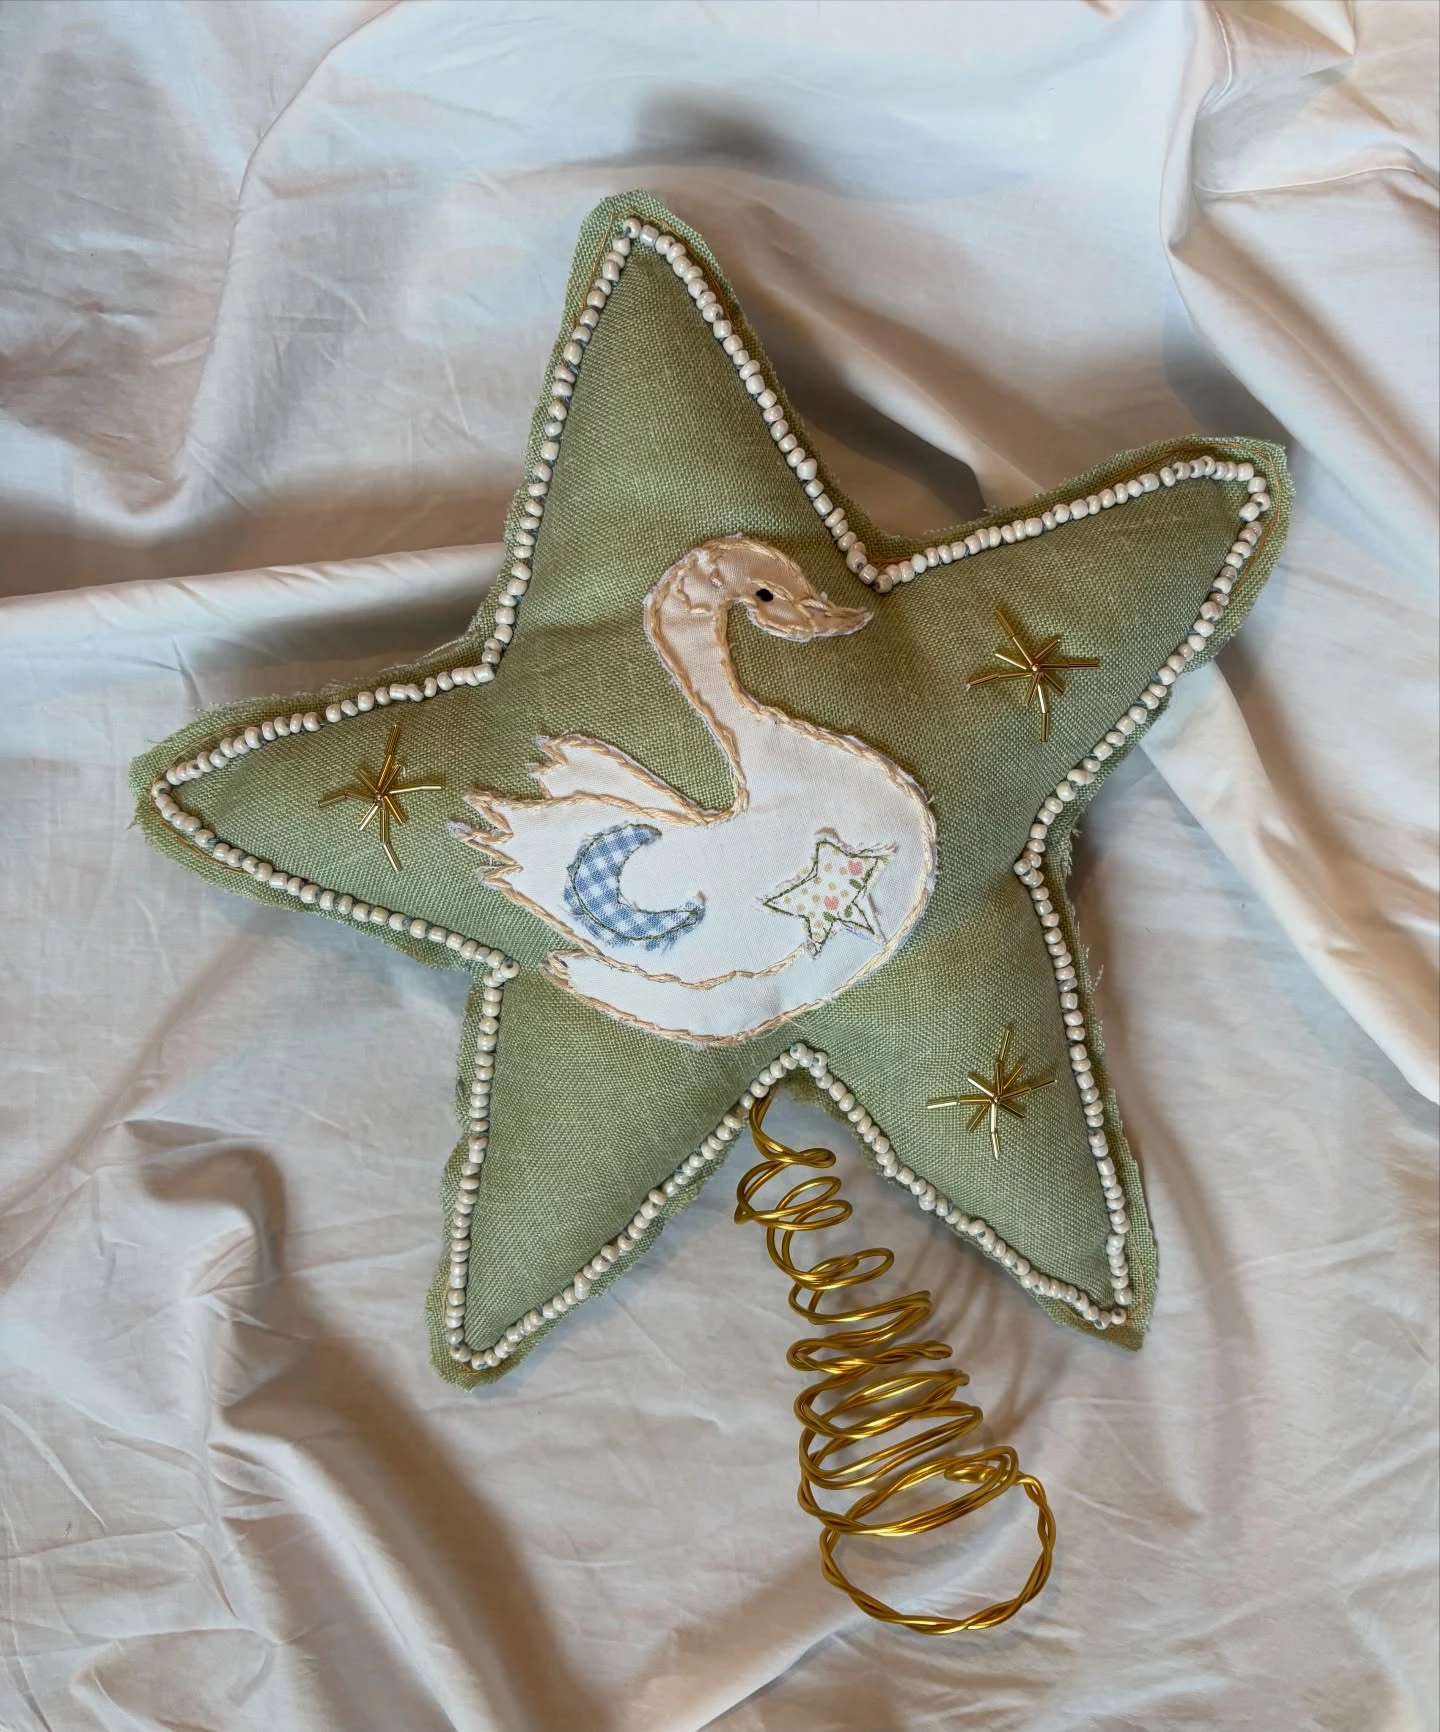
A fabric star topper gives the tree a handmade focal point from the highest branch downward.
Beads, embroidery thread, wire, and ribbon add detail and a little structure to the star shape.
This is a slower project, so it suits adults or older children who can enjoy the stitched work without rushing.
- Fabric
- Beads
- Embroidery thread
- Wire
- Ribbon
- Star shape for the base
Let the Handmade Details Lead
A tree filled with handmade ornaments feels more personal when the colors and textures vary gently instead of matching perfectly.
Mix soft felt, painted clay, stitched fabric, crochet, and beads to create contrast while keeping the display cohesive.
Choose a few favorites as focal points, then use the smaller pieces to fill gaps and add rhythm.
The best decorations are the ones that make the tree feel like it belongs in your home.

I am Eleanor Foy, the mom of two behind DaisyHacks. I am a lover of clean, calm homes and a person who will happily spend 45 minutes researching a 5 minute cleaning hack. No regrets.