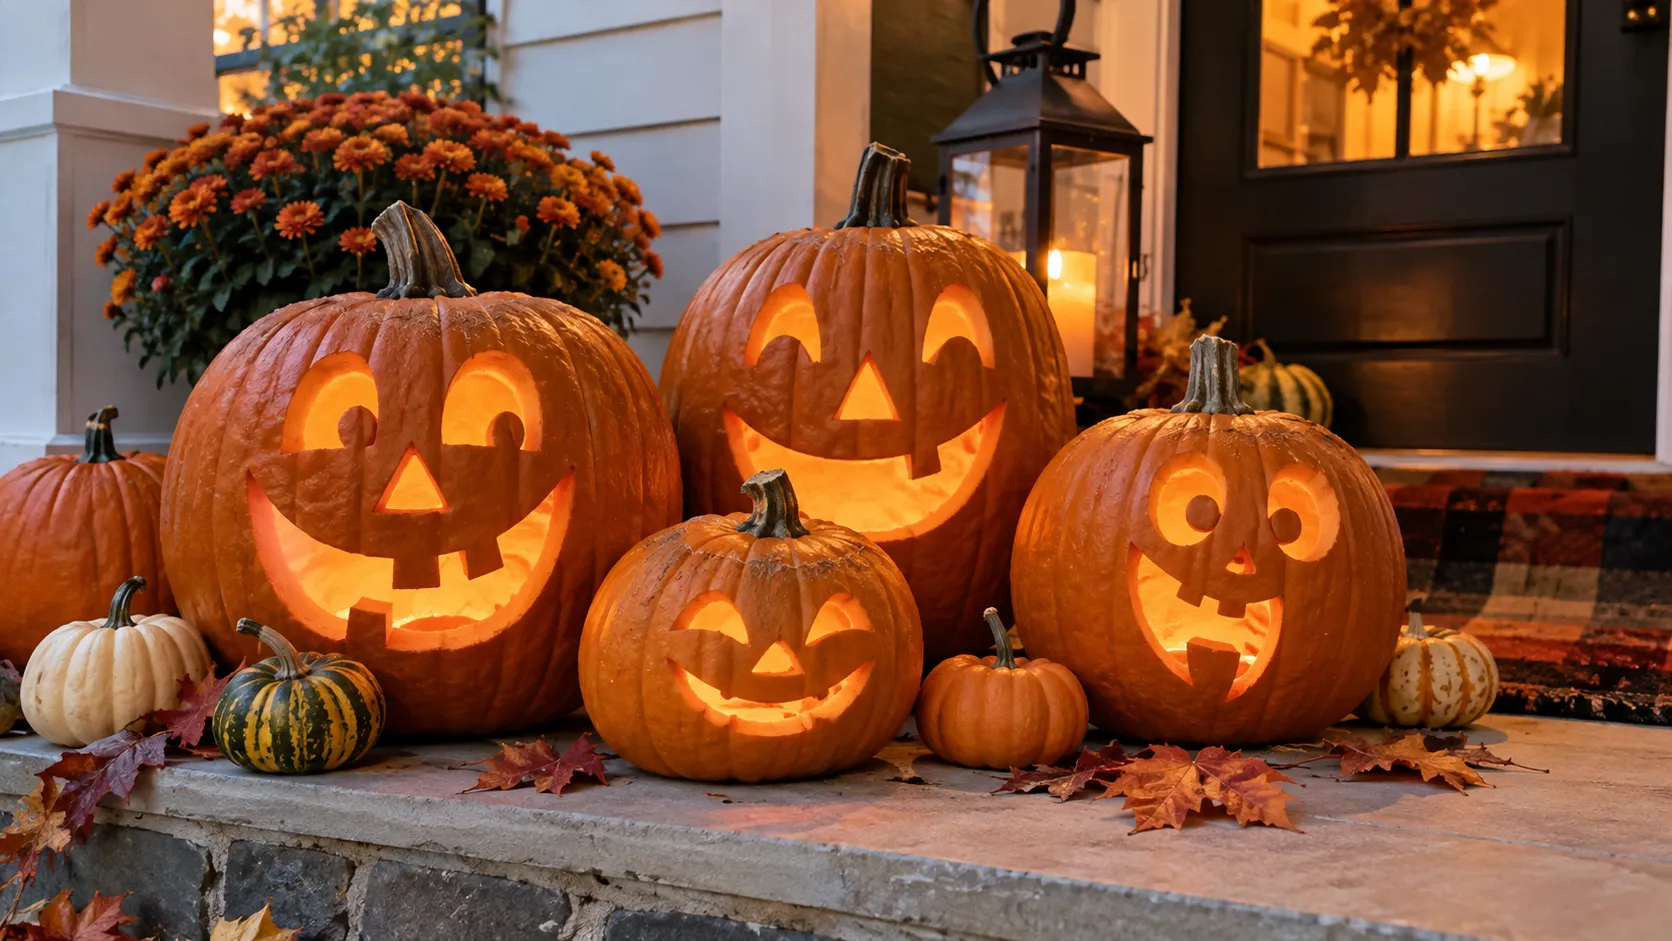
27 Kid Friendly Pumpkin Carving Ideas for a Playful Halloween
Pumpkin decorating gets tricky when little hands want to help but sharp tools need careful supervision.
You Might Also Like
These kid friendly pumpkin carving ideas include painted designs, simple shapes, funny faces, and creative displays.
Some options need almost no carving at all, while others give older children a little more room to get involved.
Think about where the pumpkin will sit, how much detail your child can manage, and whether a battery light will make the design glow.
A simple design can still feel special when the shape, color, and expression have plenty of room to show.
Let's break it down.
1- Give a Monster a Swirly Eye

A round glowing eye, jagged smile, and swirly detail give this monster plenty of personality without making it feel too frightening.
The eye becomes the focal point, while the simple mouth keeps the rest of the face easy to understand.
Older children may enjoy helping plan the more detailed eye, with an adult handling the cutting.
2- Paint a Friendly Frankenstein
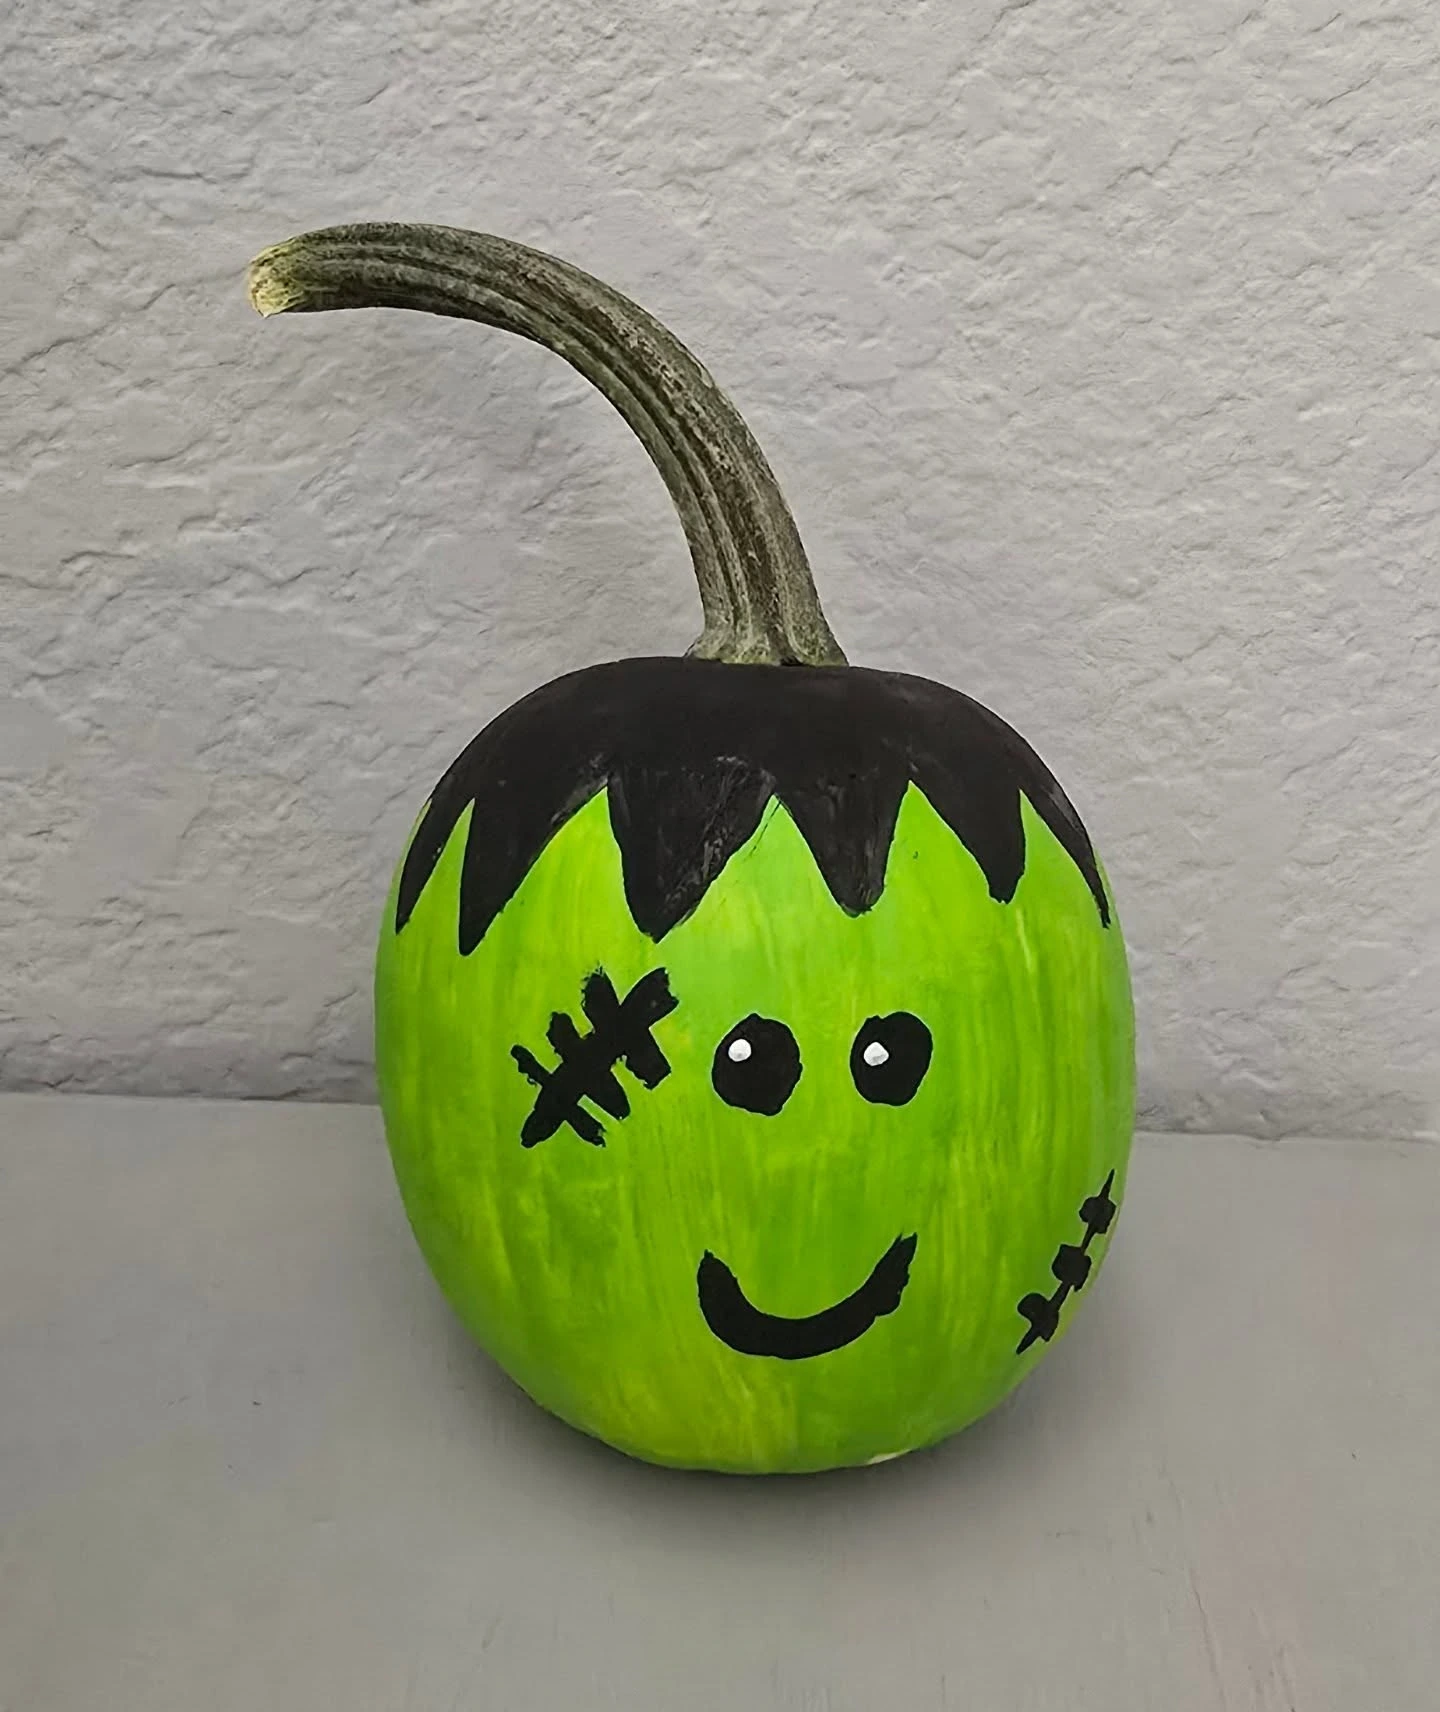
Green paint, black hair, simple eyes, stitches, and a smile create a recognizable Frankenstein with very little carving.
The strong green and black palette makes the face readable, even from a short distance.
For a no-carve version, use paint pens for every detail and let younger children focus on the expression.
- Green paint
- Black paint or paint pen
- Paint pens for eyes, stitches, and smile
3- Create a Moonlit Mountain Scene
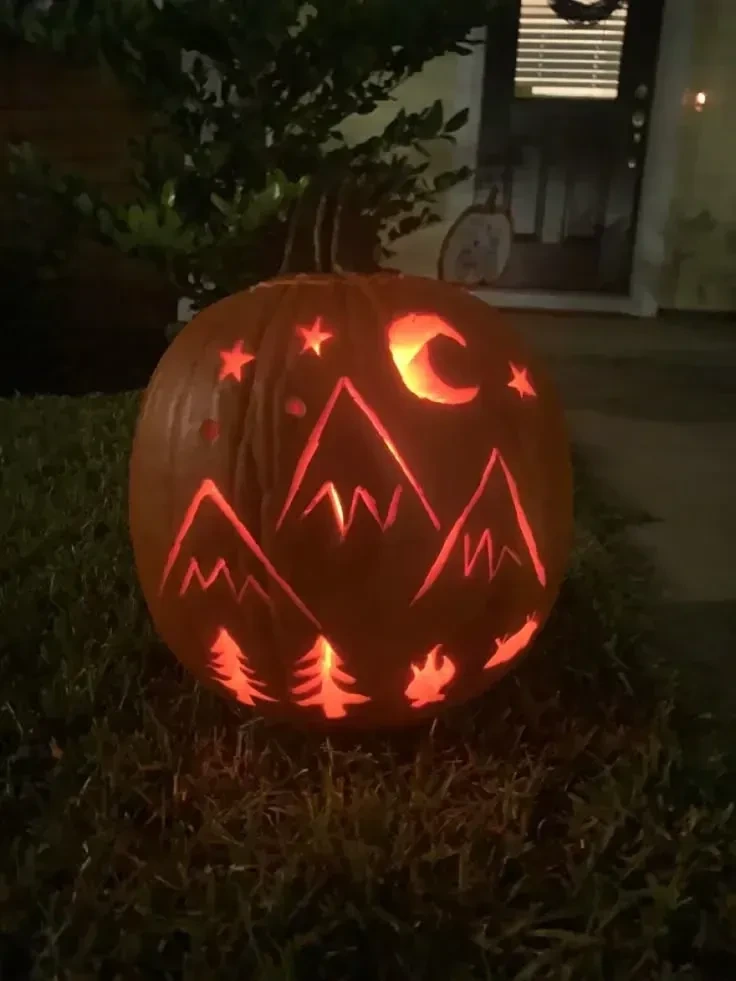
A moon, stars, mountains, and trees turn the pumpkin into a small scenic display rather than a traditional face.
The simple mountain shapes create a clear layered effect, while the moon and stars add small points of light.
This design suits older children who want something creative and a little more grown up.
4- Add a Goofy Pumpkin Tongue

Big teeth and a carved tongue make this face funny instead of scary.
The tongue acts as the character detail, so the rest of the design can stay bold and uncomplicated.
It is an approachable choice for children who want a pumpkin with a strong personality.
5- Make a One-Eyed Monster
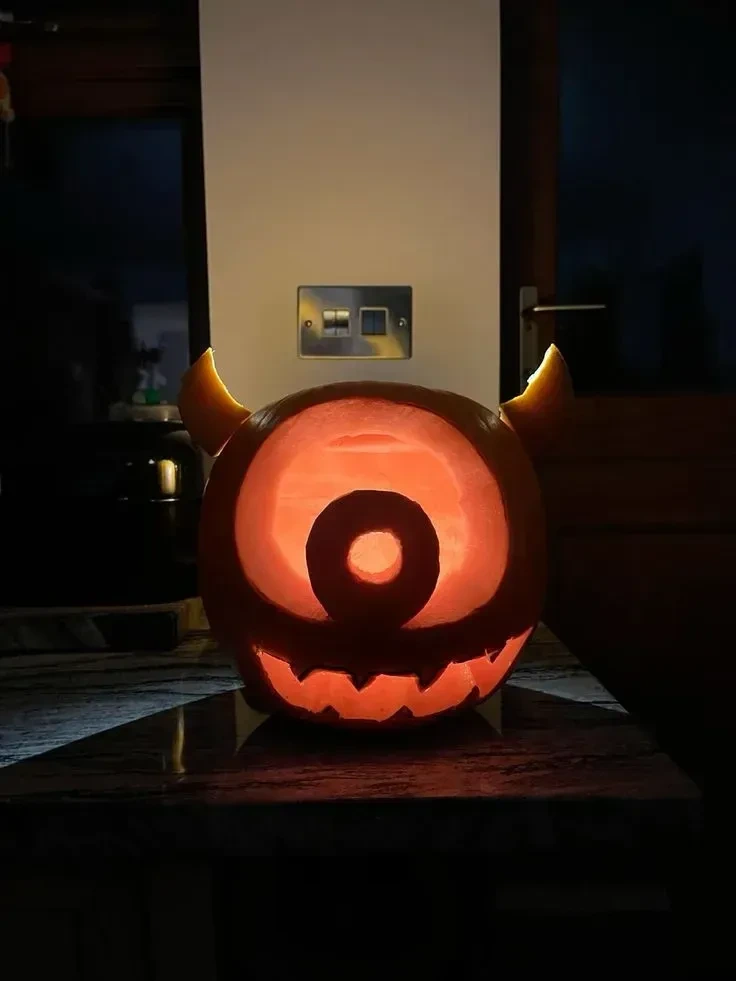
One large glowing eye, little teeth, and a funny expression are enough to create a cheerful monster character.
The oversized eye gives the pumpkin an easy focal point, while the small teeth keep the mood playful.
A simple face like this works well when your child wants a character without lots of complicated cuts.
6- Build a Tiny Pumpkin Village
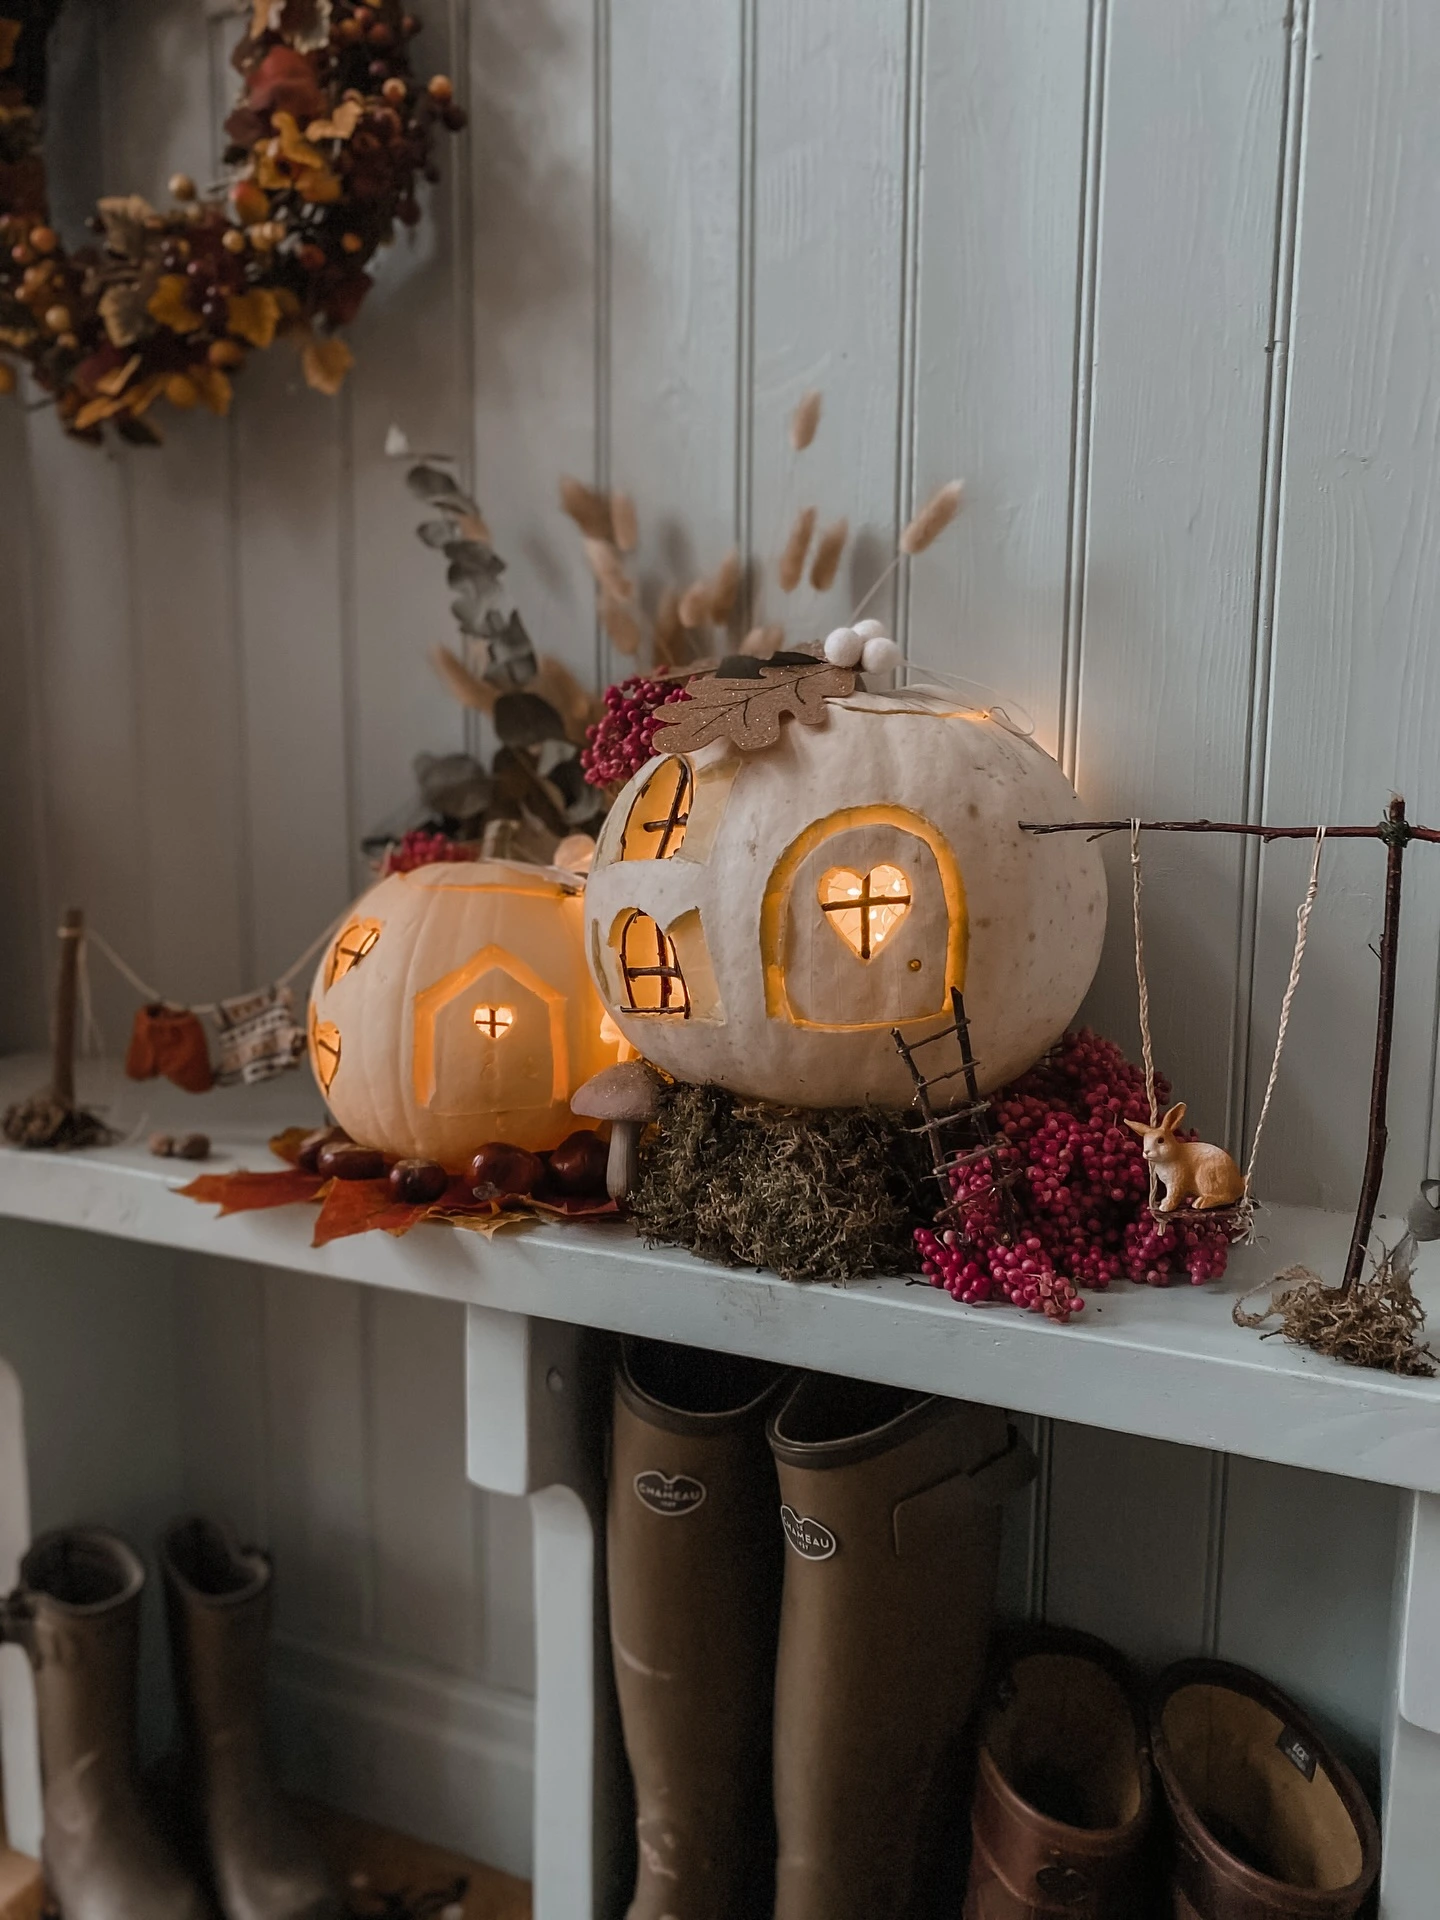
Turn several pumpkins into a little village with white pumpkin houses, tiny doors, and glowing windows.
The group feels magical because the display uses repetition, different shapes, and small details instead of one large face.
An adult can carve the doors and windows first, while children arrange leaves, berries, moss, twigs, or other small props around the pumpkins.
- White pumpkins
- Leaves and berries
- Moss and twigs
- Battery tea lights
7- Carve a Simple Bow
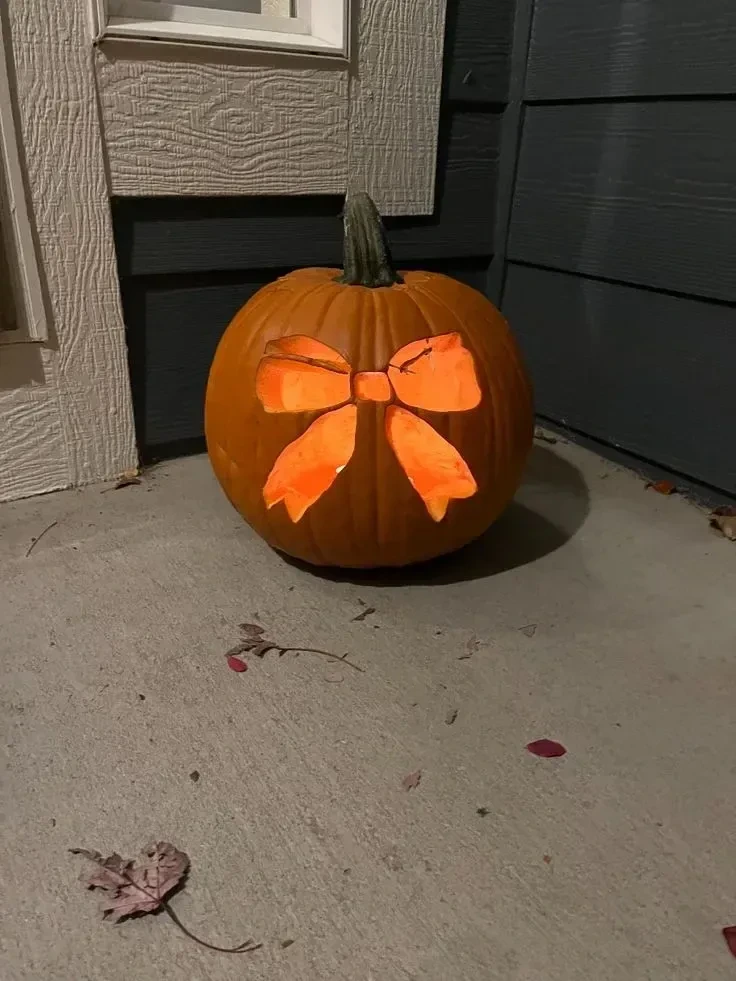
A bow cutout gives a pumpkin a cute, pretty feeling without relying on a spooky face.
The bow becomes the main decorative shape, so the design stays clean and easy to read.
Add a simple face only if your child wants more detail, or let the bow stand on its own.
8- Cut Out a Peace Sign
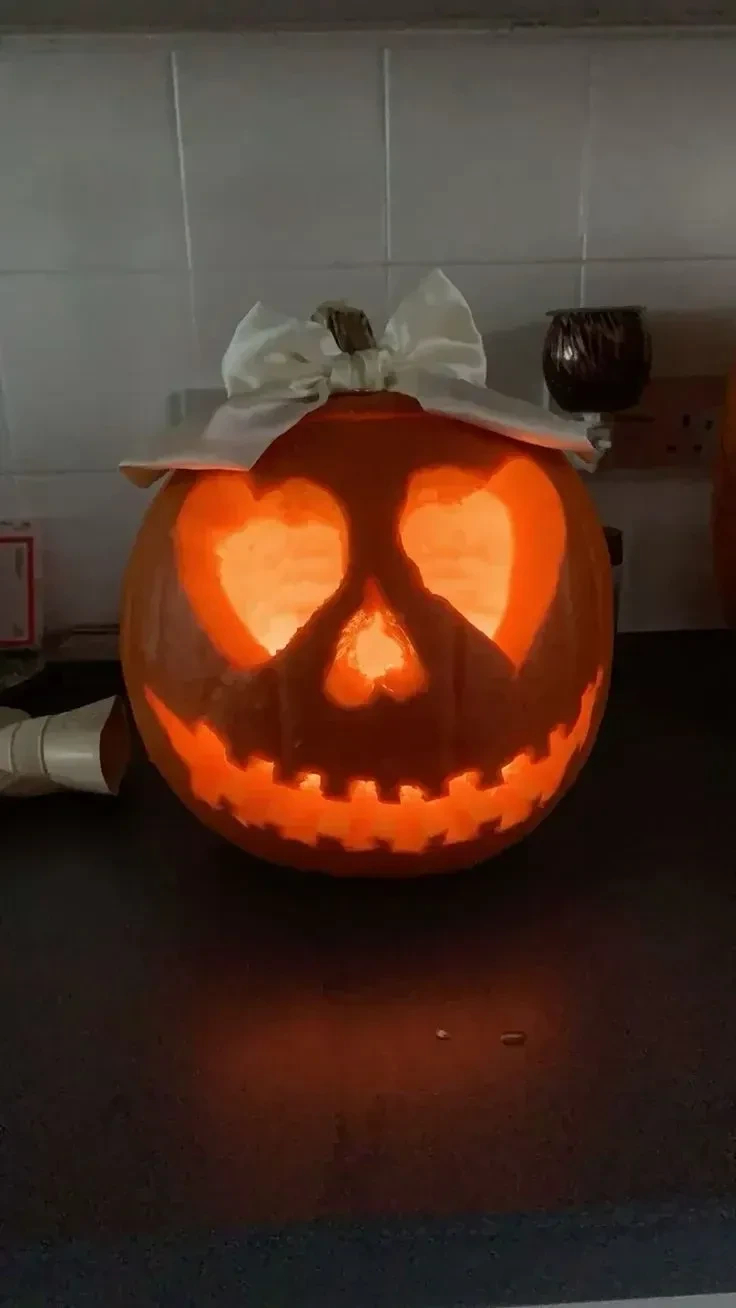
A bold peace sign creates a cheerful throwback design that looks clear once the pumpkin is lit.
Its wide, simple shape provides plenty of negative space and avoids the fuss of many tiny cutouts.
This is a good pattern choice for children who would rather decorate a symbol than carve a face.
9- Paint a Collection of Colorful Pumpkins

Brightly painted pumpkins with bats, flowers, and other small Halloween shapes bring color without requiring carving.
A mix of painted motifs keeps the group lively, while the shared seasonal theme makes the pumpkins feel connected.
This approach is useful for children who are not ready for sharp tools and can also be less messy than removing pumpkin insides.
- Pumpkins
- Bright paint
- Paint pens
- Halloween shape templates
10- Give the Pumpkin Heart Eyes

Heart-shaped eyes and a glowing smile make a jack-o-lantern look happy rather than spooky.
The repeated heart shape adds charm while keeping the design simple enough for a beginner.
You can use large hearts for easier cutting and a stronger expression.
11- Carve Classic Mickey Ears
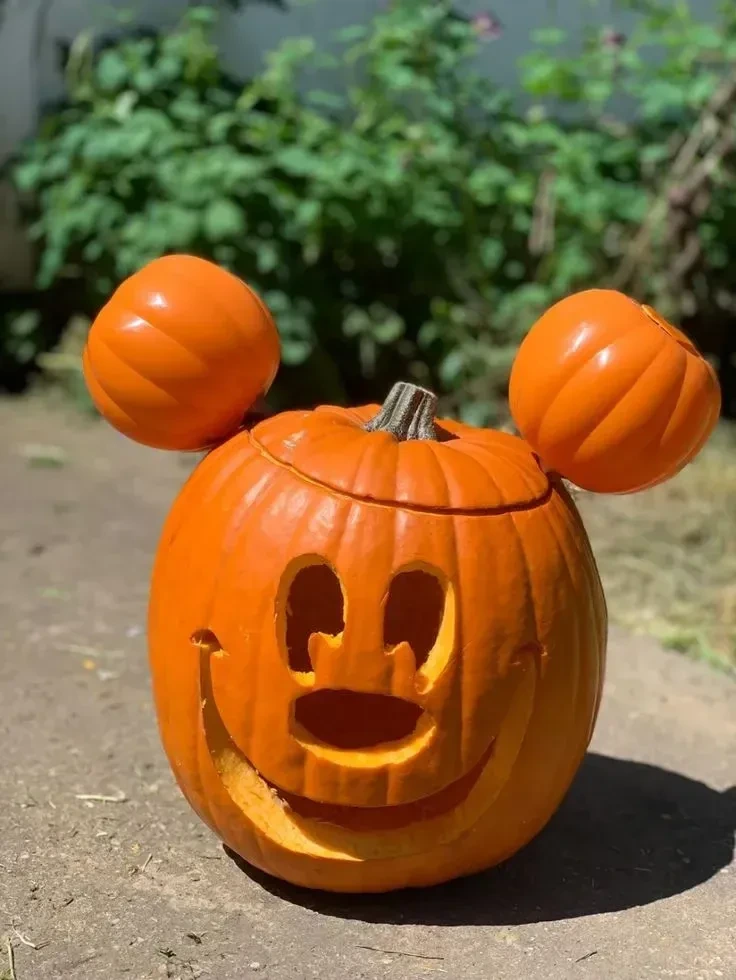
Round ears and a simple face make this character pumpkin instantly recognizable without tiny details.
The repeated circular shapes create a playful outline, while the face keeps the center visually grounded.
It is a friendly choice for children who want a character design that is straightforward to plan.
12- Try a Sad Pumpkin Face
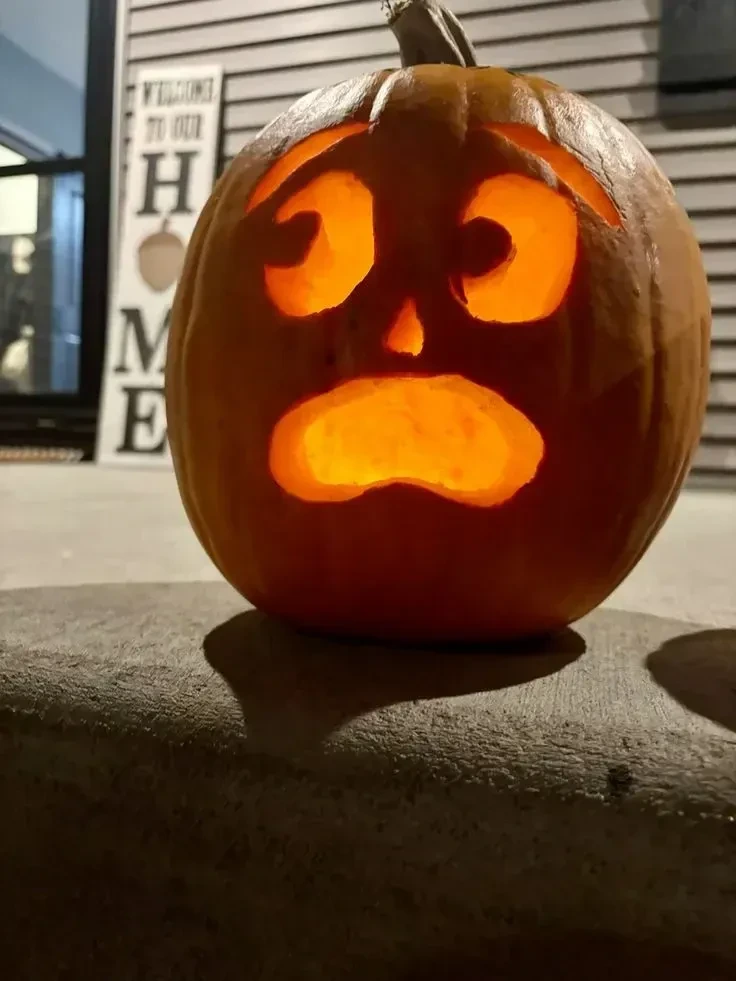
Big eyes and a curved mouth give this pumpkin a funny, expressive look that stands apart from the usual grin.
The emotion comes from just a few simple shapes, making the design easy to understand and recreate.
It is a playful option for a child who wants a pumpkin that feels different from everyone else's.
13- Add Woodland Antlers and Ears
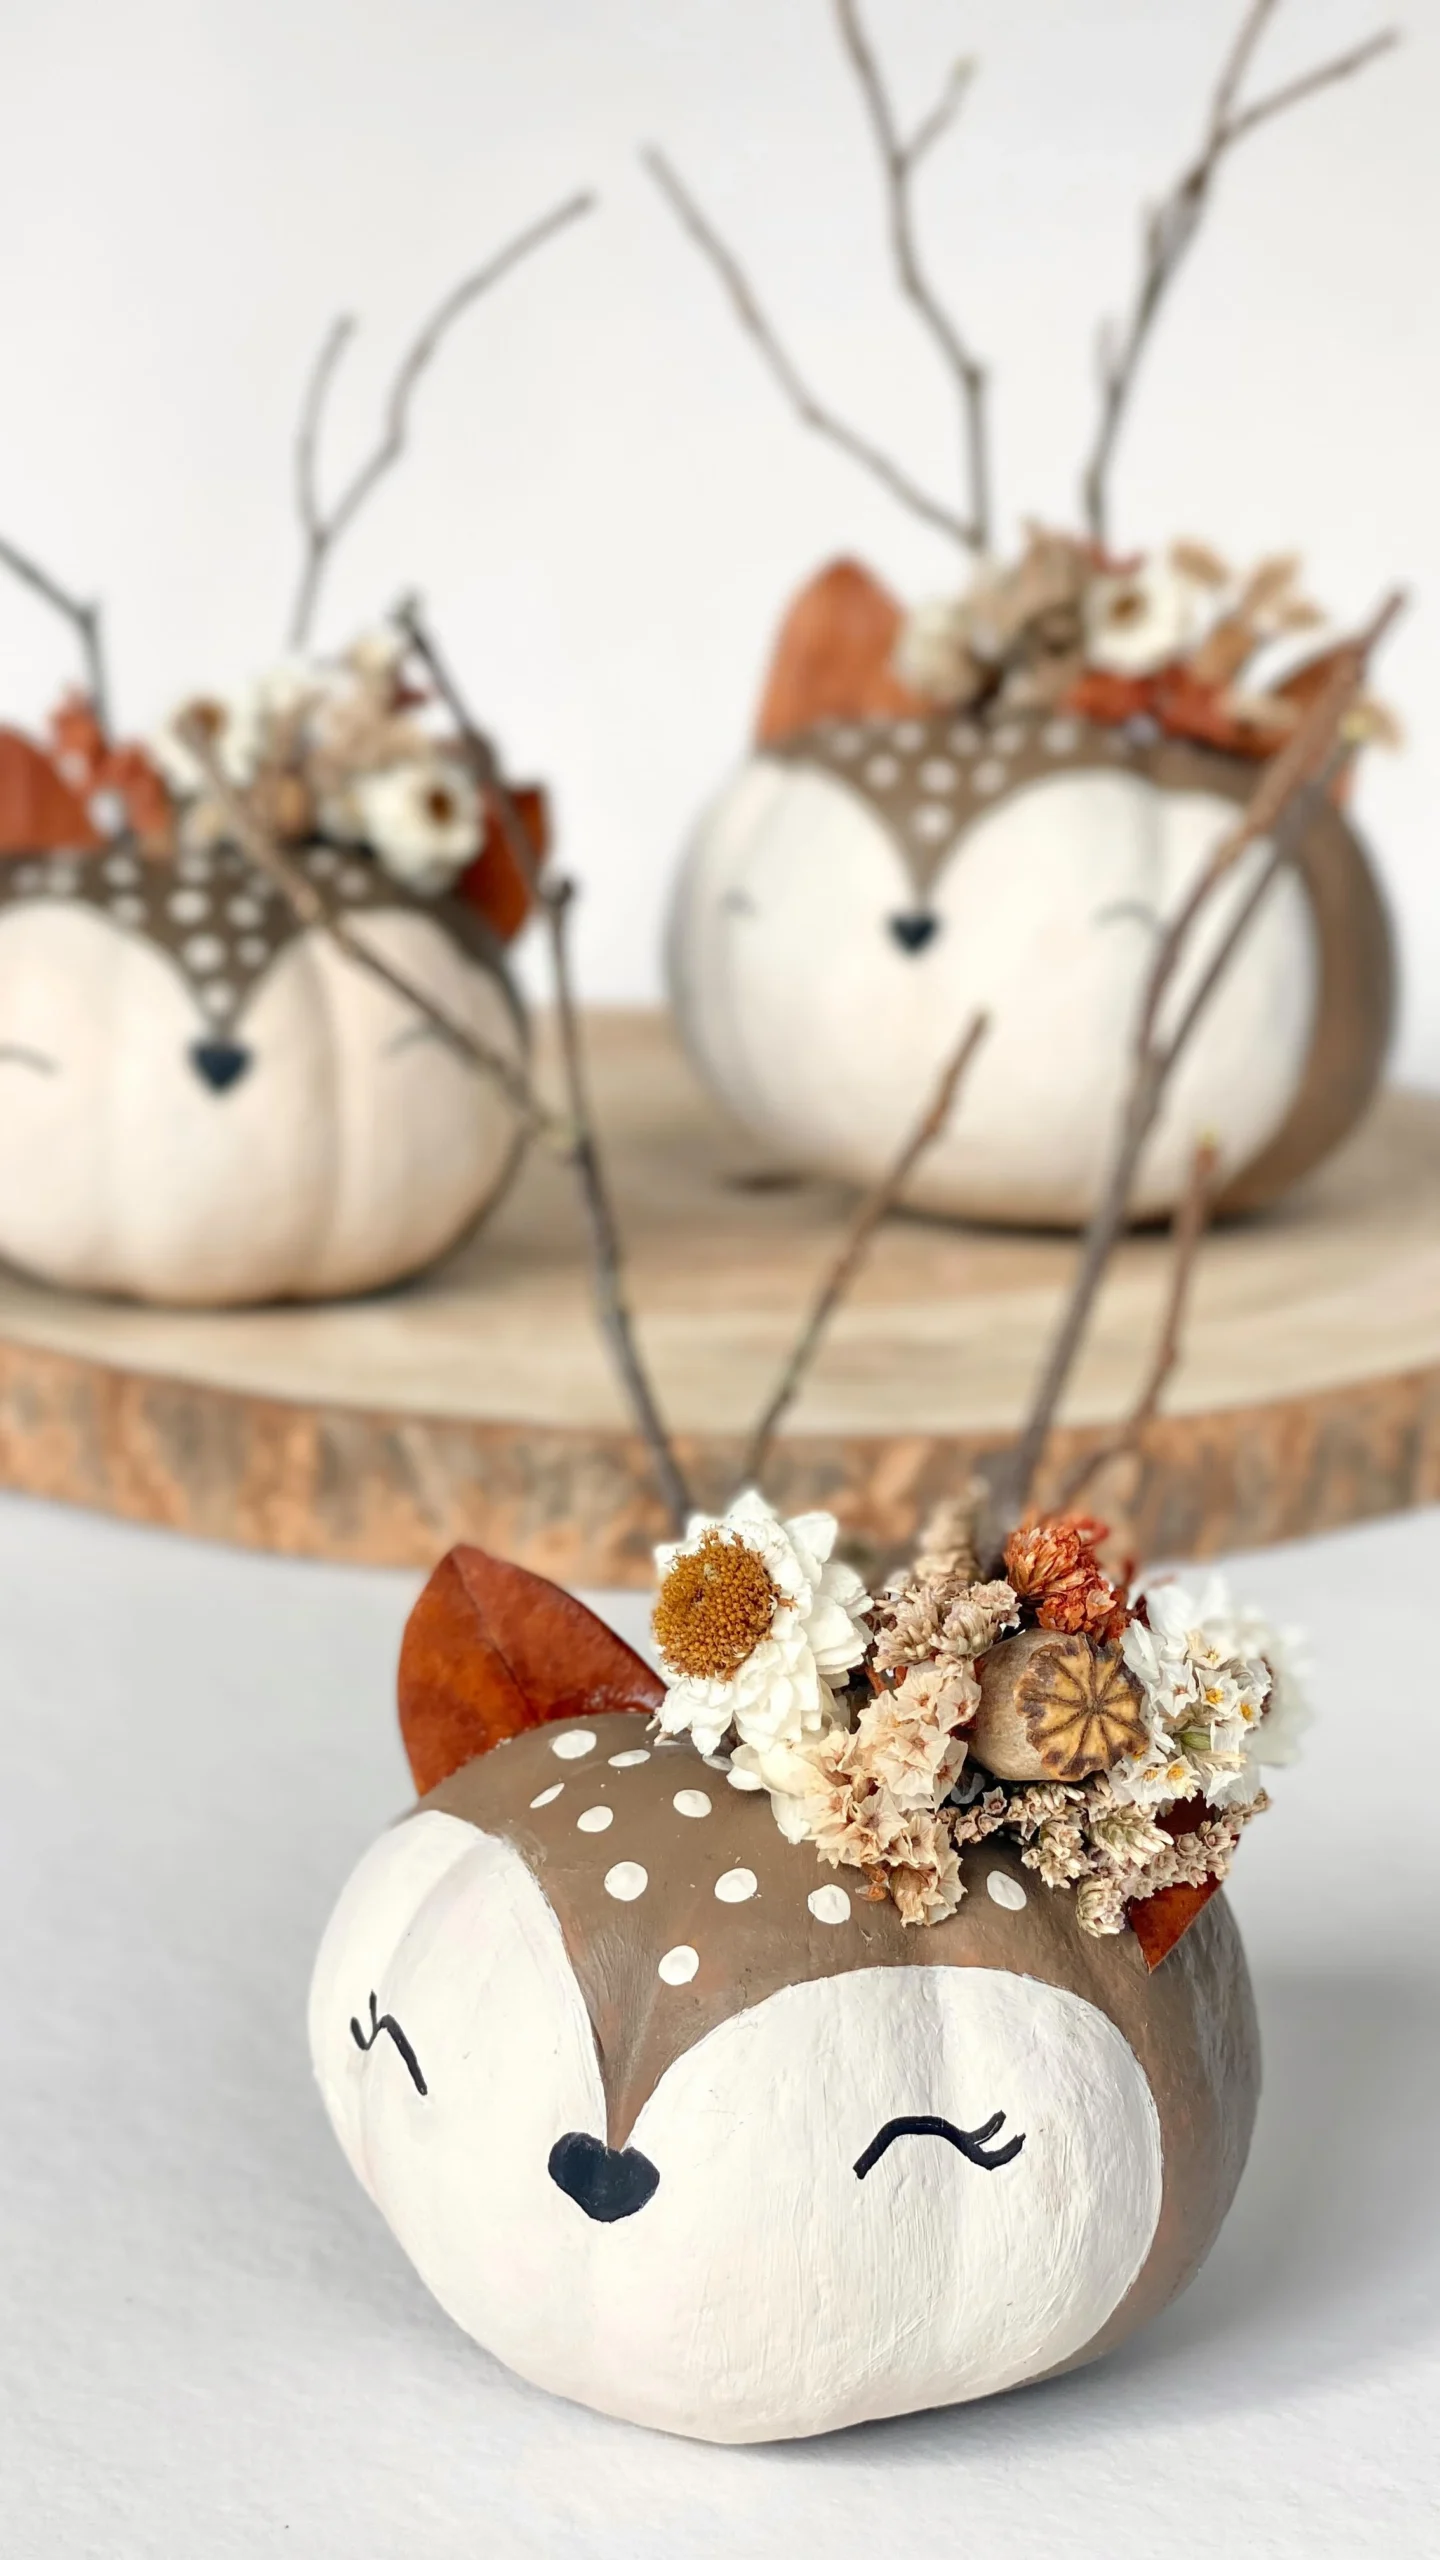
White woodland pumpkins, painted faces, twig antlers, and small ears create a sweet animal-inspired display.
The painted details keep the project approachable, while the twigs add natural texture and height.
Each pumpkin can have its own face, which makes the group feel handmade and personal.
- White pumpkins
- Paint
- Twigs
- Small ears
14- Set Up a Movie Night Pumpkin
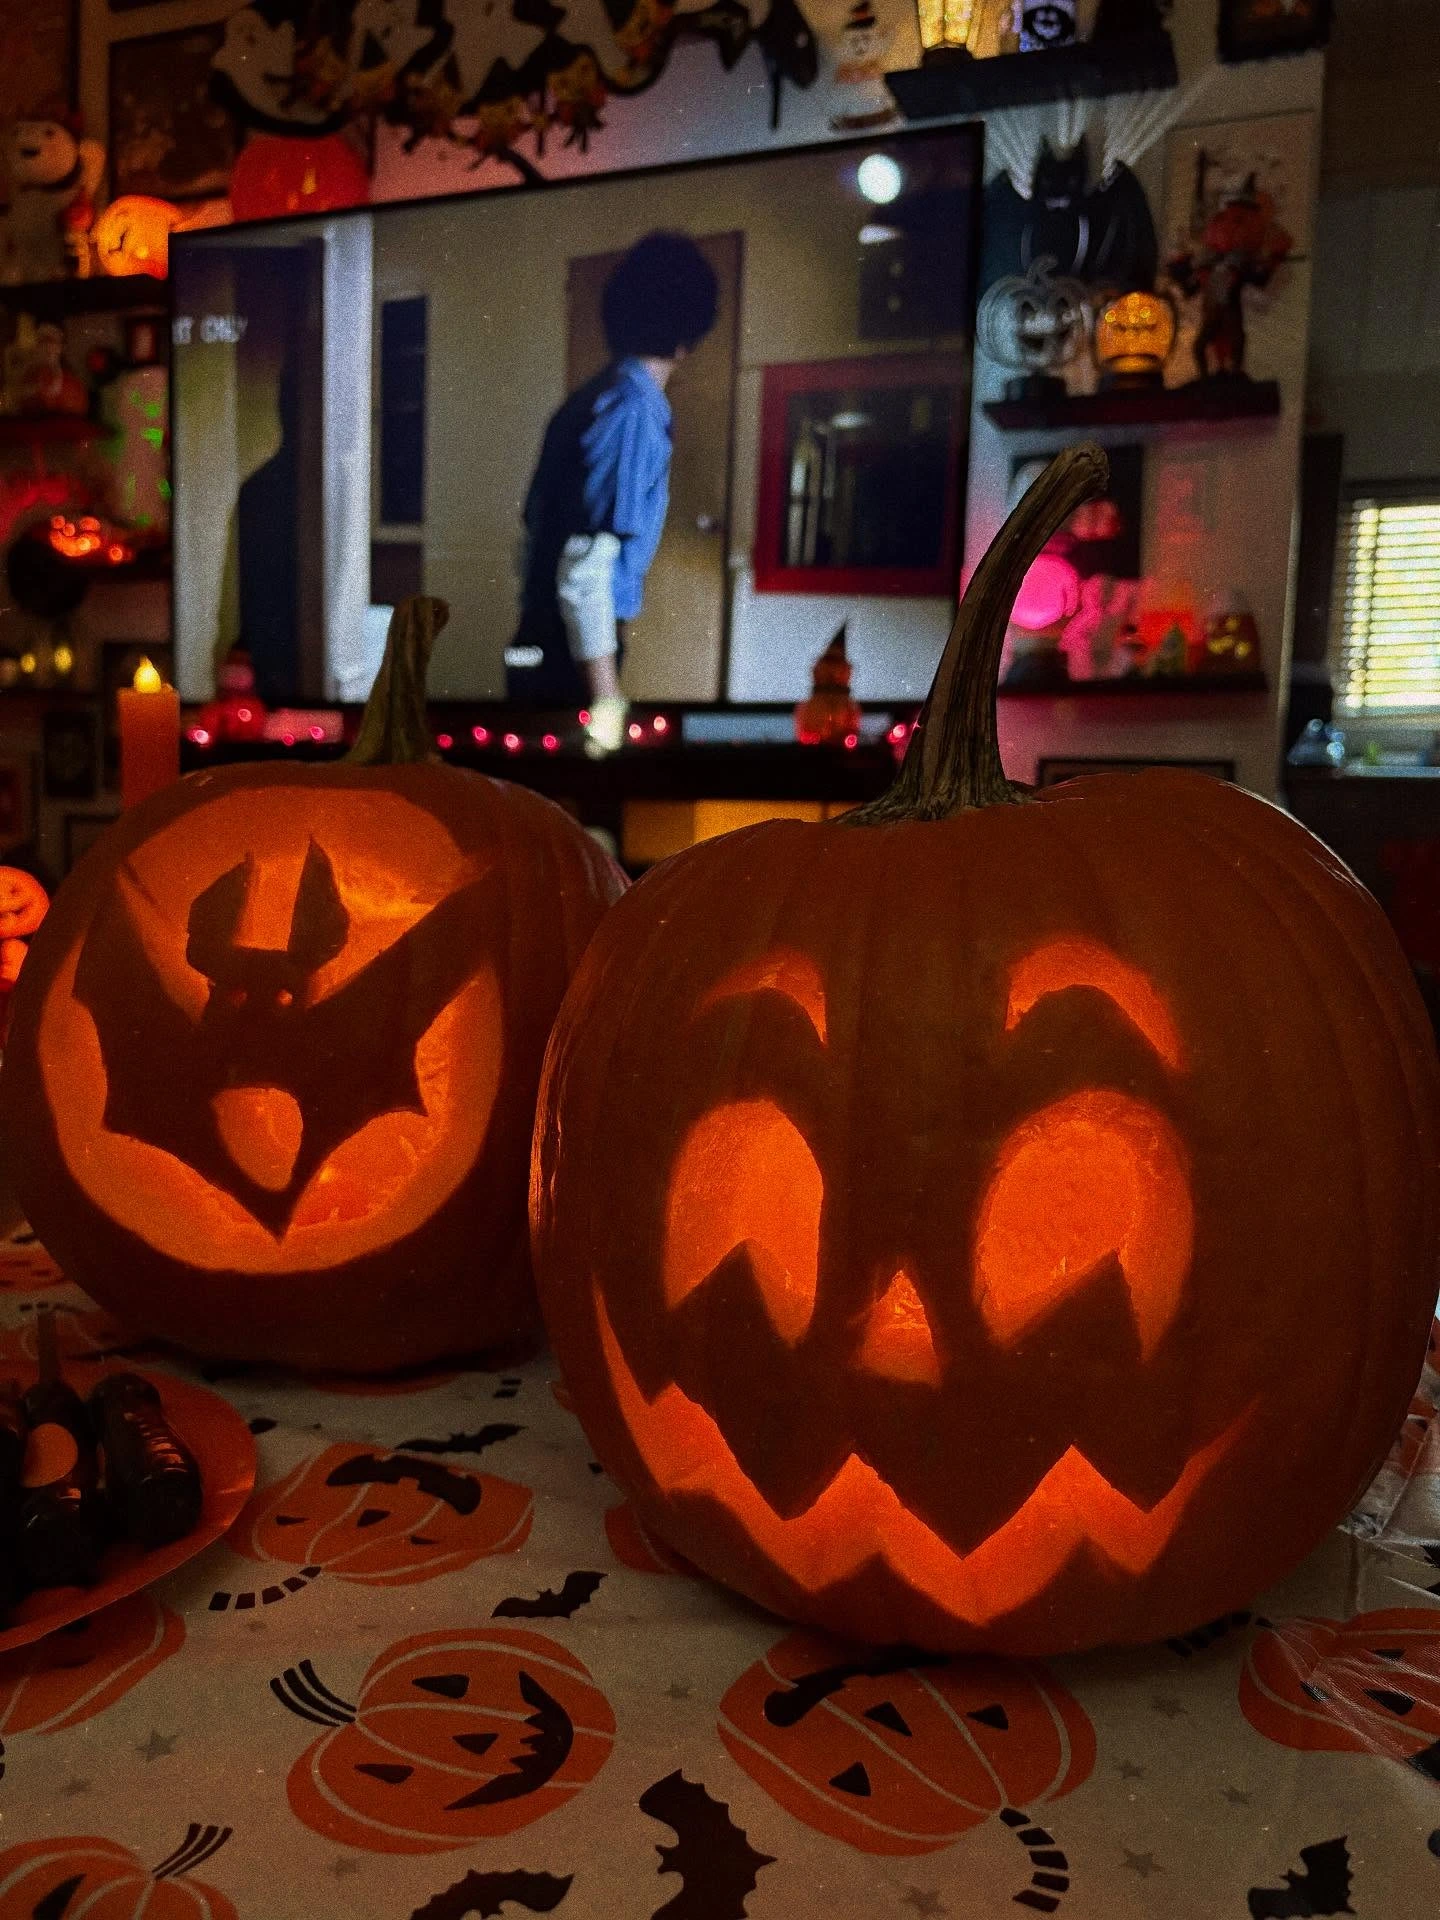
A plain pumpkin can still belong in a Halloween movie night setup when the surrounding arrangement feels festive.
More Ideas to Love
The simple pumpkin keeps attention on the shared activity instead of making the carving the only event.
This is a useful low-pressure choice when children want to participate but do not want to plan a detailed design.
15- Keep the Face Tiny
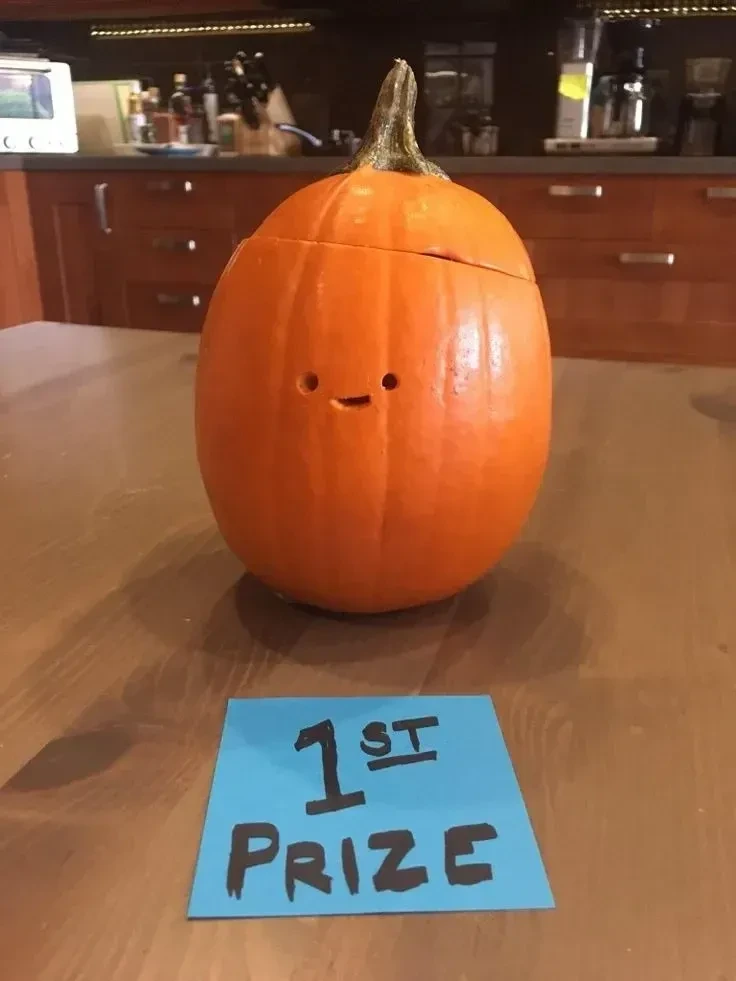
Two small eyes and a little smile create a sweet face with barely any carving.
The generous blank space around the face makes the pumpkin feel intentionally simple rather than unfinished.
Younger children can help choose the placement and draw the expression before an adult cuts it.
16- Carve Big Block Numbers

Large block numbers give a pumpkin a current, playful look without requiring a detailed character face.
The bold shapes glow clearly and are easy to map out before cutting.
Have children trace the numbers first, then let an adult handle the inside cuts.
17- Fill the Pumpkin with Stars

Star cutouts create a bright pattern without needing a face at all.
Repeating the same simple shape gives the pumpkin rhythm, while the glowing openings add visual interest after dark.
This works well for children who want a pattern that feels festive but not spooky.
18- Make a Silly Spooky Face
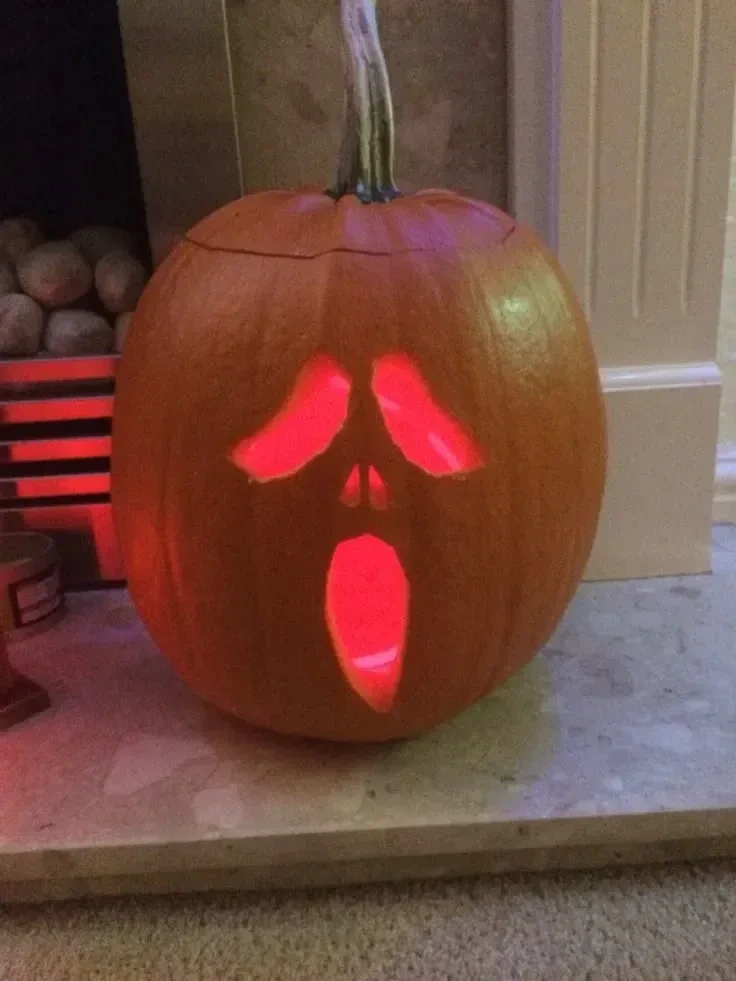
Glowing eyes and an open mouth make this face more dramatic, but the cartoon-like expression keeps it kid friendly.
The larger features create impact without needing lots of fine detail.
Older children may enjoy choosing how spooky or silly the eyebrows and mouth should feel.
19- Give It a Little Tongue
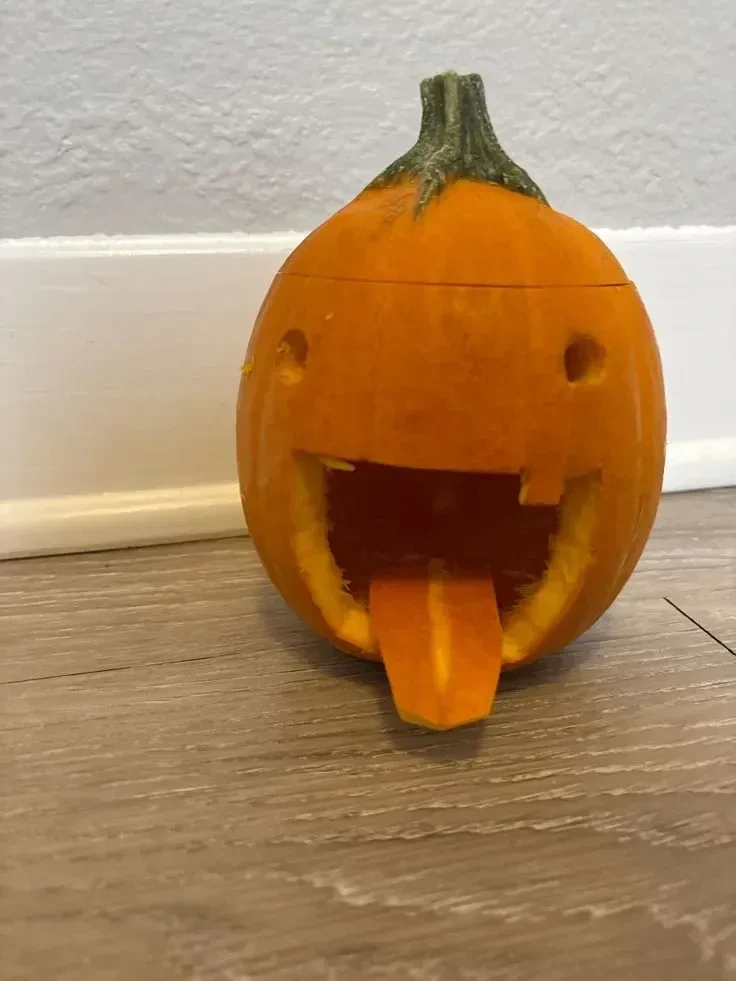
Round eyes, an open mouth, and a small tongue turn a basic face into a funny character.
The tongue is the memorable detail, while the few surrounding shapes keep the design manageable.
It is a simple way to add personality without covering the pumpkin in complicated cuts.
20- Use Cute Ghost Cutouts
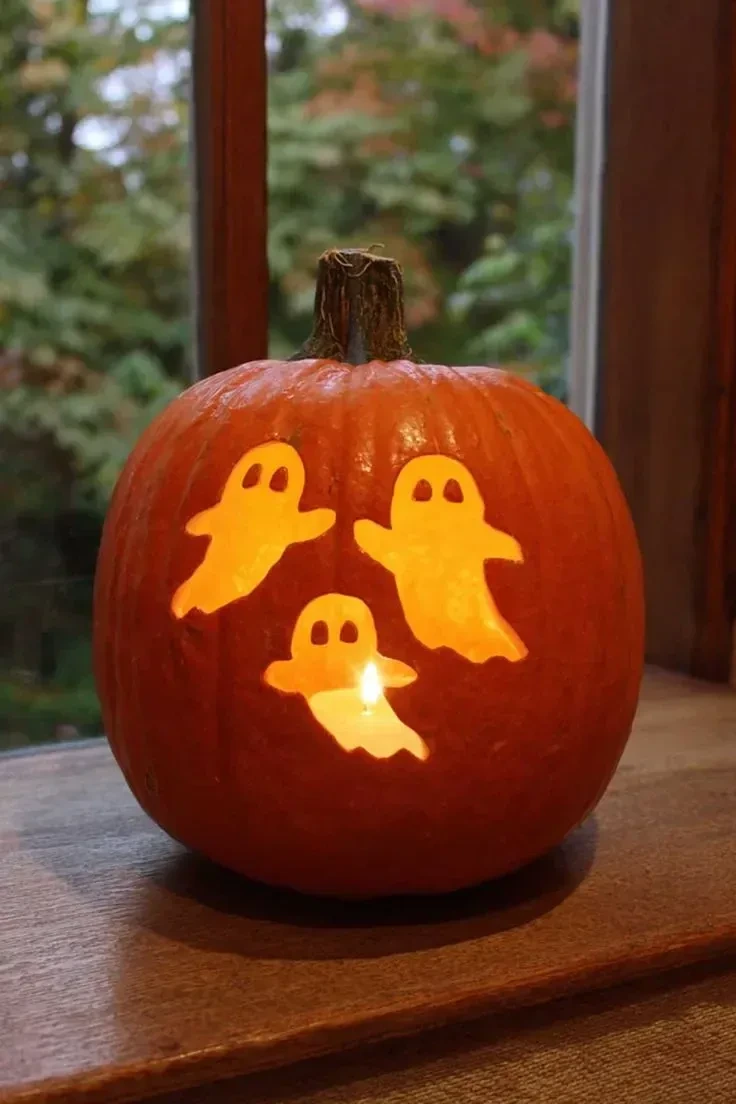
Small ghost shapes add a Halloween reference without making the pumpkin actually scary.
Repeating a few simple silhouettes creates a pattern that feels light and playful.
Younger children may prefer this approach because the ghosts are recognizable without needing an intense face.
21- Make a Happy Ghost Face
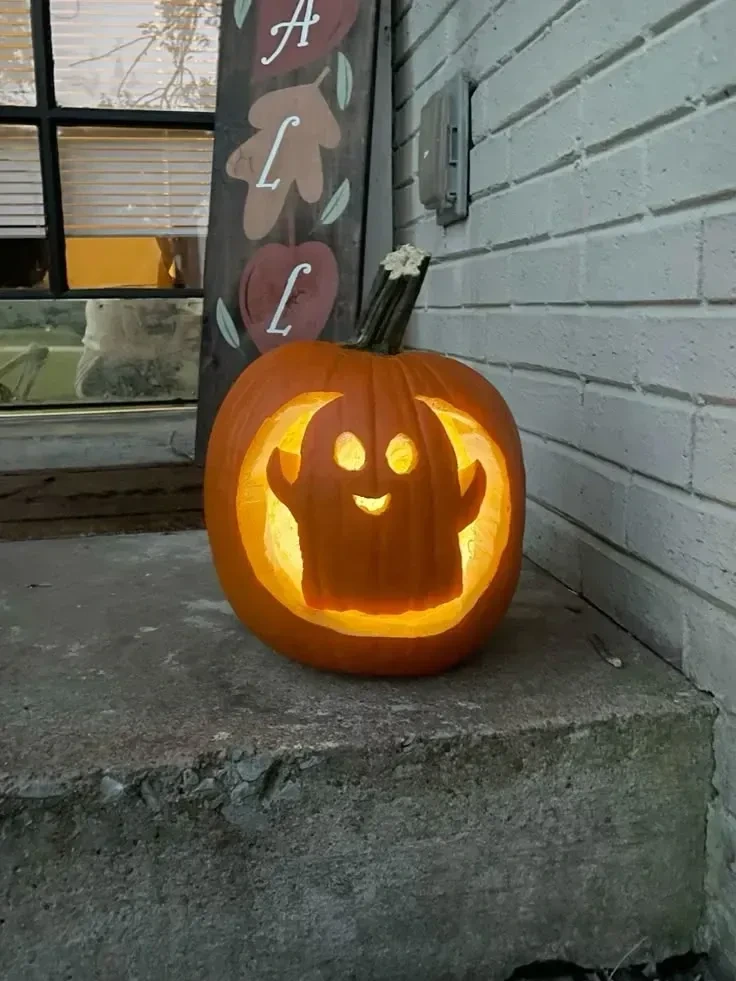
A simple ghost face with glowing eyes gives the pumpkin a bright, friendly Halloween personality.
The uncomplicated features keep the design approachable and make it easy to read on a porch.
This is a gentle choice for younger children who want something seasonal without a frightening expression.
22- Turn a Pumpkin into a Little Library

A carved door, tiny sign, and books inside turn the pumpkin into a miniature book nook.
The small-scale concept makes the pumpkin feel creative and unexpected without relying on a scary face.
An adult can handle the door carving while children choose how the little library should be arranged.
- Pumpkin
- Tiny books
- Small sign
- Battery light
23- Create a Funny Screaming Face
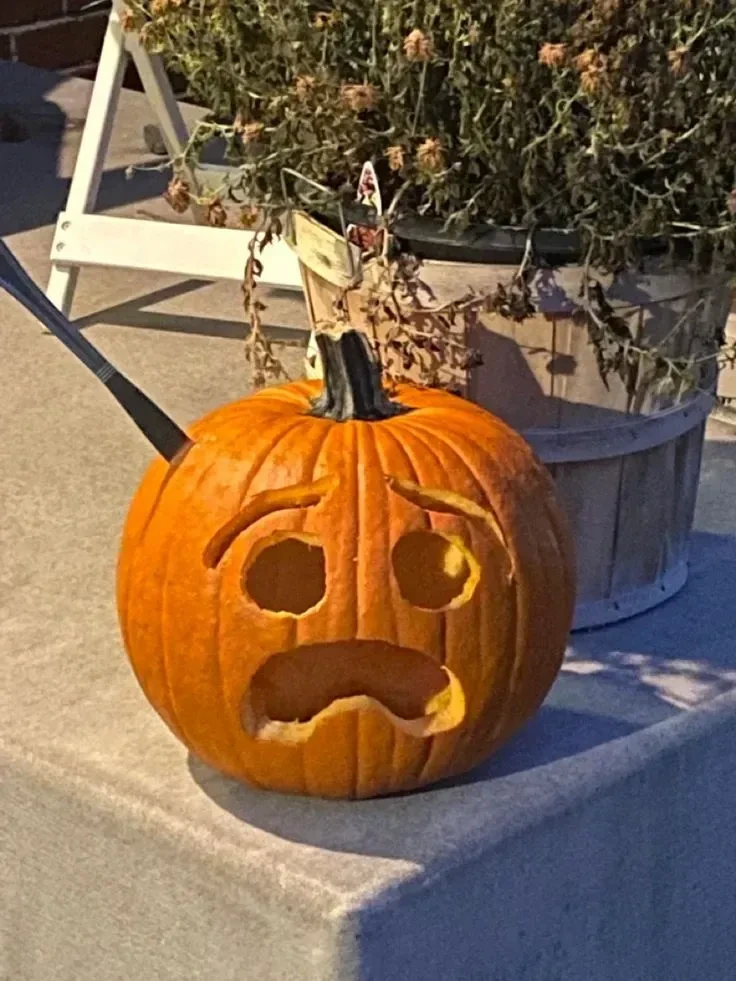
Round eyes, downturned eyebrows, an open mouth, and a mustache give this pumpkin a humorous personality.
Keep Reading
The eyebrows do much of the expressive work, so the design can stay simple while still looking different.
It is an easy variation on a classic jack-o-lantern for children who want something goofy.
24- Give the Pumpkin Star Eyes
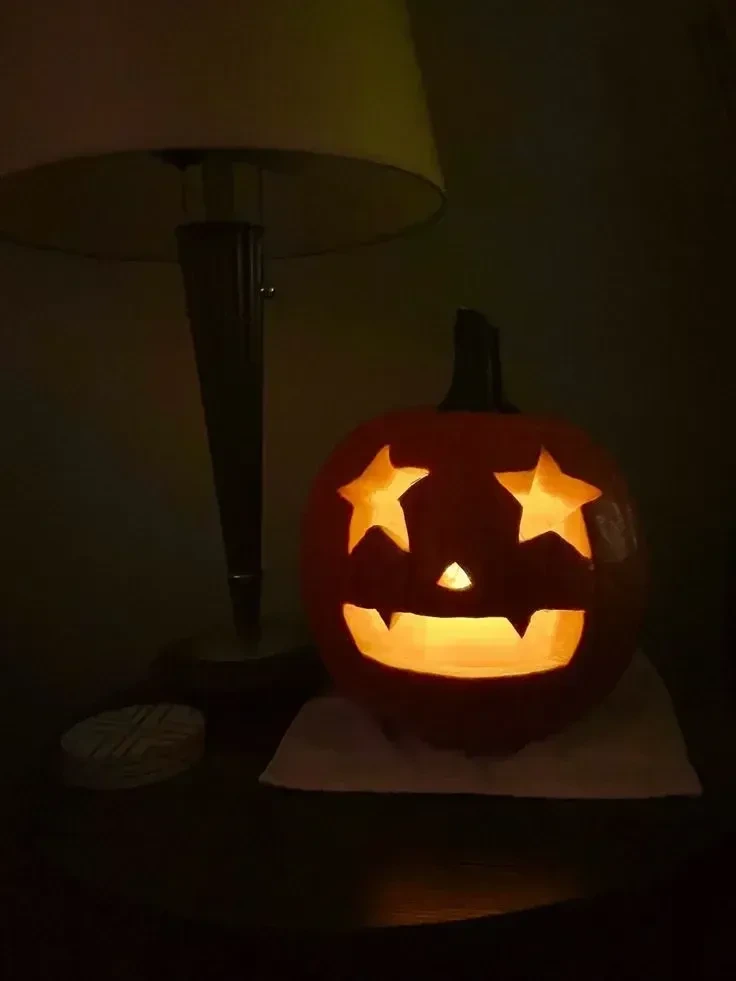
Star-shaped eyes make a familiar jack-o-lantern face feel more playful and bright.
The simple shapes are beginner friendly, but they still create strong glowing points once the pumpkin is lit.
Pair the eyes with a basic smile so the stars remain the main feature.
25- Carve Cheerful Flowers

Flower cutouts give a pumpkin a cheerful fall feeling without any spooky expression.
The repeated petals create a decorative pattern, while the glowing openings keep the design lively after dark.
This suits children who want something pretty and seasonal rather than traditionally Halloween themed.
26- Add a Black Cat Silhouette
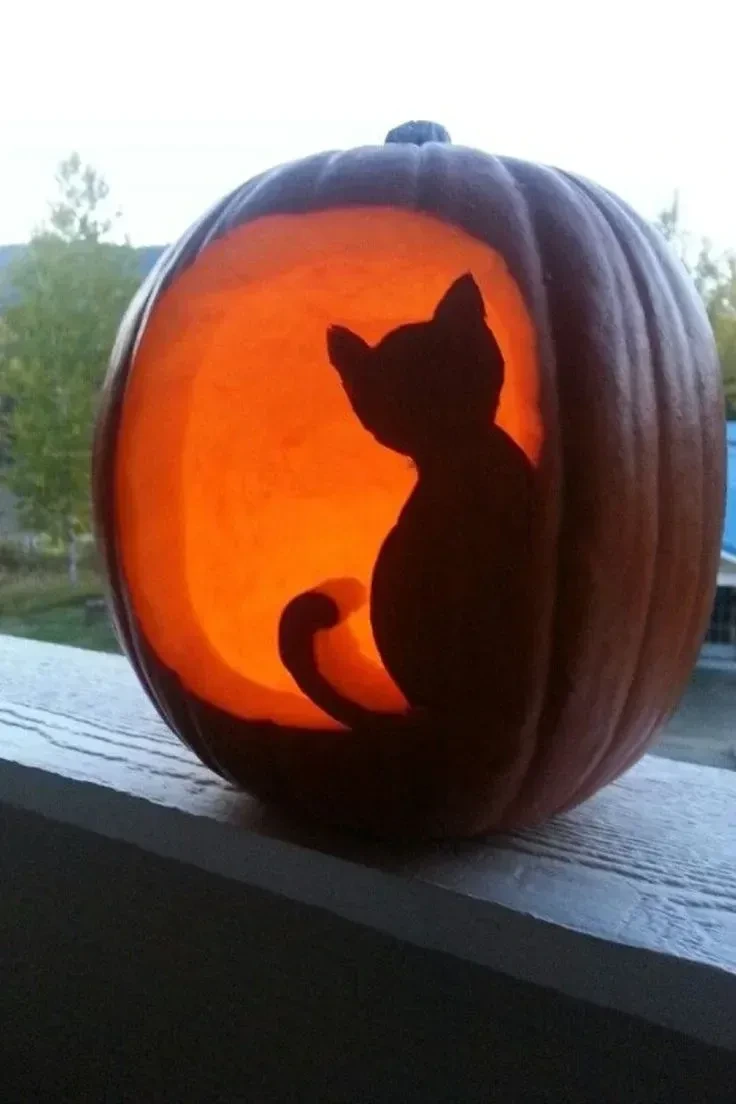
A black cat silhouette is easy to recognize, especially when the pumpkin glows behind it.
The arched tail provides the key visual detail and gives the silhouette a graceful curve.
Keep the rest of the cat shape simple so the outline stays clear.
27- Make a Playful Coraline-Inspired Pumpkin

Button-like round eyes, a simple mouth, and twig hair give this pumpkin a handmade character feel.
The extra pieces add texture and personality without requiring lots of tiny carved details.
The slightly imperfect look is part of the charm, so children can focus on making the face expressive.
- Round eye pieces
- Twigs
- Simple facial details
Pick the Pumpkin That Fits Your Helper
The best design is the one that matches your child's age, patience, and comfort with the project.
Painted pumpkins, tiny faces, bold patterns, and funny characters all give children a way to make the idea their own.
Keep the display easy to enjoy, with clear walkways and a safe battery light when the pumpkin needs to glow.
A simple pumpkin with plenty of personality can be the one everyone remembers.

I am Eleanor Foy, the mom of two behind DaisyHacks. I am a lover of clean, calm homes and a person who will happily spend 45 minutes researching a 5 minute cleaning hack. No regrets.