12 Graduation Photo Display Ideas for a Personal Party Setup
Graduation photos can fill a party space quickly, especially when table space is limited.
You Might Also Like
The right arrangement keeps memories easy to see without making the decor feel crowded.
You can build a display around one favorite portrait, a full photo board, or a cheerful mix of frames and flowers.
Different heights, repeated colors, and a little breathing room help every setup feel intentional.
These graduation photo display ideas work for welcome tables, dessert stations, gift areas, and party backdrops.
Let's break it down.
1- Layer a Photo-Filled Table
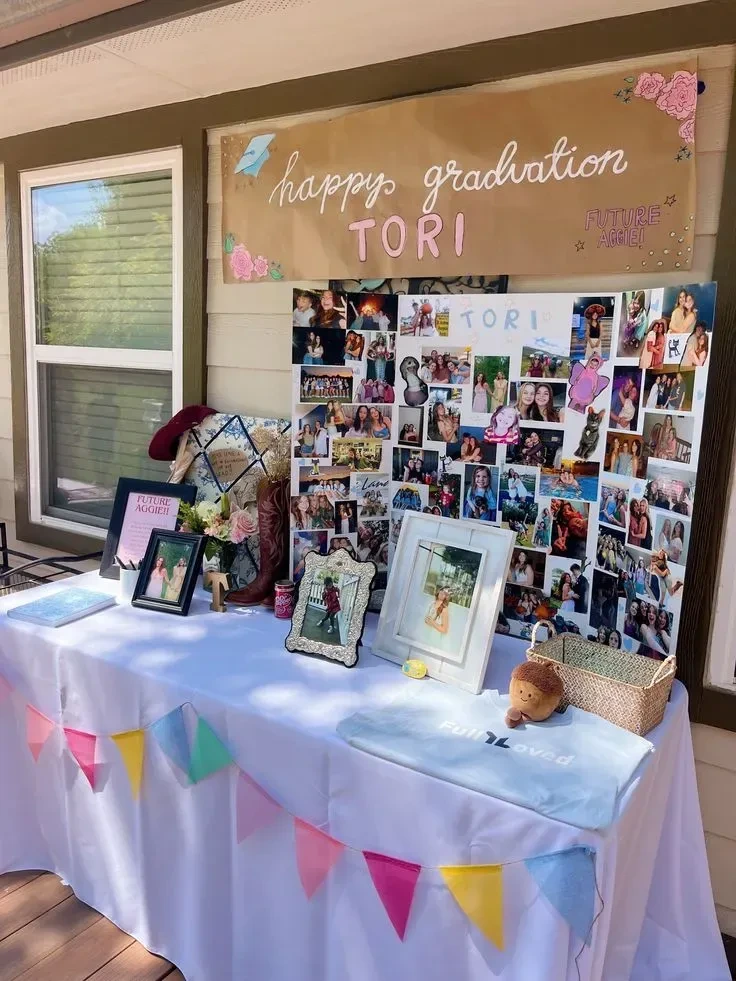
Cover a table with a cheerful mix of framed photos and photo collages so guests can browse the memories up close.
A banner above the arrangement adds height, while the combination of large frames and smaller groupings keeps the display from feeling flat.
For an outdoor party, use a sturdy table and leave a clear section for drinks, cards, or serving pieces.
- Framed photos
- Photo collages
- Decorative banner
- Table surface
2- Combine Childhood Photos with Flowers
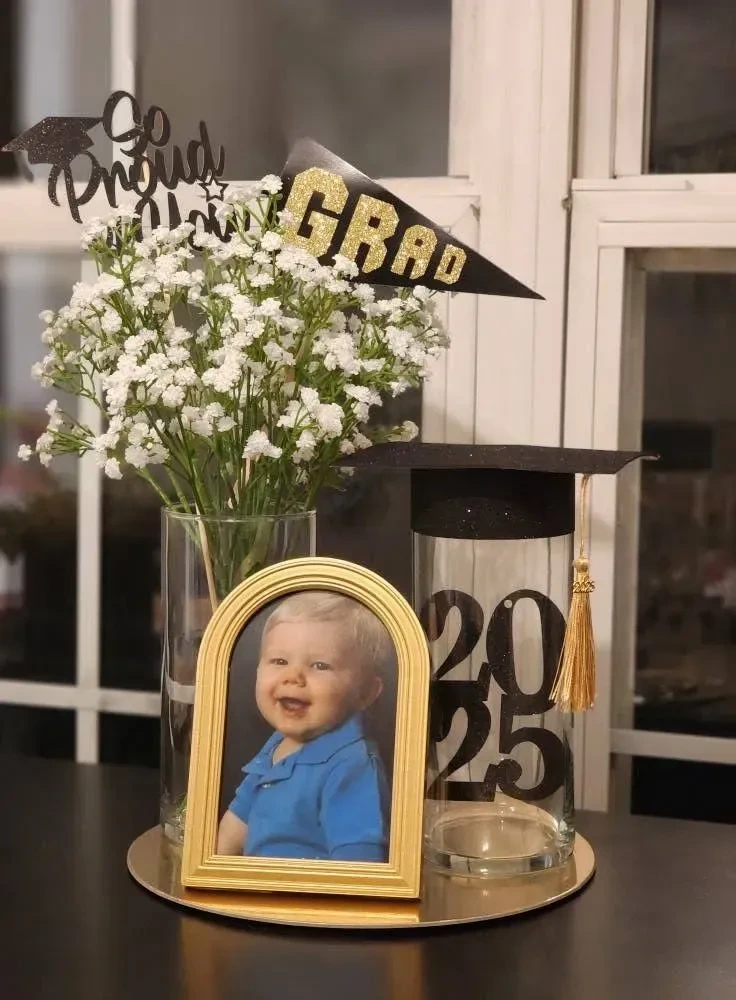
Pair a baby photo with fresh flowers and classic black-and-gold graduation details for a display that feels both personal and celebratory.
The softer memory keeps the formal colors from feeling too serious, while the flowers bring freshness and texture.
Set the arrangement on a welcome table where guests can pause as they arrive.
- Baby photo
- Fresh flowers
- Black accents
- Gold graduation details
3- Style One Framed Photo with a Vase
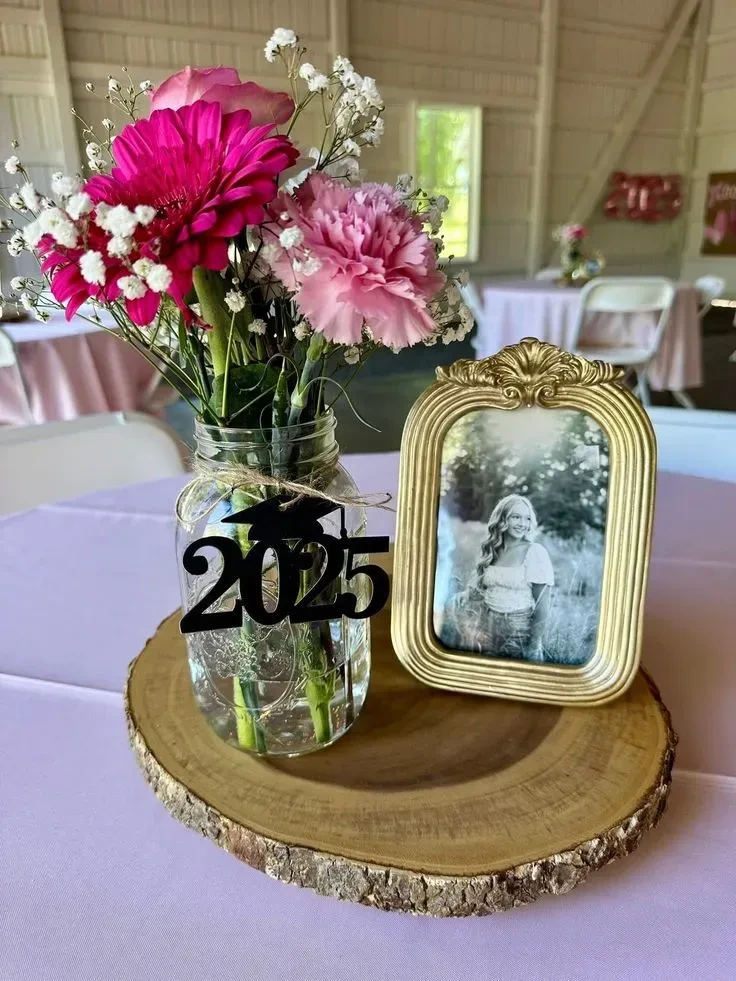
If you only want to display one or two meaningful pictures, let a framed childhood photo carry the moment.
A bright floral arrangement beside it adds color and height, while a gold frame and a 2025 detail give the setup a polished finish.
This small arrangement works nicely on a welcome table without taking over the surface.
- Gold frame
- Childhood photo
- Bright floral arrangement
- 2025 detail
4- Make One Large Collage the Focal Point

A single large framed collage keeps the memory display contained while giving the table a strong visual center.
Balloons around it make the arrangement feel festive and help frame the collage without adding loose photos everywhere.
Use this approach on a gift or dessert table, keeping the front edge clear for plates, presents, or cards.
- Large framed collage
- Balloons
- Gift table or dessert table
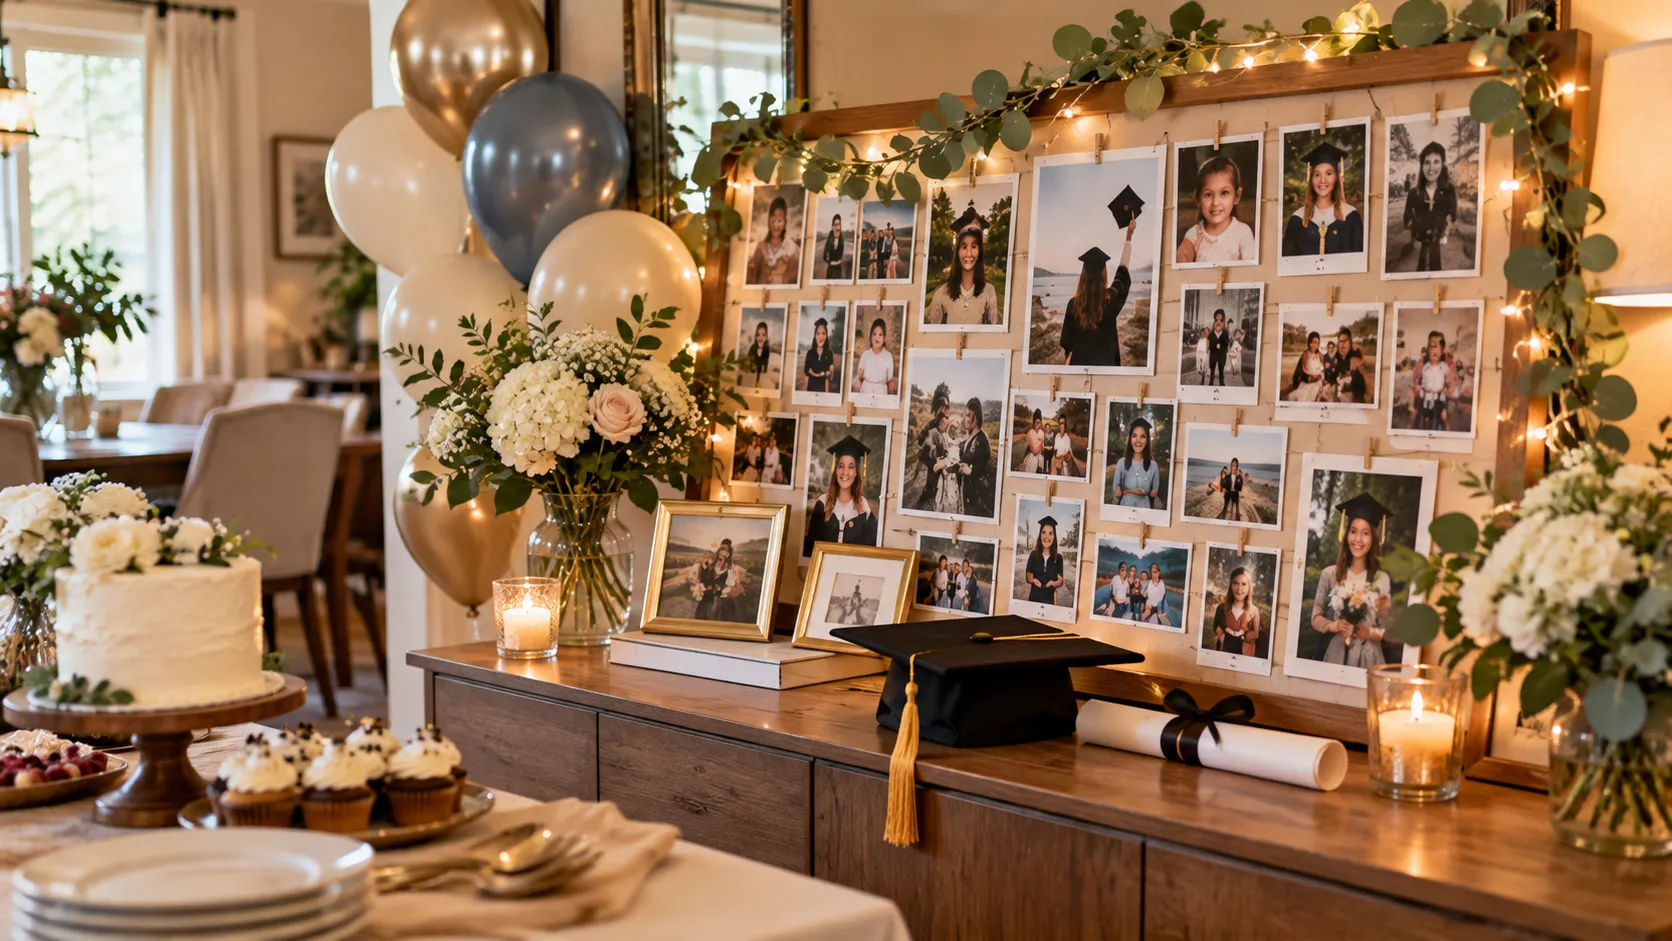
5- Clip Photos Along Fairy Lights
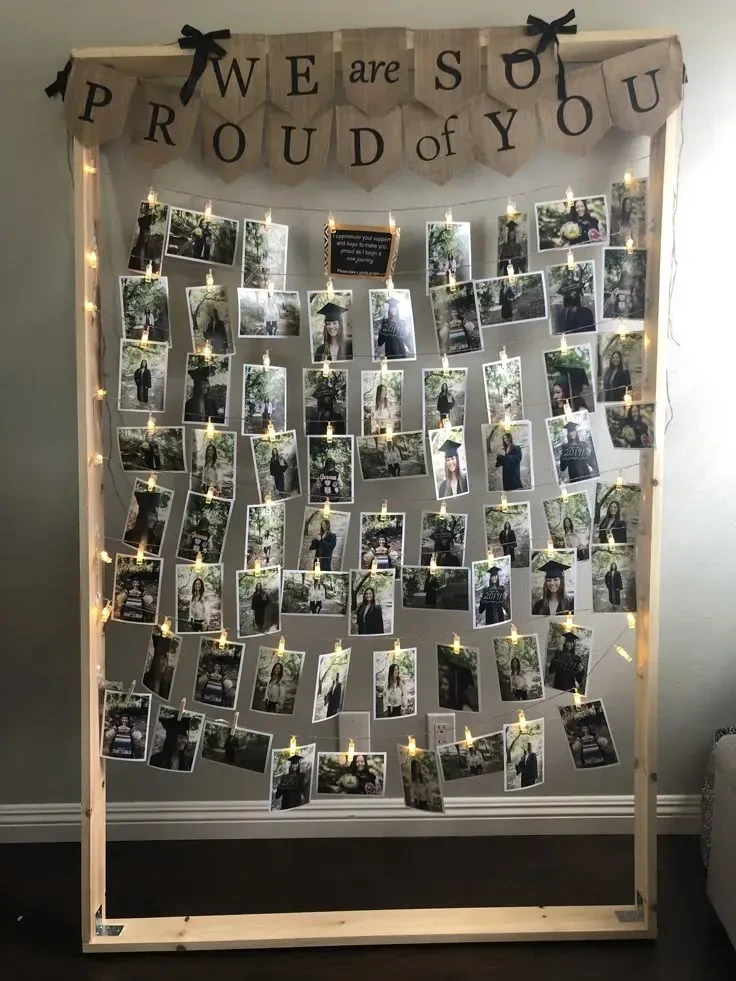
Hang clipped photos along fairy lights to fill a wall with memories while keeping the overall look light and cozy.
The glowing line creates structure, and the photos remain the main focus rather than competing with a lot of extra decor.
This is a simple choice when you want an emotional display that does not require a large table.
- Fairy lights
- Clips
- Printed photos
- Open wall space
6- Cover a Curved Board with Photos
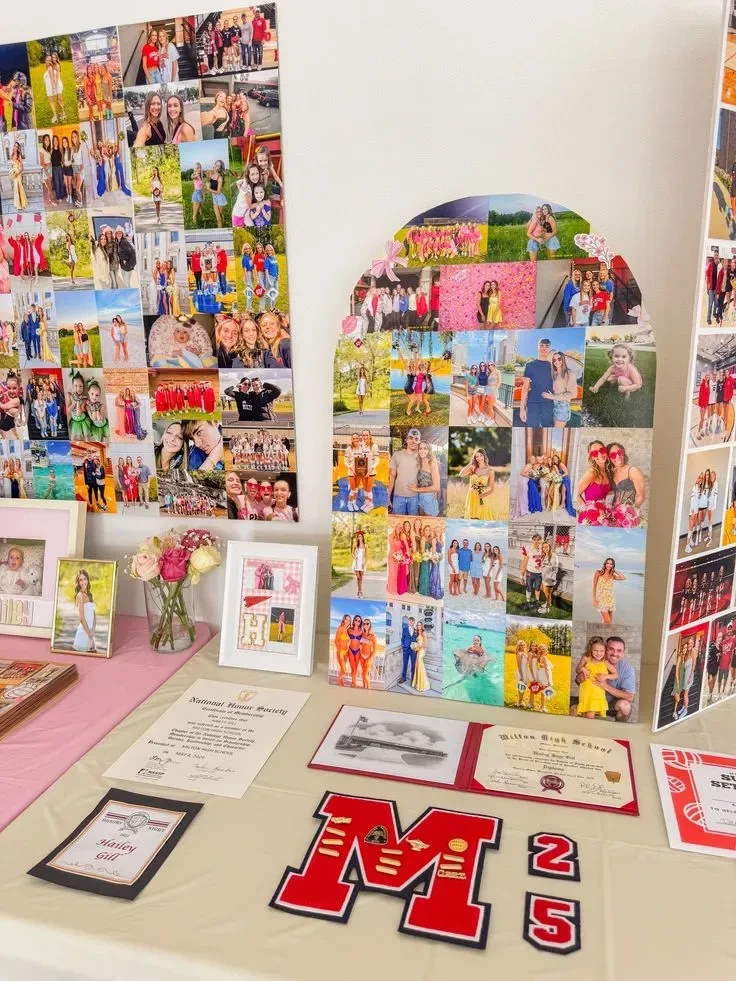
A curved board covered with photo collages creates a playful shape for a graduation celebration.
Framed pictures placed on the table below add another layer, giving the display balance between the large backdrop and the smaller tabletop details.
The colorful arrangement works well in a party area that needs a clear visual point of interest.
More Ideas to Love
- Curved display board
- Photo collages
- Framed pictures
- Table
7- Build a Blue Photo Wall
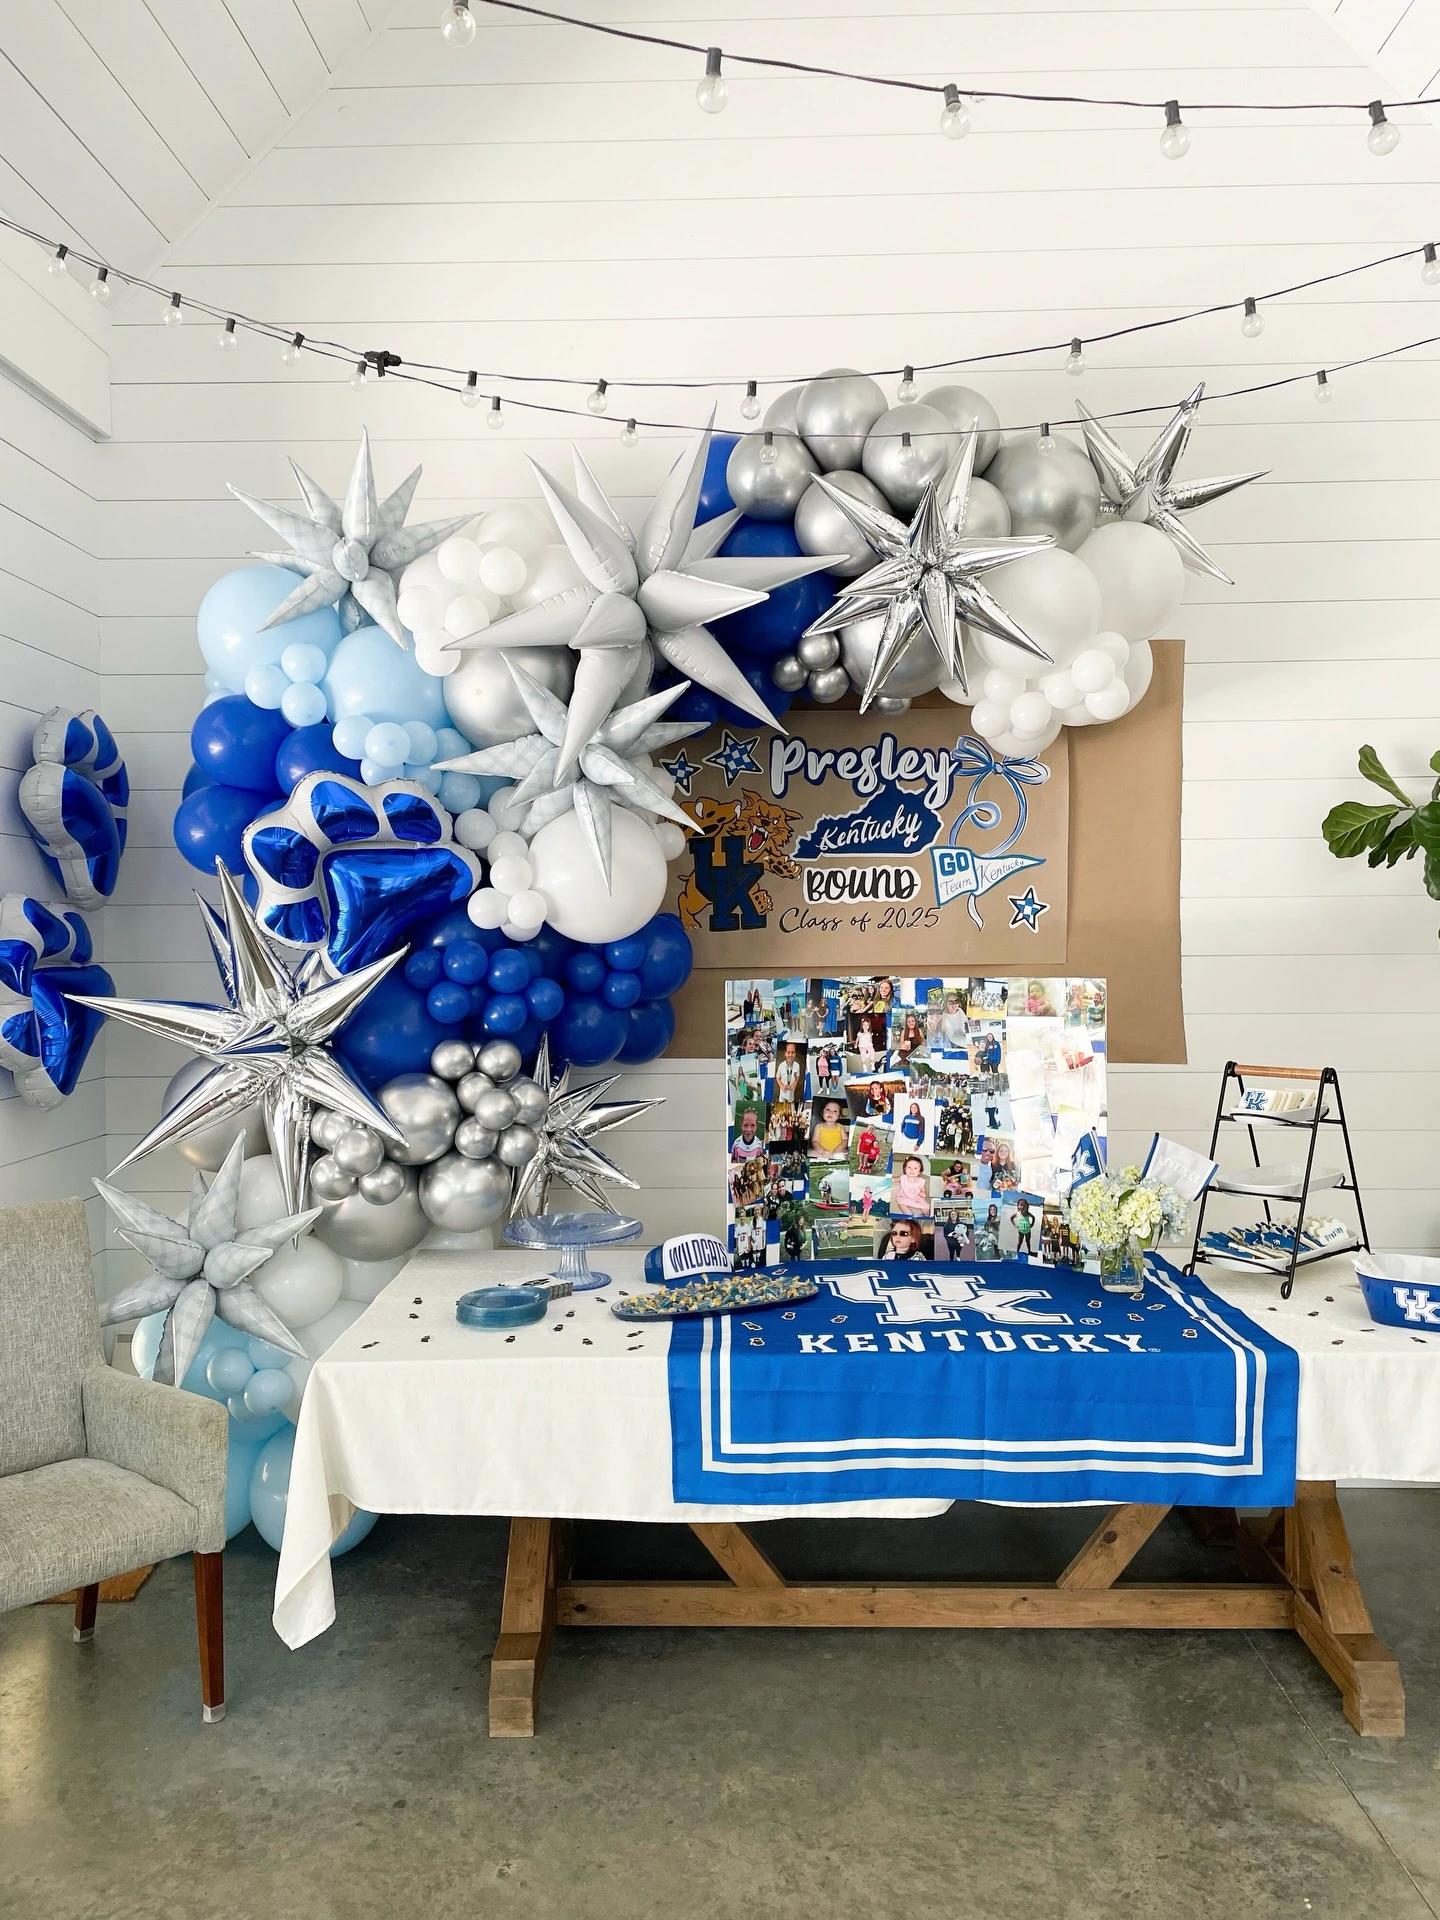
A blue balloon wall can turn a simple photo table into a full backdrop for pictures and memories.
Photos, a sign, and school colors feel connected when they repeat the same palette without filling every inch with detail.
Use the area for both display and guest photos, leaving enough open space for people to stand comfortably.
- Blue balloons
- Printed photos
- Graduation sign
- School-color accents
8- Fill a Frame with Photos and Flowers
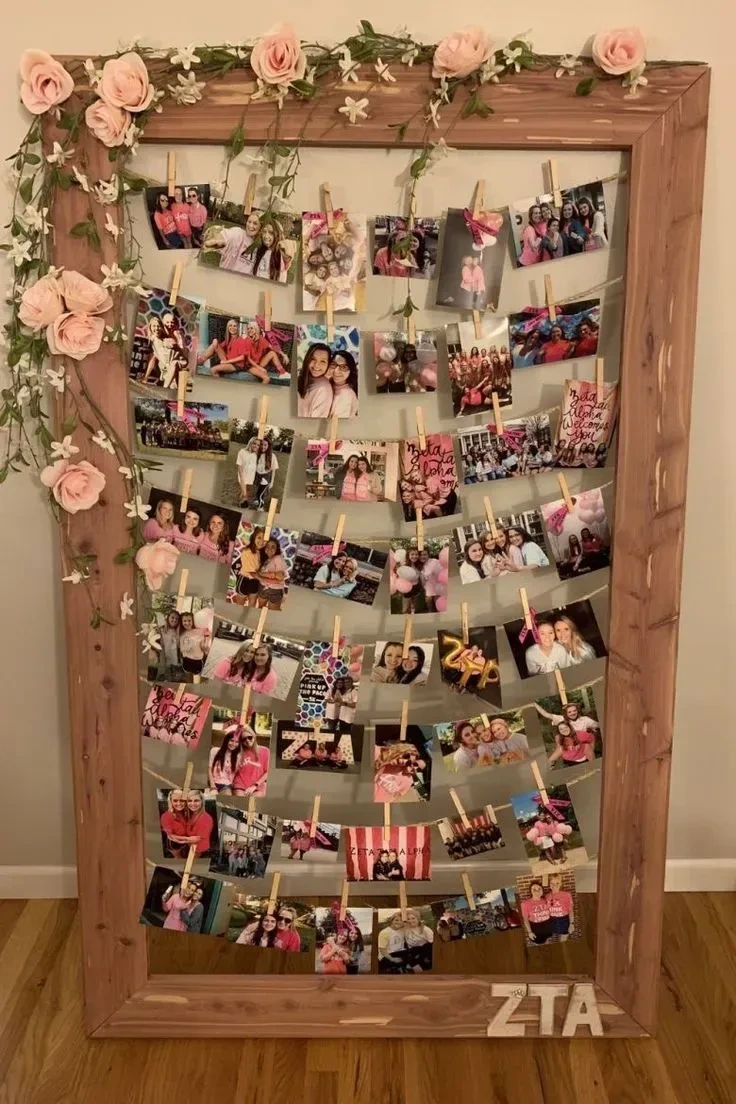
Fill a large frame with memories so the photos become part of the room's decor rather than a collection of separate pieces.
Small flowers woven through the arrangement soften the structure and add a little organic texture.
This idea works when you want a keepsake-style display that can remain visible beyond the party.
- Large frame
- Printed photos
- Small flowers
9- Cover a Board with Candid Moments
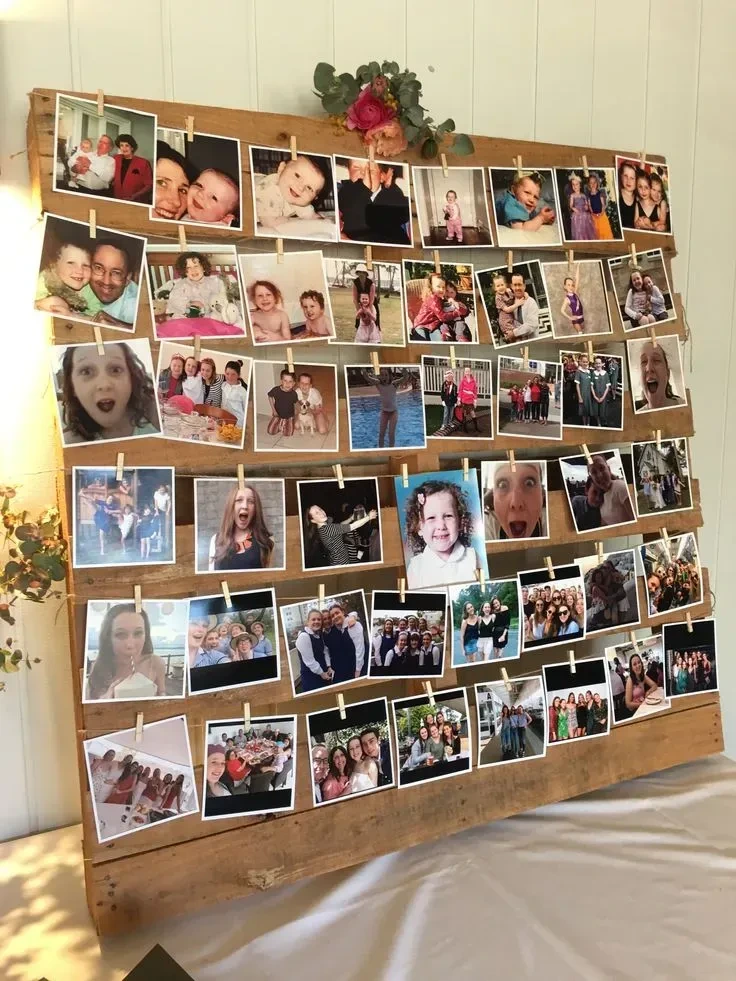
A board filled with candid snaps feels relaxed, personal, and easy for guests to explore.
Covering the surface with photos gives the display energy and keeps it from looking overly formal or carefully staged.
Place it where people naturally gather, with enough room in front for guests to stand and look through the memories.
- Photo board
- Candid snapshots
- Open viewing area
10- Pair a Photo Book with Small Frames
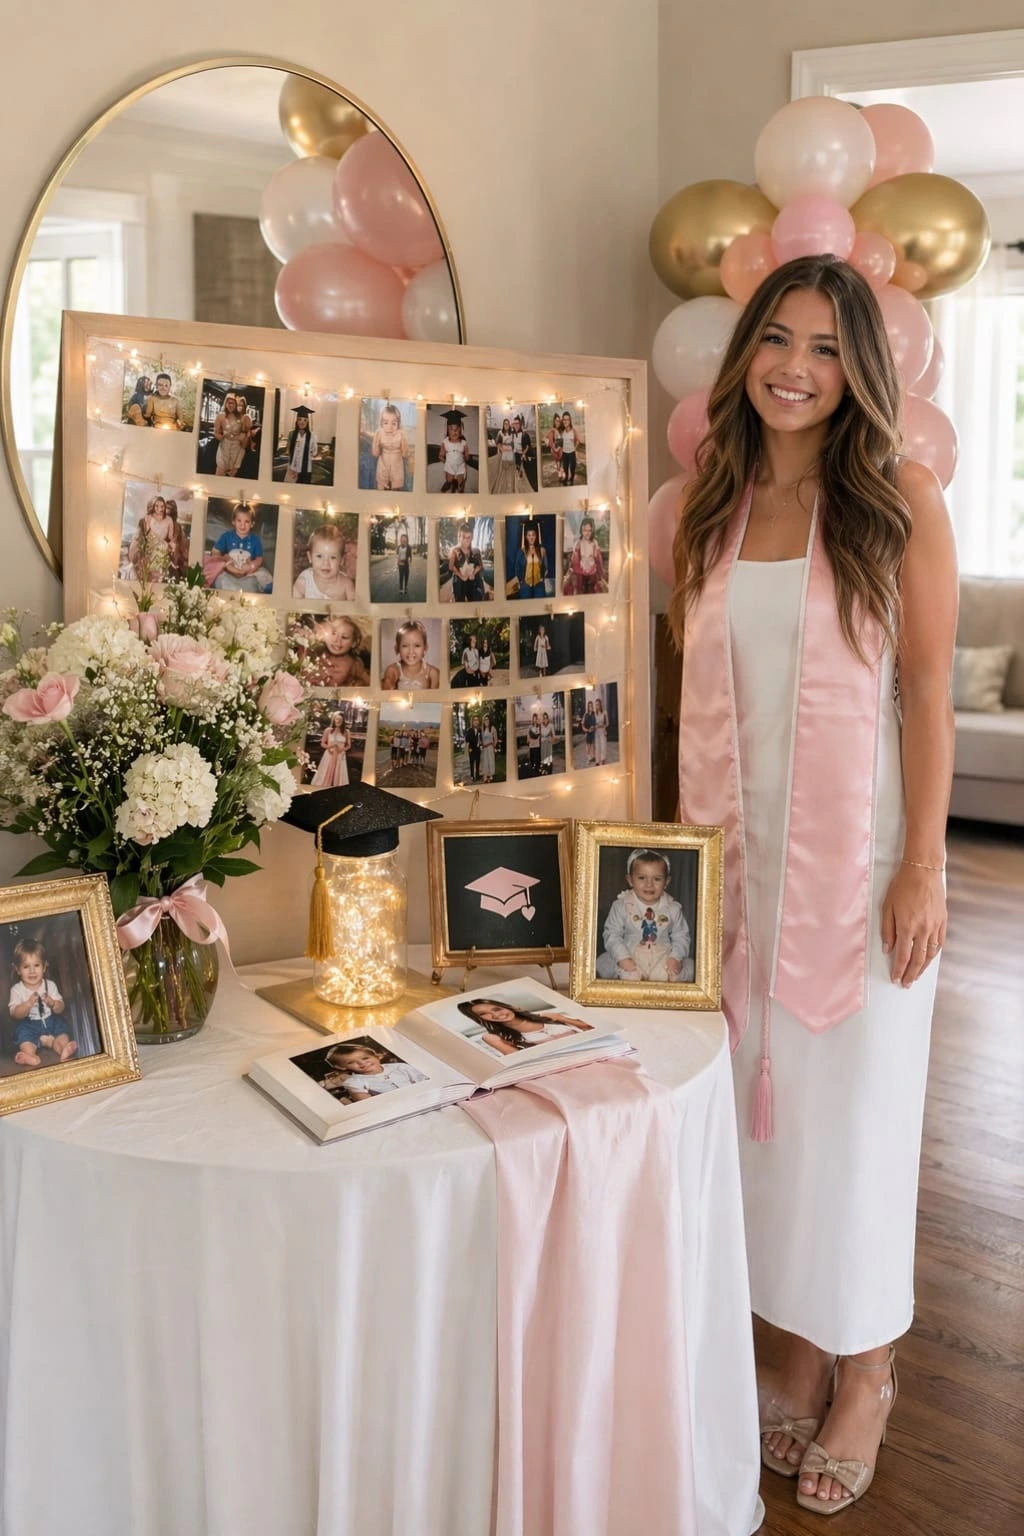
A photo book gives guests more memories to browse, while smaller frames make the tabletop easy to scan at a glance.
Flowers, a baby photo, and small graduation decorations create a sweet, personal arrangement without requiring a large setup.
Keep the photo book open to a favorite page, but leave enough tabletop space for guests to turn pages comfortably.
- Photo book
- Small frames
- Baby photo
- Flowers
- Graduation table decor
11- Create a Photo Bouquet
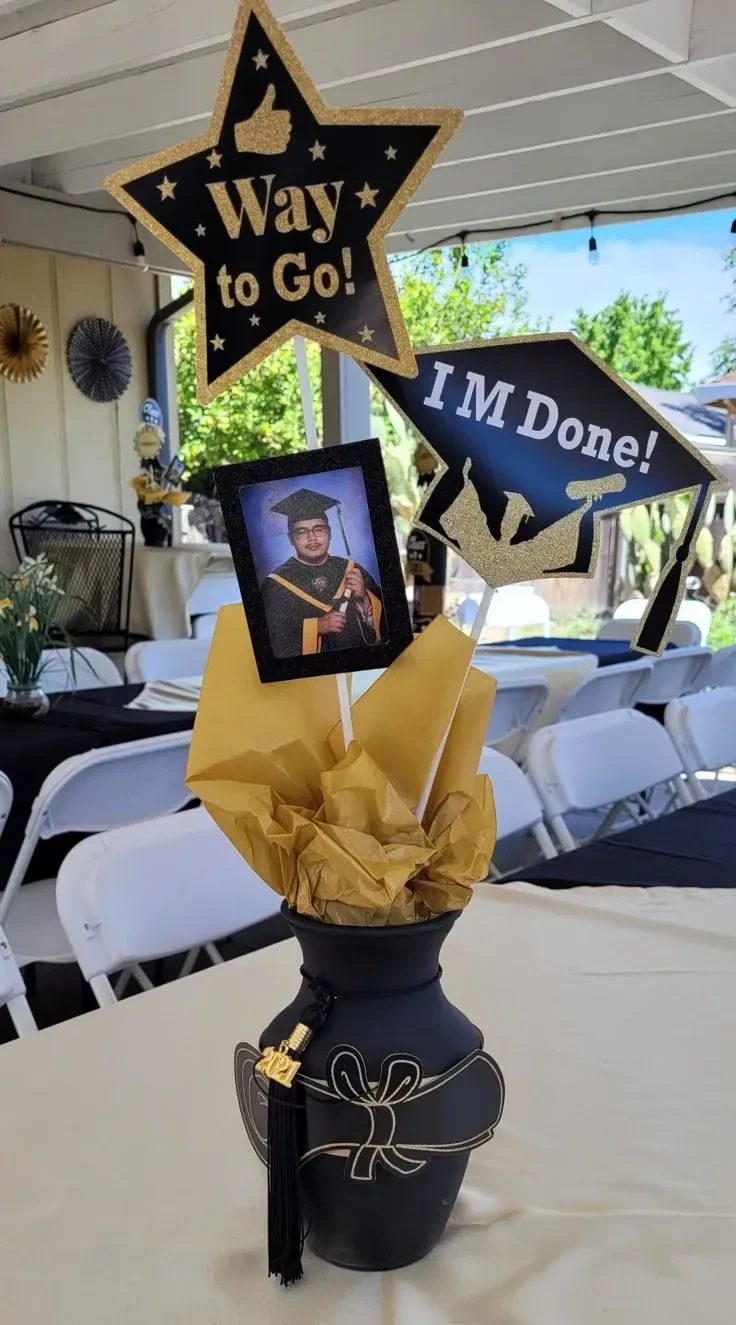
A vase with a framed graduation photo in the middle feels more styled than placing a frame on the table by itself.
Keep Reading
The bouquet adds height and softness, while the centered photo keeps the arrangement personal and easy to recognize.
Use it on a welcome table or another spot where a small decorative detail can make an impression.
- Vase
- Floral arrangement
- Framed graduation photo
12- Add Mini Graduation Caps
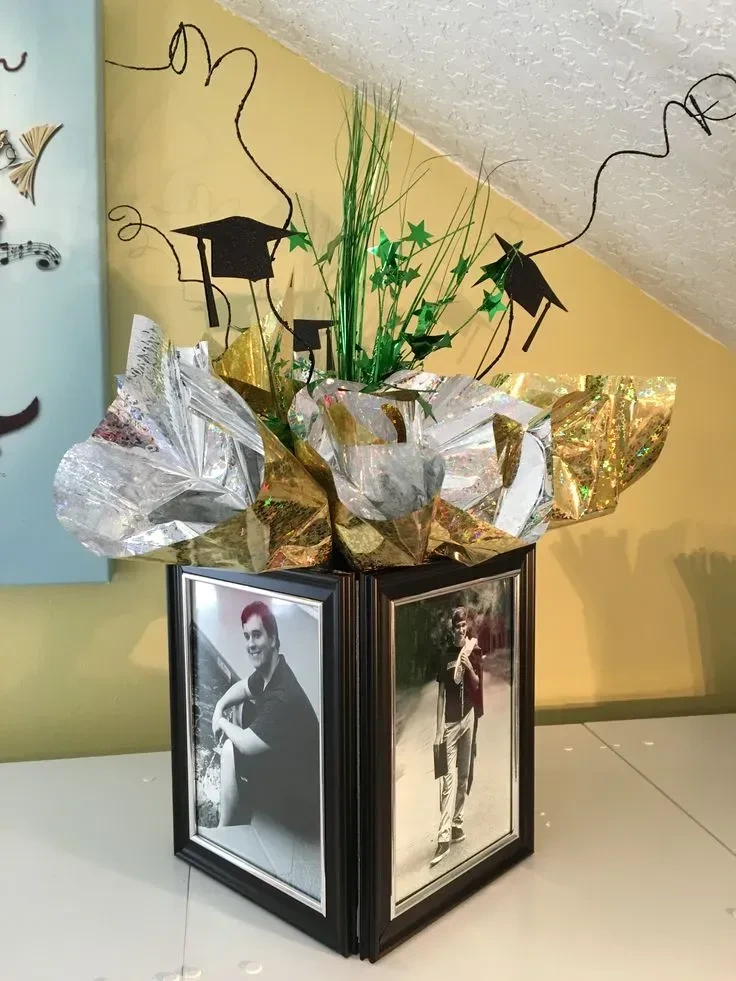
Black frames, silver wrapping, and mini graduation cap picks give a photo display a modern, slightly playful finish.
The darker frames keep the photos grounded, while the silver and cap details add texture and celebration around them.
This arrangement suits a table where you want the photos to stay central but still include a few decorative surprises.
- Black frames
- Silver wrapping
- Mini graduation cap picks
- Printed photos
Let the Memories Set the Mood
A meaningful graduation display does not need to cover every surface.
One framed childhood photo, a full candid board, or a layered table can give guests plenty to look at while keeping the party practical.
Choose the format that suits your space, then use height, color, and a little empty room to keep it comfortable and clear.
The best display is the one that makes people pause, smile, and remember.
I am Eleanor Foy, the mom of two behind DaisyHacks. I am a lover of clean, calm homes and a person who will happily spend 45 minutes researching a 5 minute cleaning hack. No regrets.